11
®
LEADERS IN POLE & AERIAL FITNESS
Copyright© Vertical Leisure Ltd. 2019 Version 2.0 All rights reserved.
Base
Anti / Counter
Clockwise
Tighten/Expand
Ceiling
Joist
Anti/Counter-Clockwise
Tighten/Expand
Adjuster Cover
ANTI/COUNTER -
CLOCKWISE to LOOSEN
3 x Adjuster Locking
Hex Screws
Ceiling
Joist
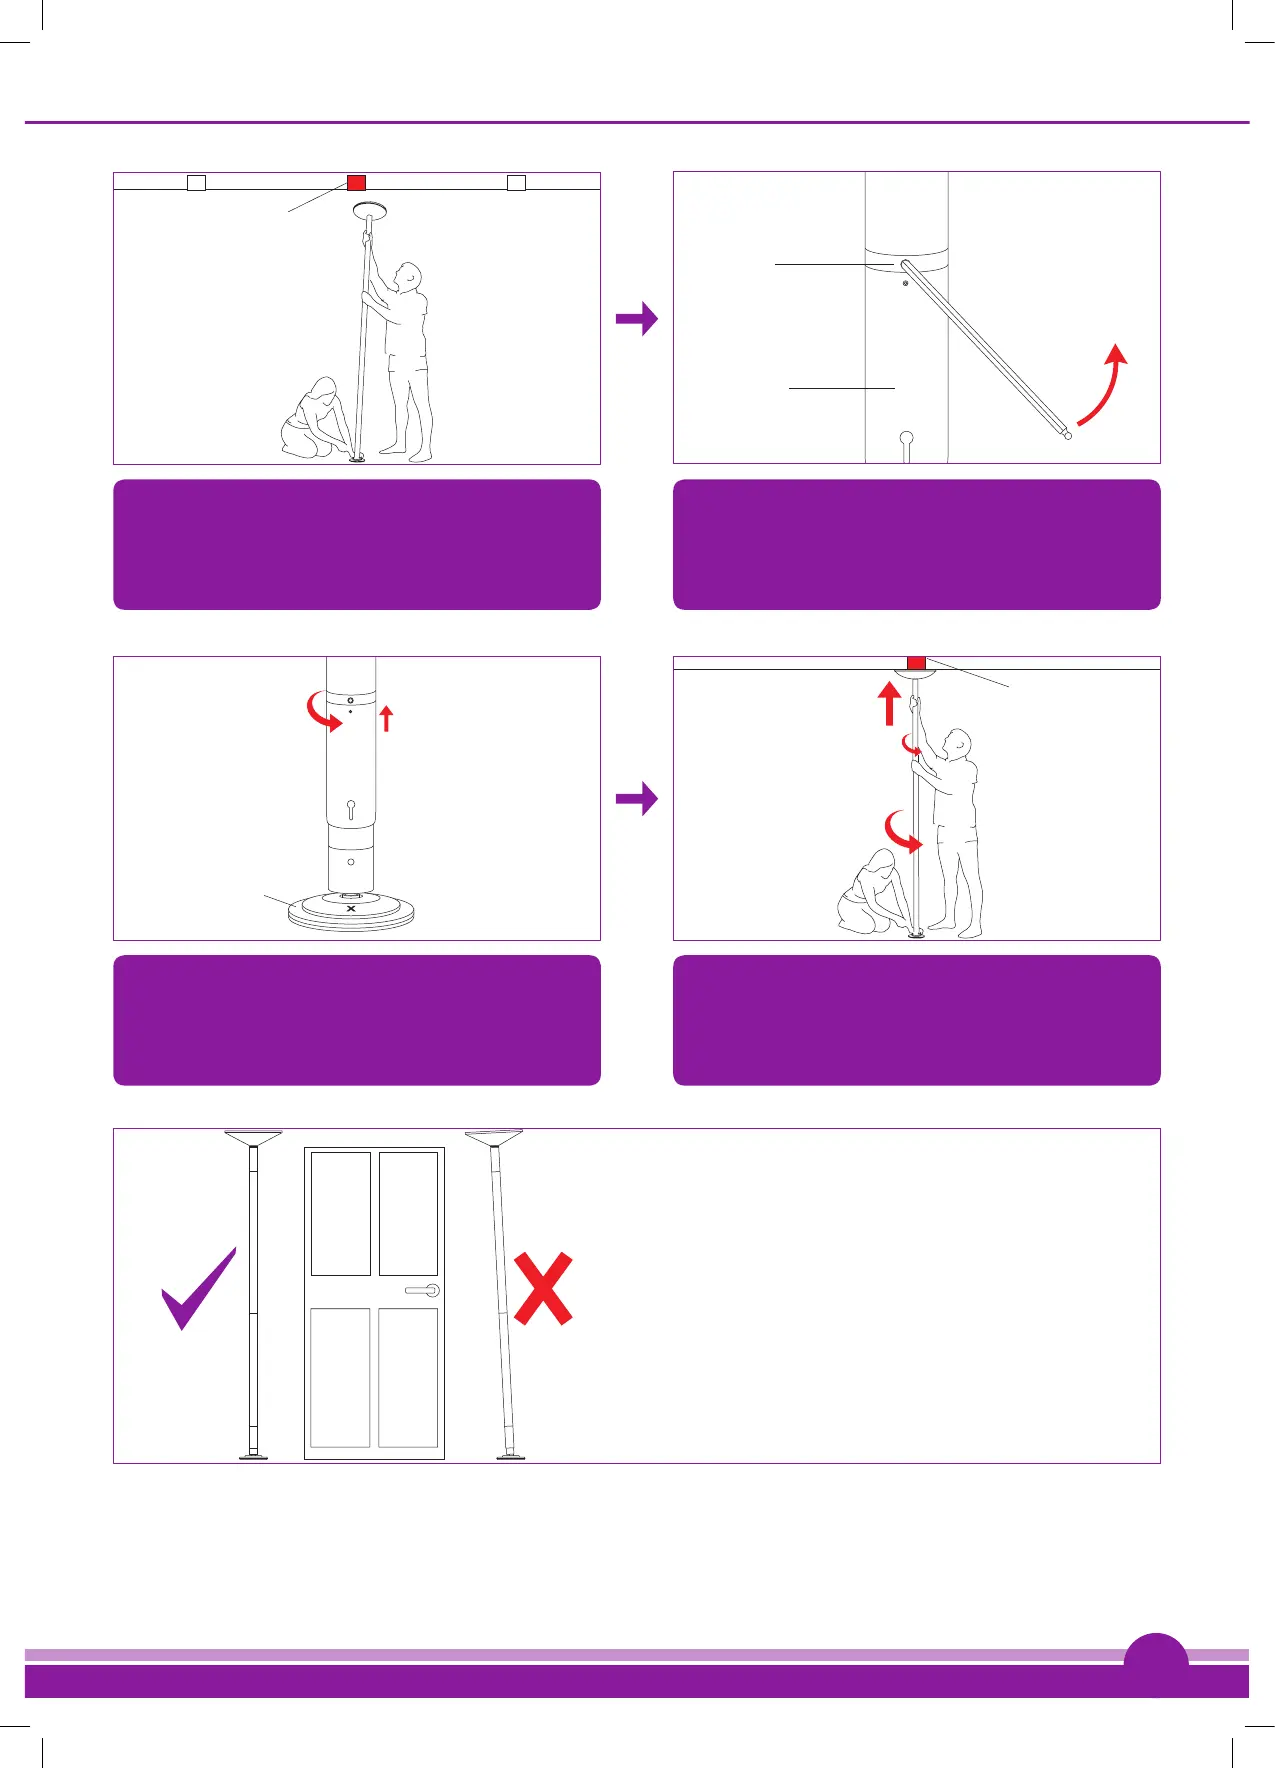
With one person holding the base, the other person
should slowly and carefully lift the pole, raising it until
it is vertical and under the Joist. DO NOT kick into
position.
Now undo the 3 Adjuster Locking Hex Screws at
the top of the Adjuster Cover with the 5mm Hex
Key - a minimum of 2 whole turns. DO NOT
completely remove the screws.
Fig. (8.1) Fig. (8.2)
Fig. (8.3) Fig. (8.4)
Pole Expansion: Rotating the main pole tube from
left to the right (Anti/Counter-Clockwise) will Expand/
Tighten the Pole. Rotating the pole tube from right to
the left (Clockwise) will Shorten/Loosen the Pole.
Once vertical, with the second person still holding
the base, rotate the pole, Anti/Counter-clockwise (i.e.
rotate left to right) which will expand the pole until it
touches the ceiling.
Fig. (8.5)
Checking the pole is level
Once the Upper Dome is against the ceiling and
before it is tightened further, make sure that the pole
is vertical. Best way to do this is using a ‘spirit-level’
(which can be purchased from a local hardware
store) or visually align the pole with a door or window
frame.