These tubes are always installed together
A Pole
B Pole
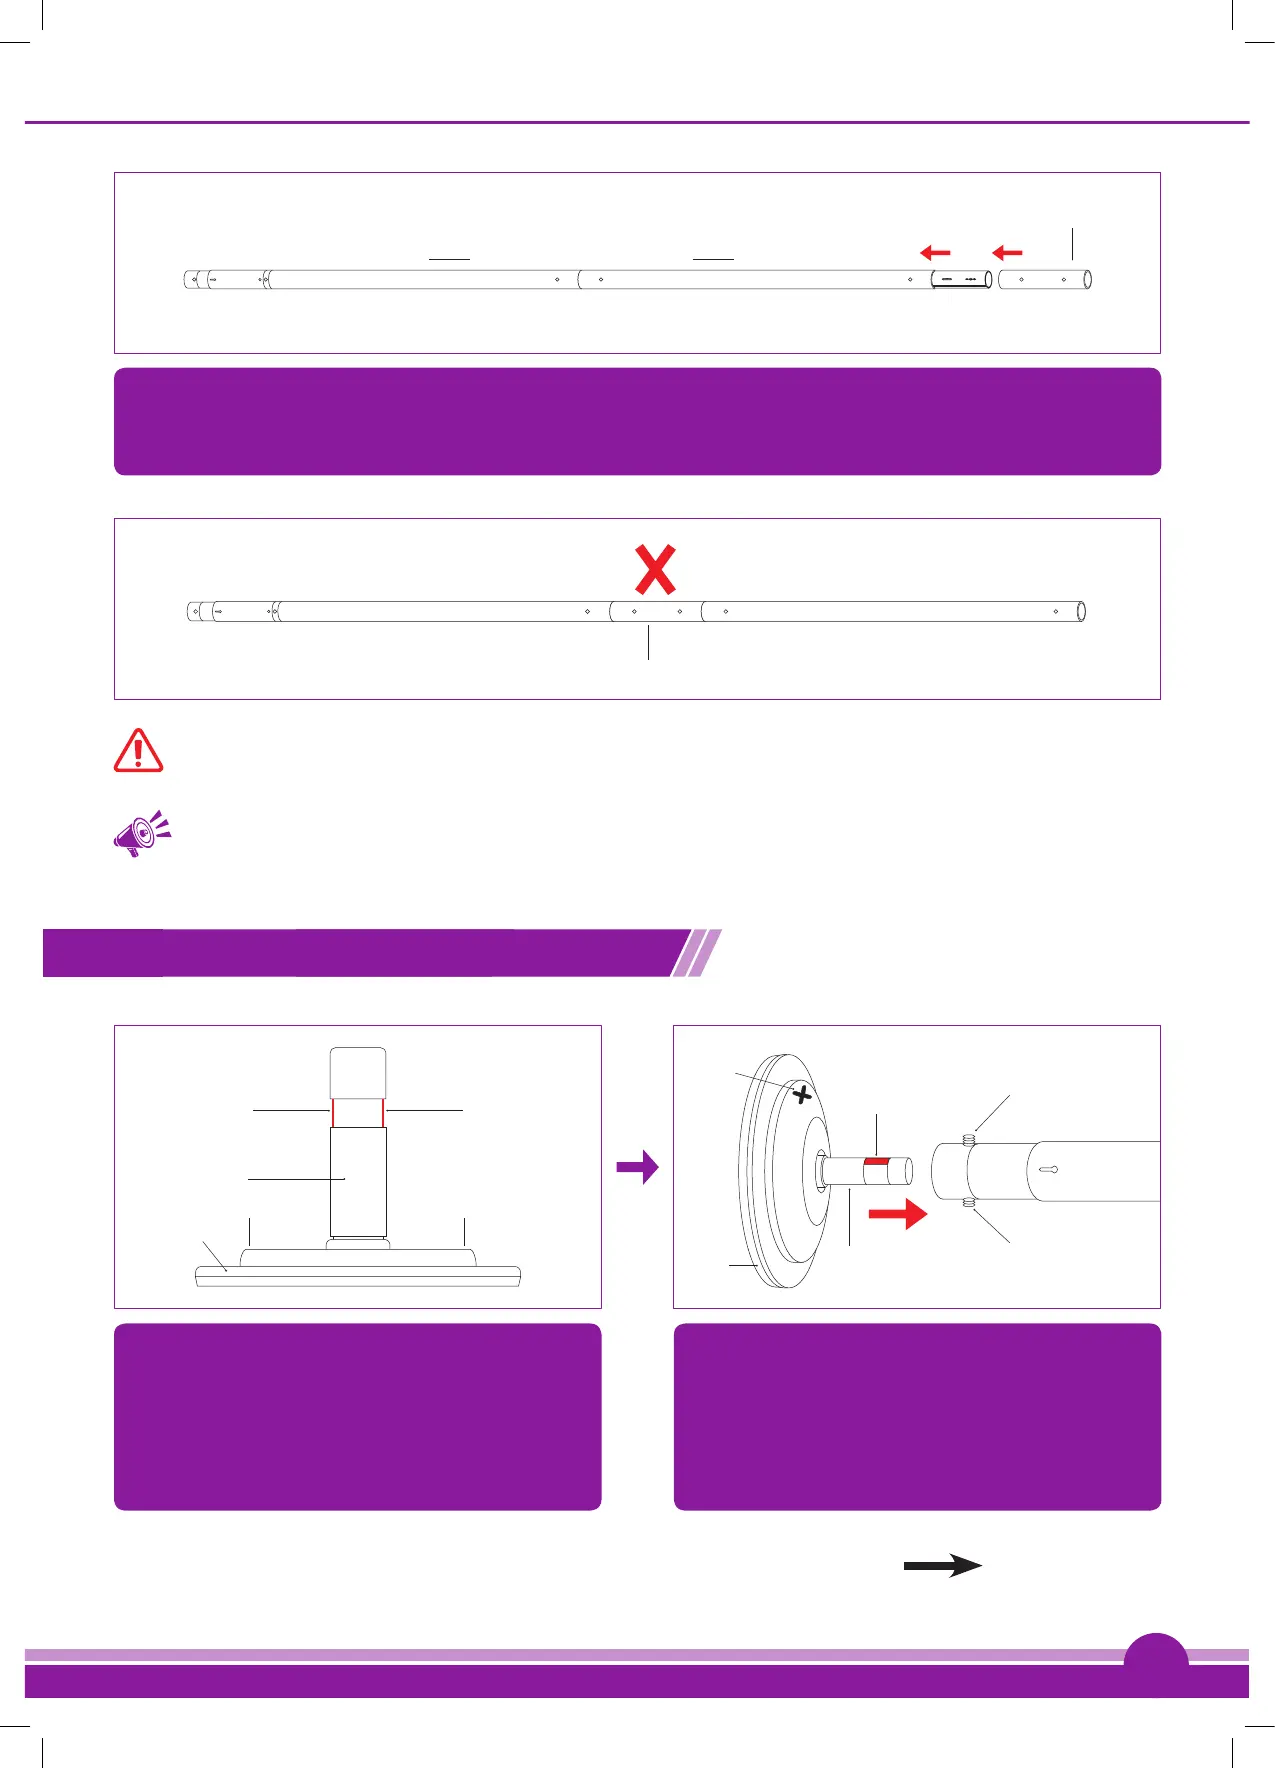
X-JOINT EXTENSION
Install Extensions at the top of the Pole.
Then, as required, keep adding X-Joints and Extensions to reach your desired height – minimising the number of joints
and tubes by using optional longer extensions, available from our online shop; www.xpole.com (first select your
region, then search for ‘Extensions’) or local supplier.
Fig. (5.5)
A Pole
B Pole
EXTENSION
Fig. (5.6)
NEVER INSTALL EXTENSIONS IN THE MIDDLE OF THE POLE – THIS IS DANGEROUS. ALWAYS
INSTALL EXTENSIONS AT THE TOP OF THE B POLE.
TIP: If longer extensions are required (than supplied in the standard set), then a key point is
to minimise the number of extensions & Joints used for a given height requirement; i.e. if the
required extension length is 500mm – it is better to use [1 x 500mm extension & 1 x X-Joint]
rather than [2 x 250mm extensions & 2 x X-Joints].
®
LEADERS IN POLE & AERIAL FITNESS
9
Copyright© Vertical Leisure Ltd. 2019 Version 2.0 All rights reserved.
How to attach the base to the A-Pole
Base Shaft
Base
Flat Section
X Mark
XX
Flat Section
X Mark
Static/Spin Screw
Static/Spin Screw
Base Shaft
Flat Sections
Base
X Mark
Fig. (6.1)
Fig. (6.2)
The 2 x flat sections are where the hex screws will
locate to stop the pole from spinning. Note the
2 x flat sections on the base shaft, and ensure these
are in line with the X’s on the base.
Make sure the 2 x Static/Spin screws are fully
loosened using the 5mm Hex Key. DO NOT
completely remove the screws. Slide the base shaft
into the A-Pole. The two screws need to be in line
with the X’s on the base to ensure they are screwed
onto the flat sections.
How to attach the base to the A-Pole continued, turn page