Do you have a question about the X4-TECH A-1000 and is the answer not in the manual?
Explains symbols used in the manual for important information and warnings.
Prohibits unauthorized modification and warns about voiding warranty.
States that servicing must be done by qualified and appropriately trained personnel.
Advises familiarizing with controls before use.
Specifies protection class and voltage requirements.
Emphasizes correct setup according to manual instructions.
Guidance on routing power cords to prevent damage or hazards.
Warns against extreme temperatures and cable modification.
Instructs to cease operation and seek professional help if damage is visible.
How to unplug safely from the wall outlet.
Unplug during thunderstorms for safety.
Unplug when not in use for extended periods.
Warning that the device is not a toy and unsuitable for children.
Warning against contact with water or moisture.
Prevents fire/shock risk from liquids.
Advises operating in moderate climates, avoiding extreme temperatures.
Instructions for handling condensation from temperature changes.
Prevents liquid contact with interior and fire hazards.
Reiterates avoiding moisture, especially in bathrooms.
Warning against touching the plug with wet hands.
Ensures proper ventilation and stable placement.
Warns against placing fire sources near the device.
Advise contacting a technician if operation or safety is impaired.
Refers to safety info in other chapters.
Advises checking other manuals when connecting devices.
Advises contacting support for unclear connection issues.
Stresses reading and following the manual for safe operation.
Instructions for proper battery disposal.
Prohibits disposing of electronic devices in household waste.
Guidance on choosing a suitable location for the device.
Importance of a stable and even surface for placement.
Ensures proper ventilation to prevent overheating.
Warning against modifying the casing.
Emphasizes safe installation to prevent accidents.
Caution regarding furniture finishes and device feet.
Guidance on using appropriate cables for audio connections.
Recommends shielded cables to prevent interference.
Specific instruction for connecting white audio plugs.
Specific instruction for connecting red audio plugs.
How to connect a CD player.
Connects CD player outputs to amplifier CD jacks.
How to connect AV sources like TV or DVD players.
Connects AV device outputs to amplifier AV jacks.
How to connect a tape deck.
Connects tape deck outputs to TAPE PLAY jacks.
Connects tape deck inputs to TAPE REC jacks.
How to connect an equalizer.
Connects equalizer outputs to EQ PLAY jacks.
Connects equalizer inputs to EQ REC jacks.
How to connect a record player.
Connects record player outputs to PHONO jacks.
Connects record player ground lead to amplifier.
Warning about using PHONO jacks only for record players.
Diagram showing phono connections.
How to connect a tuner.
Connects tuner outputs to TUNER jacks.
Guide on connecting loudspeakers.
Requirements for connecting speakers.
Advise to switch off before connecting/disconnecting speakers.
How to connect speakers directly to the amplifier.
Importance of correct speaker polarity.
Specifies impedance requirements for loudspeakers.
Connecting speakers to the designated terminals.
Connecting left loudspeaker positive and negative terminals.
Connecting right loudspeaker positive and negative terminals.
How to connect remote control cables for system operation.
Enables remote operation of connected components.
Connecting components to amplifier for remote control.
How to connect the device to a power source.
Safety instruction for unplugging the power cable.
Pre-connection steps for power supply.
Connecting the power cable to a power outlet.
Connecting equalizer remote control cable.
Connecting tape deck remote control cable.
Connecting tuner remote control cable.
Connecting CD player remote control cable.
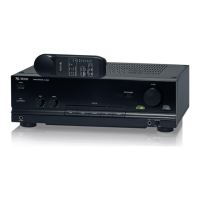
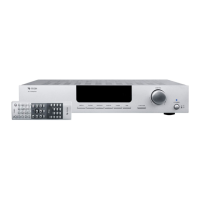
Button to turn the device on and off.
Shows selected audio input and volume level.
Receives infrared signals from the remote control.
Selects different sound settings (Pop, Rock, Classic, FLAT).
Adjusts the listening volume level.
Warning about high volumes and distortion causing speaker damage.
Integrates external equalizer or signal processor.
Regulates the volume of a connected microphone.
Jack for connecting a dynamic microphone.
Selects the PHONO input mode.
Selects the CD input mode.
Selects AV1 or AV2 input modes.
Selects the TUNER input mode.
Selects the TAPE input mode.
Adjusts high-pitched tones (treble).
Adjusts low-pitched tones (bass).
Mutes the sound temporarily.
Jack for connecting headphones, mutes speakers.
Warning about headphone volume and hearing damage.
Indicates when the device is powered on.
Refers to chapter 4 for remote connection details.
Refers to chapter 4 for AV connection details.
Refers to chapter 4 for speaker connection details.
For connection to a power supply.
Component selection buttons on the remote.
Buttons for tuner operation.
Remote control buttons for volume adjustment.
Remote button to switch between equalizer and amplifier.
Remote button for equalizer preset selection.
CD player control buttons on the remote.
Instructions for inserting and changing batteries.
Warning to keep batteries away from children.
States batteries are hazardous waste and not for household disposal.
Importance of correct battery polarity.
Warning against leaving batteries unattended due to choking hazard.
Instructions for recharging rechargeable batteries.
Warning about battery exposure to heat and short-circuiting.
Precautions when handling leaking batteries.
Steps to open the battery compartment.
How to insert new batteries correctly.
How to close the battery compartment.
When to replace batteries.
Recommendation for using alkaline batteries.
Advice on mixing batteries.
Step-by-step guide to playing audio.
Initial check of all connections.
Setting the volume dial to minimum.
Setting tone controls to neutral.
Turning on the audio source device.
Choosing the audio input source.
Adjusting volume to the desired level.
Warning against listening to loud music and potential hearing damage.
Adjusting tone using dials or EQ presets.
Procedure for turning off the amplifier.
Warning about potential damage if sequence is not followed.
Instructions for recording audio.
Selecting the source for recording.
Initiating recording on the source device.
Note that volume/tone don't affect recording quality.
Steps to diagnose sound issues.
Verify all connections are properly made.
Ensure all connected devices are on.
Verify the correct input source is selected.
Check the current volume level.
Steps to resolve remote control issues.
Ensure batteries are inserted correctly.
Replace depleted batteries.
Ensure clear line of sight to the sensor.
Clear obstructions between remote and sensor.
Check operating distance for the remote.
Solutions for non-functional buttons.
Restart the device to resolve issues.
Steps to troubleshoot a missing audio channel.
Check audio cable connections to source/amplifier.
Check loudspeaker cable connections to speakers.
Diagnosing and resolving buzzing sounds.
Ensure signal levels are appropriate.
Lower the volume to prevent distortion.
Adjust treble and bass controls.
Check ground connection for record players.
Check for faulty audio cables.
Steps to resolve audio distortion.
Correctly connect high-level sources to appropriate inputs.
Adjust equalizer settings.
Steps to resolve lack of bass.
Check speaker polarity.
Verify bass control setting.
Steps to resolve lack of treble.
Verify treble control setting.
All other repairs must be done by authorized technicians.
Advises regular safety inspections.
Procedure for unsafe operation.
Conditions indicating unsafe operation.
Warning about exposed live parts during servicing.
Device must be disconnected before servicing.
Warning about residual voltage in capacitors.
Emphasizes qualified personnel for repairs.
Guidelines for transporting or sending the device for service.
Advice on cleaning the device exterior.
Instructions for cleaning the device safely.
Proper disposal of unusable equipment.
Contacting the service hotline for assistance.
Website for information and updates.