22
Installing accessories
Note: No accessories are supplied with this Oscillating tool.
For the purposes of describing the accessory installation,
the plunge cutting blade and sandpaper base is used.
WARNING: Remove the battery pack from oscillating tool
or place the switch in the locked off position before making
any assembly, adjustments or changing accessories. Such
preventive safety measures reduce the risk of starting the
tool accidentally.
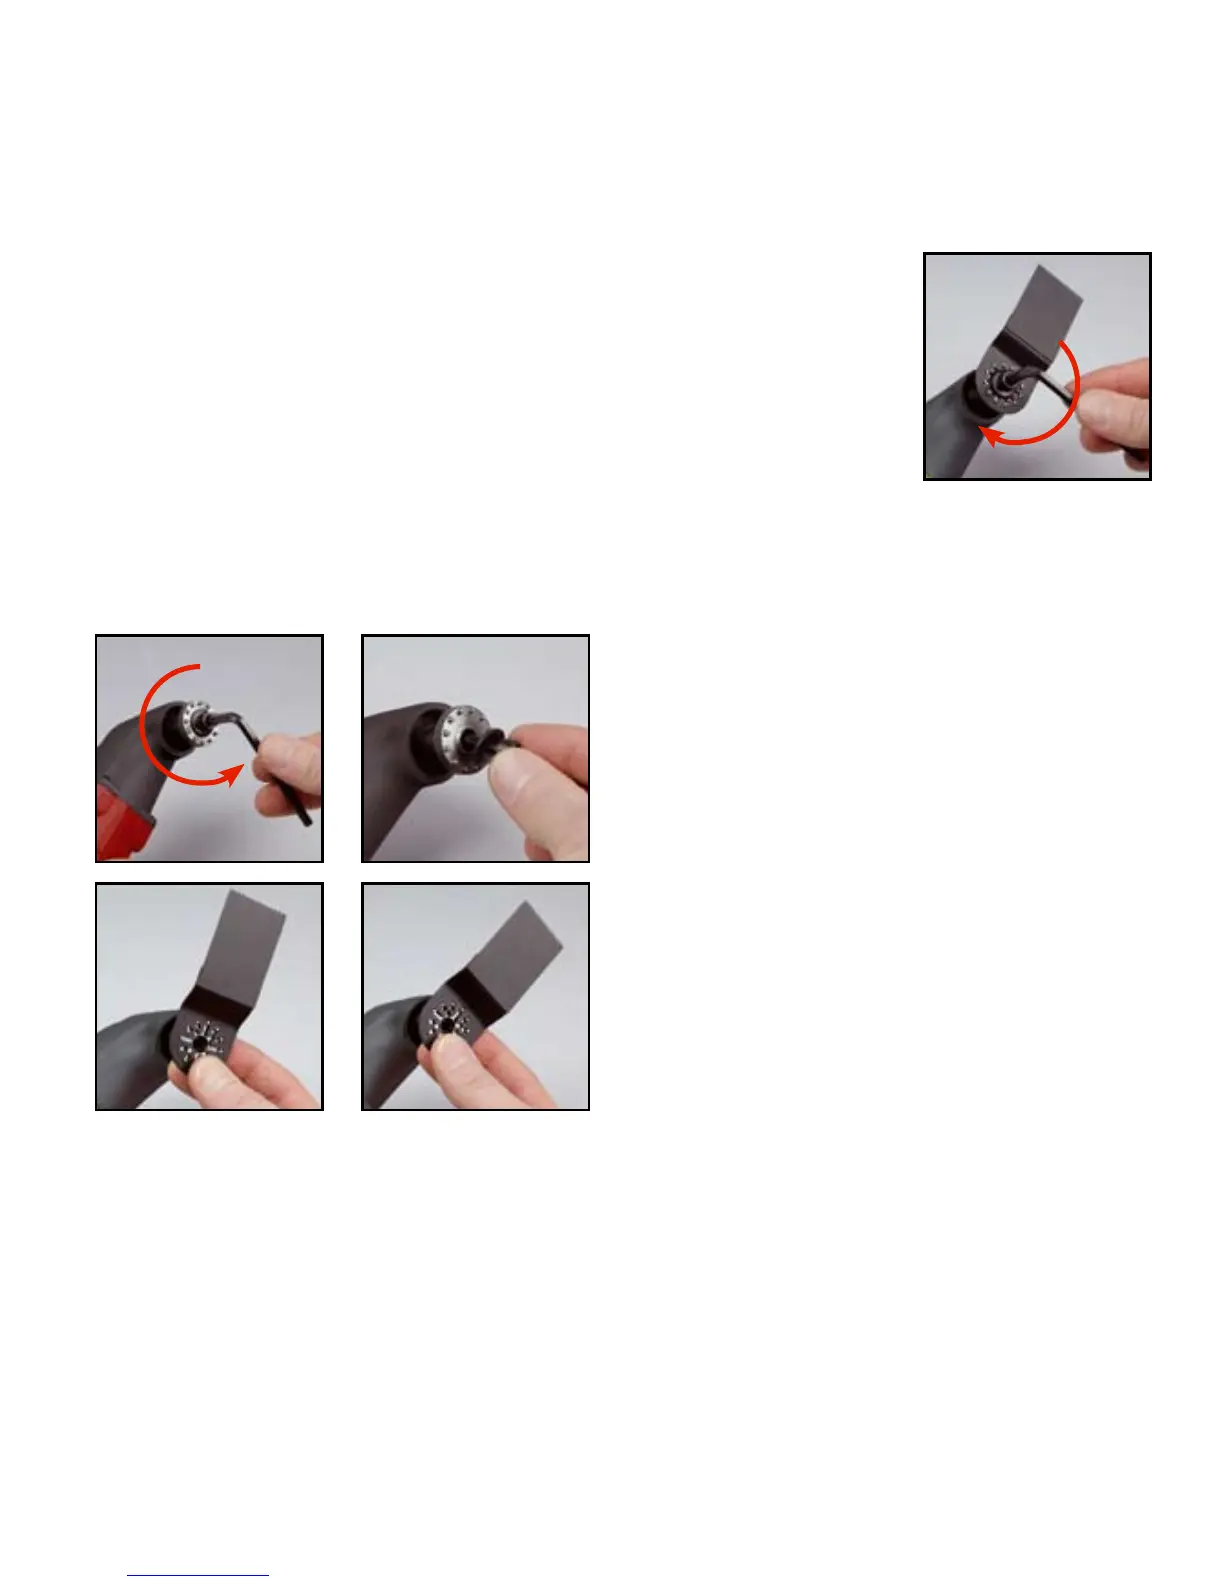
1. Remove the accessory clamp screw (6) and retaining washer
(5) from the inner flange (4) by turning the screw counter
clockwise. Use the 5mm hex key if the screw is too tight to
be removed by hand.
2.
Place the plunge cutting blade
onto the inner flange (4).
Note: The accessory locates on the centre raised section
of the flange and also locates on 12 pins which fit through
the holes or slots of the accessory. The accessory can
locate at various angles, left or right,depending on the Job
to be performed.
4. When you have selected
the location for the plunge
cutting blade, re-insert the
accessory clamp screw (6),
and retaining washer (5)
and tigthen in a clockwise
direction using the hex key
until the blade is secured.
Using a detail sander
attachment
1. Install the sanding pad on the oscillating tool as per the
“Installing accessories” instructions.
2. Install the sandpaper on the sanding pad.
3. Turn the switch ON.
This tool is designed for detail sanding on small surface
areas. Place the sandpaper surface of the sanding pad on
the workpiece to be sanded. Keep the tool moving to avoid
gouging the surface. Use coarse sandpaper and lower
speeds when sanding rough surfaces and for removing
previous finishes. Use fine sandpaper and higher speeds to
produce the smoothest surface.
Using a scraper blade
1. Install the scraper blade on the multi-tool.
When using a scraper blade to scrape old finishes or glue
from a workpiece, place the under side of the blade flat on
the workpiece surface and then lift upward on the rear of the
tool to allow the blade to form a very slight angle with the
workpiece surface. Feed the blade slowly into the material
that is to be removed. Do not force the tool as slower travel
speeds will produce better cutting action and reduce the risk
of gouging the workpiece.
When using a scraper blade to cut carpet, place a scrap
workpiece under the carpet where the cut is being made.
Turn the tool so the scraper blade is at right angles
(perpendicular) to the carpet and then feed the blade
into the carpet.