29
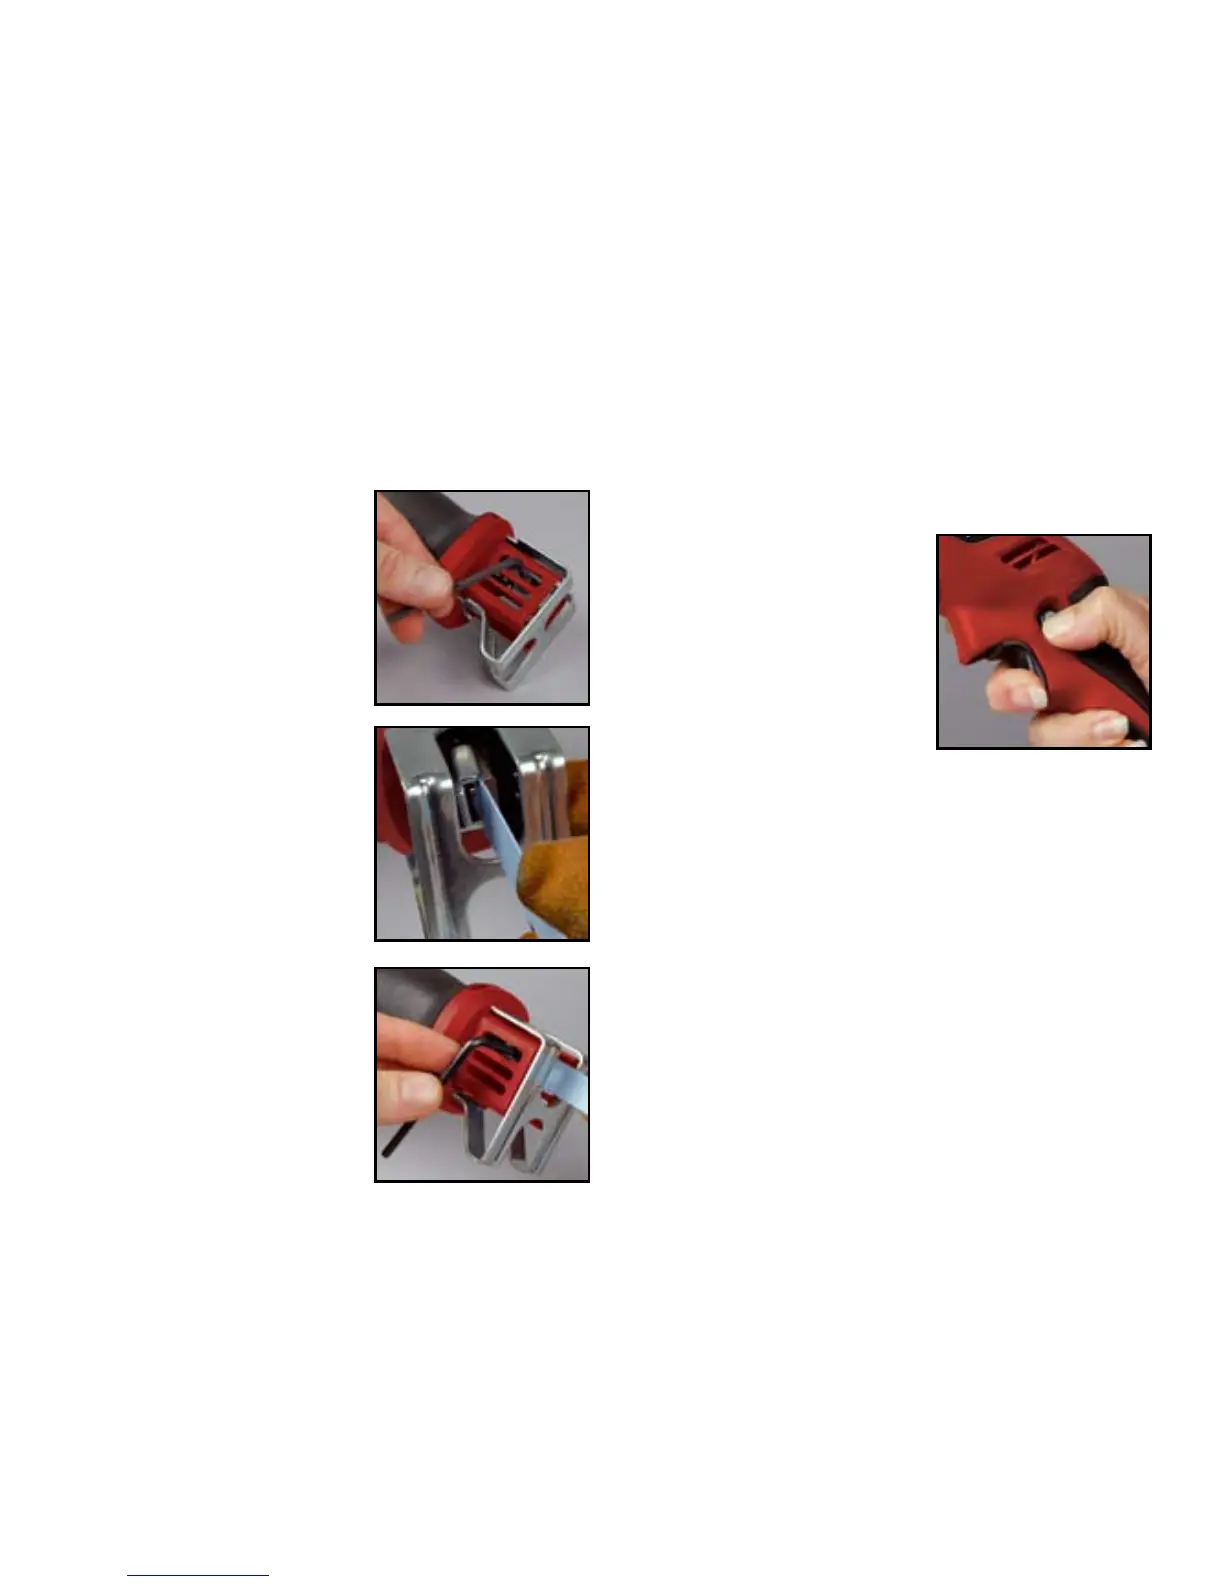
Installing a saw blade
Note: A saw blade is not supplied with this kit. The
following information is for instructional purposes only.
Caution Always ensure the saw is switched OFF and
the battery pack removed BEFORE attempting to fit or
remove a blade, Making any adjustments or cleaning.
When fitting a blade it is suggested to wear gloves as the
blade cutting edges are sharp.
1) Using the hex key provided
on the trim saw, LOOSEN the
blade clamp screw sufficient for
the blade clamp to move back
away from the flat shaft leaving
a gap of your blade thickness
between the end of the locating
pin and the inside of the blade
clamp. This will be approx
4 turns of the screw. You do
NOT need to remove the
screw
2) In the mounting end of the
blade there is a small hole.
Slide the blade into the
clamp area and pass the
blade between the end of the
locating pin and the inside of
the clamp plate, and locate
the hole in the blade on the
locating pin. Ensure correct
orientation of the blade.
3) Tighten the blade clamp screw
so the clamping plate is just
on the blade. Check the blade
is secure, and the teeth of
the blade are well clear of the
front guard. Then tighten firmly the clamp screw.
4) NOTE, Prior to starting the saw ALWAYS first check the
blade is secure. Tighten if necessary. Failure to do so
may result in serious injury.
Removing the blade
Caution: Always ensure the saw is switched OFF and
the battery pack removed BEFORE attempting to fit or
remove a blade, Making any adjustments or cleaning.
When fitting a blade it is suggested to wear gloves as the
blade cutting edges are sharp.
1.) Loosen the clamp screw as per Point 1 above.
2.) Lift the blade off the locating pin and slide the blade out
of the blade clamp holder.
Switching on and off
1. Attach the battery pack.
2. To start the saw, press the
lock-off button inward (2) and
squeeze the trigger switch (1).
There is no need to keep the
lock-off button depressed once
the saw has started. However,
if the trigger switch is released,
the lock-off button will re-engage as a safety precaution
to prevent accidental operation.
3. In order to restart the saw, both the lock-off button and
the trigger switch must be pressed again.
4. To stop the saw, release the trigger switch (1).
General cutting
Always wear eye protection when using the saw.
Always consider the material being cut and wear a dust
mask and hearing protection.
1. Hold the saw firmly with two hands, by the front and rear
handles.
2. Make sure that the blade is clear of any obstruction and
that any extension cords, pipes or cables are out of the
path of the blade.
3. Ensure that the material to be cut is held firmly. Small
work pieces should be held in a vice or clamped to the
workbench.