EasyManua.ls Logo

Xerox Adaptive CMYK+ Kit - User Manual

Xerox Adaptive CMYK+ Kit
48 pages
To Next Page IconTo Next Page
Loading...
Version 1.0
July 2020
702P08322
Xerox
®
Adaptive CMYK+ Kit for the
Xerox
®
Versant
®
180 Press
Accessory Reference Guide

Questions and Answers:

Xerox Adaptive CMYK+ Kit Specifications

General IconGeneral
BrandXerox
ModelAdaptive CMYK+ Kit
CategoryPrinter Accessories
LanguageEnglish

Summary

Safety

Notices and Safety

Read instructions carefully to ensure continued safe operation of the press. Safety requirements include agency evaluation, certification, and compliance.

Warning Symbols

This device has a strong permanent magnet that can interfere with medical devices. Maintain a distance of 30 cm from components.

Power Cord Safety Information

Ensure electrical supply meets requirements. Use provided cord, plug into grounded outlet, avoid extension cords, and do not modify the cord.

Vacuum Cleaner Use for Toner Spills

Use a broom or wet cloth for toner spills. If using a vacuum, ensure it has an explosion-rated motor and non-conductive hose.

Supplies for the Press

Store supplies properly, keep away from children. Never throw toner containers into open flame. Avoid skin/eye contact when handling supplies.

Powering Off the Press

Before changing toner sets, power off the press using the General Power Off procedure. Avoid using the main power switch unless directed.

Getting Started

Overview

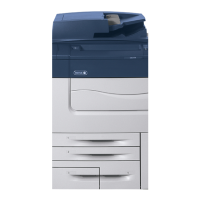
The Adaptive CMYK+ Kit adds new toner color options. It includes toner cartridges, a dispenser assembly, a developer drawer assembly, and a storage cart.

Adaptive CMYK+ Kit Options

Lists available Adaptive CMYK+ specialty toner kits: Vivid Toner Kit, Fluorescent Toner Kit, and Vivid and Fluorescent Combination Toner Kit.

Dedicated Toner Dispenser Assemblies

Each toner kit includes a dedicated toner dispenser assembly to prevent cross-contamination of toners.

Dedicated Developer Drawer Assemblies

Each toner kit includes a dedicated developer drawer assembly to prevent cross-contamination of toners.

Storage Cart

A custom storage cart is provided to store each toner kit.

Replacing a Toner Kit

Guidelines for Working with Toner Kits

Toner dispensers are not interchangeable. Keep kit elements paired properly. Schedule jobs to limit color swaps.

Replacing a Toner Kit

Step-by-step procedures for replacing a toner kit. Ensure press is configured to support the kit. Use gloves for all procedures.

Changing the NVM Value for a Toner Kit

Allows the press to recognize the toner color kit. Change NVM value before installing or changing a toner color kit.

Powering Off the Press

Procedures for powering off the press before replacing toner kits. Involves pressing the Power On/Off button and main power switch.

Removing the Toner Cartridges

Steps to remove toner cartridges. Protect work area, open toner cover, grasp handle, and pull cartridge straight out.

Removing the Drum Cartridges

Steps to remove drum cartridges. Ensure press is powered off. Open drum protection box and press front door.

Removing the Toner Dispenser Assembly

Steps to remove the toner dispenser assembly. Slide developer drawer halfway, lower toner door, grasp sides, and pull assembly out.

Removing the Developer Drawer Assembly

Steps to remove the developer drawer assembly. Slide out the drawer, lift assembly out of the rail assembly, and place in storage cart.

Installing the Replacement Developer Drawer Assembly

Steps to install a new developer drawer assembly. Align mounting boss with notch, lower into position, and push until it clicks.

Installing the Replacement Toner Dispenser Assembly

Steps to install a new toner dispenser assembly. Pull out developer drawer, remove assembly from cart, align pins, and slide into press.

Reinstalling the Drum Cartridges

Steps to reinstall drum cartridges. Pull out developer drawer, align cartridge with front of drawer, and press down both ends.

Installing the Replacement Toner Cartridges

Steps to install new toner cartridges. Open toner cover, remove from packaging, shake vigorously, and slide into press.

Powering On the Press

Steps to power on the press after toner replacement. Connect power cable, press main power switch, close cover, and press Power On/Off button.

Changing the Toner Set on the Print Server

Configure the print server for the new toner set. Click Server→Toner Sets and select Standard, Fluorescent, or Vivid.

Evaluating Print Quality

Evaluate print quality by copying a test print. Use the Adjust Image Transfer feature if needed for adjustments.

Maintenance

Cleaning Spilled Toner

Use a broom or cloth to clean spilled toner. Avoid vacuums. Be careful not to spill toner on surroundings.

Getting Assistance

Visit the Xerox website or contact Xerox Technical Customer Support for assistance with press maintenance.

Troubleshooting

General Print-Quality Problems and Solutions

Table providing solutions for common print quality issues such as smears, streaks, repeating spots, and color inaccuracies.

Toner Cross-Reference Chart

Chart showing toner kit types (Standard, Vivid, Fluorescent) and their corresponding positions in the press.

Related product manuals