3
www.xilinx.com
Self-Test Assignments for PL LEDs
STEP 4: Run the Built-In Self-Test
The BIST consists of a set of pass/fail tests that run sequentially. As each test passes, its corresponding LED glows
green. If a test fails, its corresponding PL GPIO LED is off. The flashing LEDs are at the top right edge of the board.
For SW13, up is ON or 1.
Note: To pass the PL DIP test, all the switches in SW13 must be up before any of them are moved down. The
LEDs flash faster after you begin the DIP or pushbutton (PB) test.
• The Clock, BRAM, PL-DDR4, PS-DDR4, Flash, and I2C tests run without user input.
• The DIP switch test (SW13) waits for you to move all the DIP switches toward the label ON, and then back.
• The PB test waits for you to push all the pushbuttons. The N, W, S, and E pushbuttons can be pushed in any
order, but push the center button (SW15) last.
• The LED for the test that is waiting for your input slowly flashes on and off.
MSB→ LSB
7 6 5 4 3 2 1 0
Clock BRAM PL-DDR4 PS-DDR4 Flash I2C DIP PB
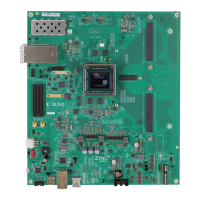
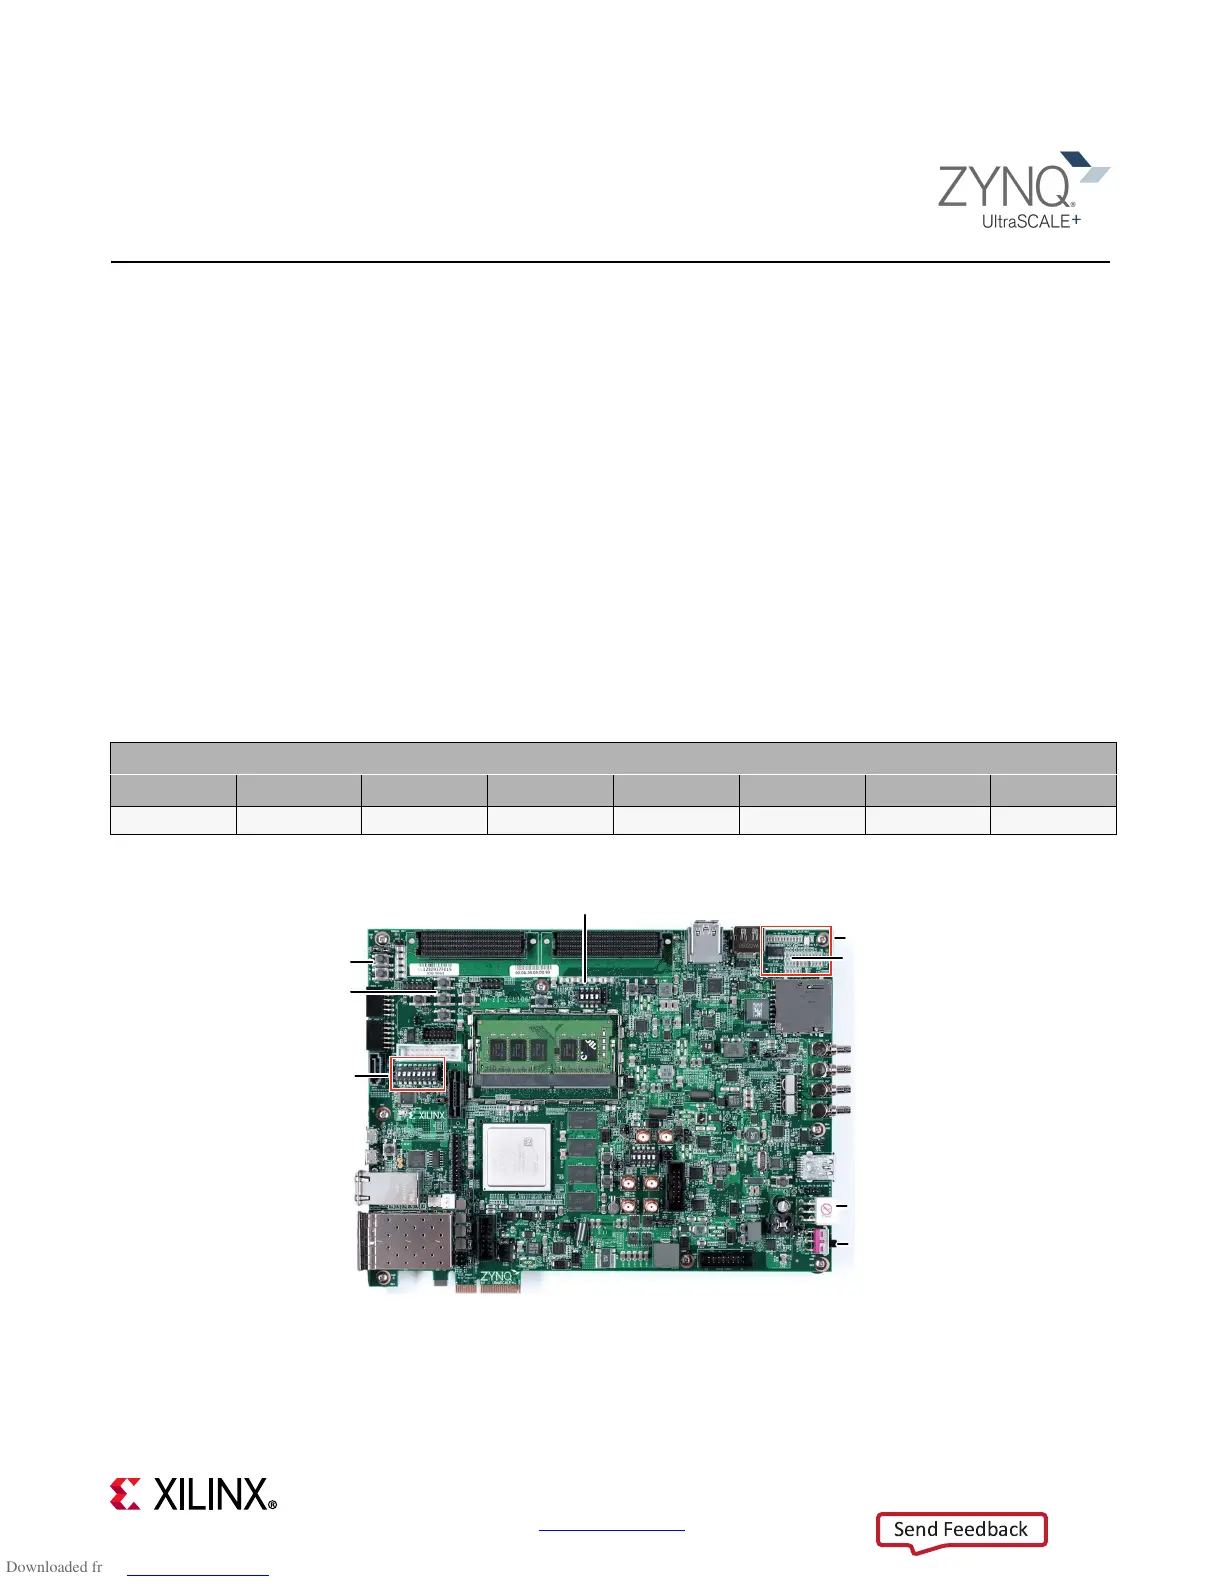
X-Ref Target - Figure 1-2
Photo can vary from product.
SW1 (Power-On)
SW4 (POR_B)
SW6
SW15
(PB Switches)
Power Good LEDs
DONE LED
J52 (12V Power)
PL DIP (SW13)

 Loading...