XR Series Wireless Arrays
6
Twist the four T-bar clips onto the metal ceiling grid at the
marked locations and tighten the screw posts to 10-12 lbf.ft
(1.38-1.66 kgf.m). Do not over tighten the screw posts.
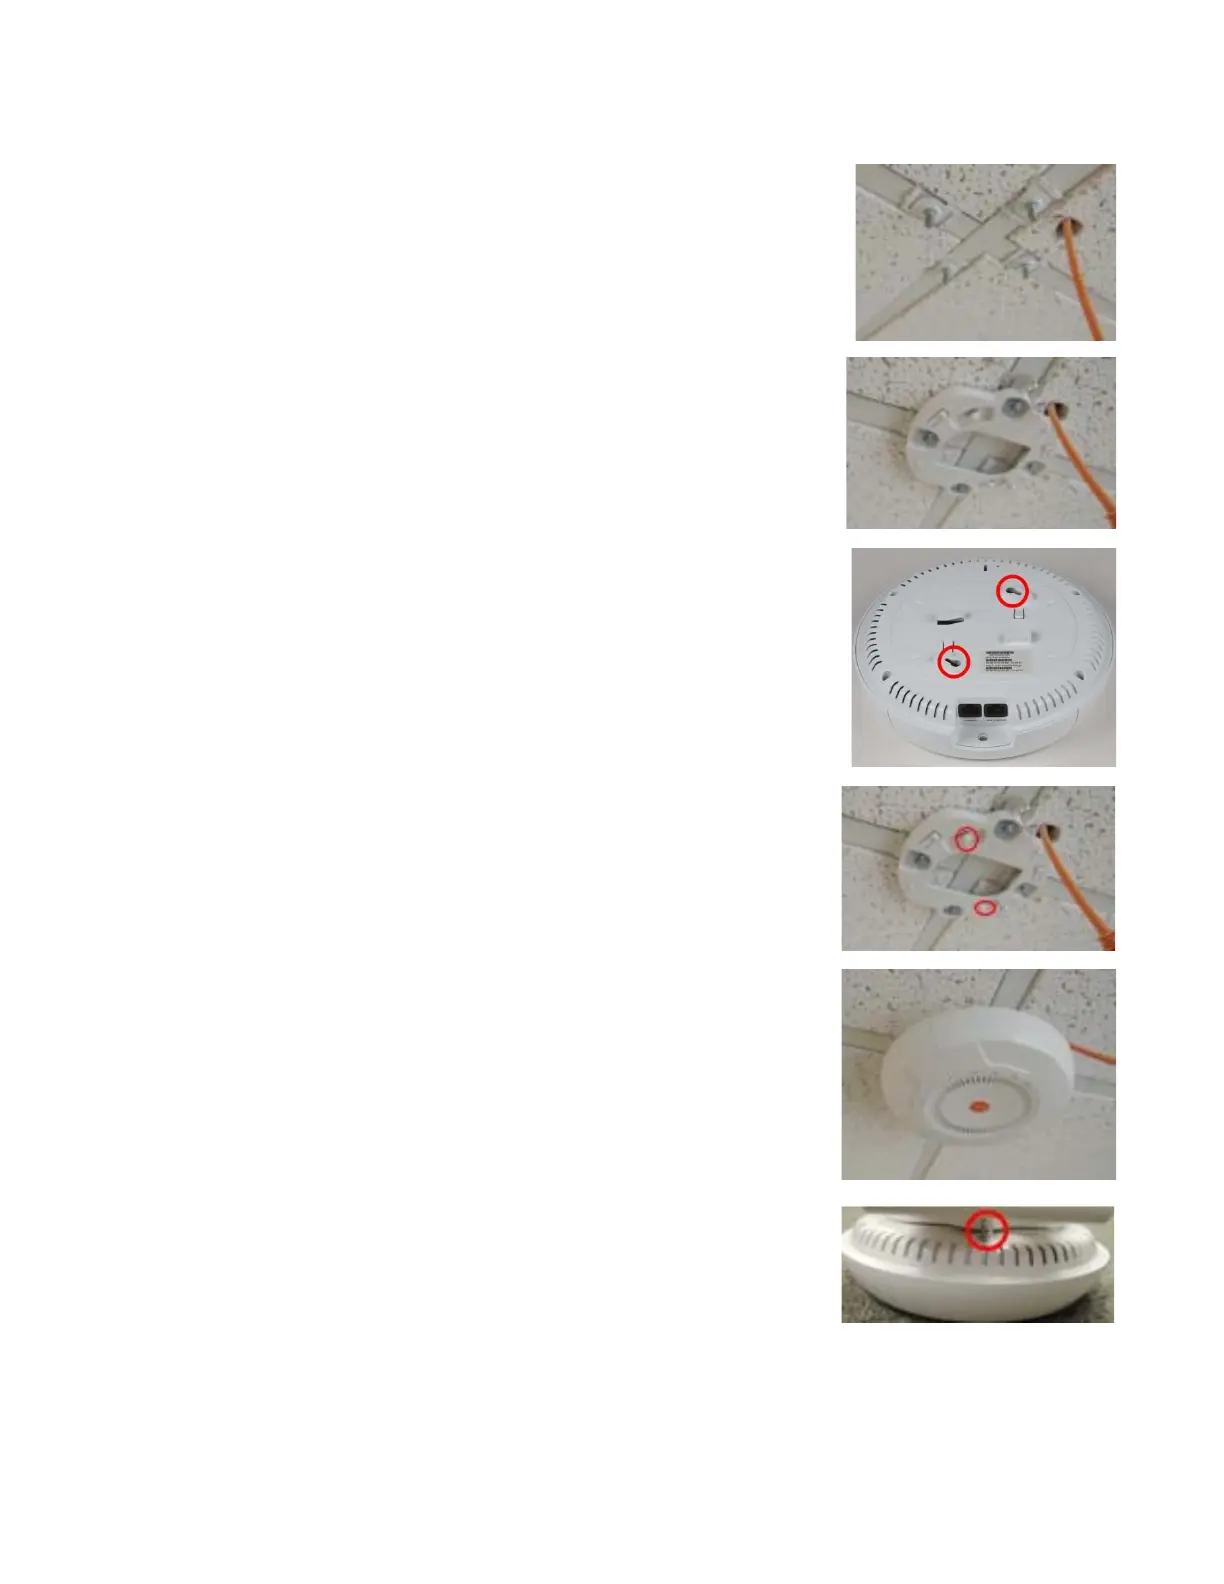
5. Cut an access hole for the cable(s) in the ceiling tile and draw
the cable(s) through.
6. Align the XR-600 mounting plate over the screw posts of the
T-Bar clips or bracket and secure it to the four posts using the
nuts provided. Tighten the nuts to 10-12 lbf.ft (1.38-1.66
kgf.m), but do not over tighten.
7. Align the two slots in the back of the XR-600 chassis shown at
right…
8. … with the corresponding tabs in the XR-600 mounting plate
shown here.
9. Push the XR-600 chassis up on the mounting plate tabs and
rotate the XR-600 to the right until it snaps in place.
10. To secure the XR-600 to the mounting plate, feed a zip tie
through the hole in the top of the locking slug and the
matching hole in the ceiling mounting plate.
11. Proceed to “Connect the Cables” on page 9.
 Loading...