3.1 - Mounting the CPU Water Block (Part 1)
Note: Installation of the mounting bolts may require you to remove the
plastic cage around the CPU socket before installation can continue.
Note: The images below show the mount being installed on a Socket
462(A) motherboard but the installation process is the same for all
sockets.
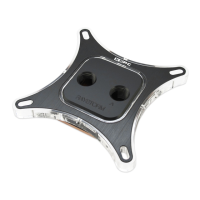
The installation of the CPU water-block is split into 2 parts. In the first part you will install the bolts for the
universal mount. Please follow the steps below.
1. Place a plastic washer over the bolt to prevent an electrical short
2. Push the bolt through one of the socket holes around the socket from the back of the board.
3. Turn the board over and place a second plastic washer over the bolt followed by a nut. Then secure the
bolt in place by gently tightening the nut.
4. Repeat the process for the 4 bolts or two if using an A64 based system
5. Once all bolts are in place the motherboard will be ready to be installed into the PC case.
Installation of the CPU water-block continues on page 9. Part 2 of the water-block takes place after the
tubing has been connected and the system has been filled.
Page 4/12
Nut
Plastic Washer
Motherboard
Bolt
Plastic Washer