TR800 Treadmill
7
TR800 Assembly Instructions
Main Base Frame
1
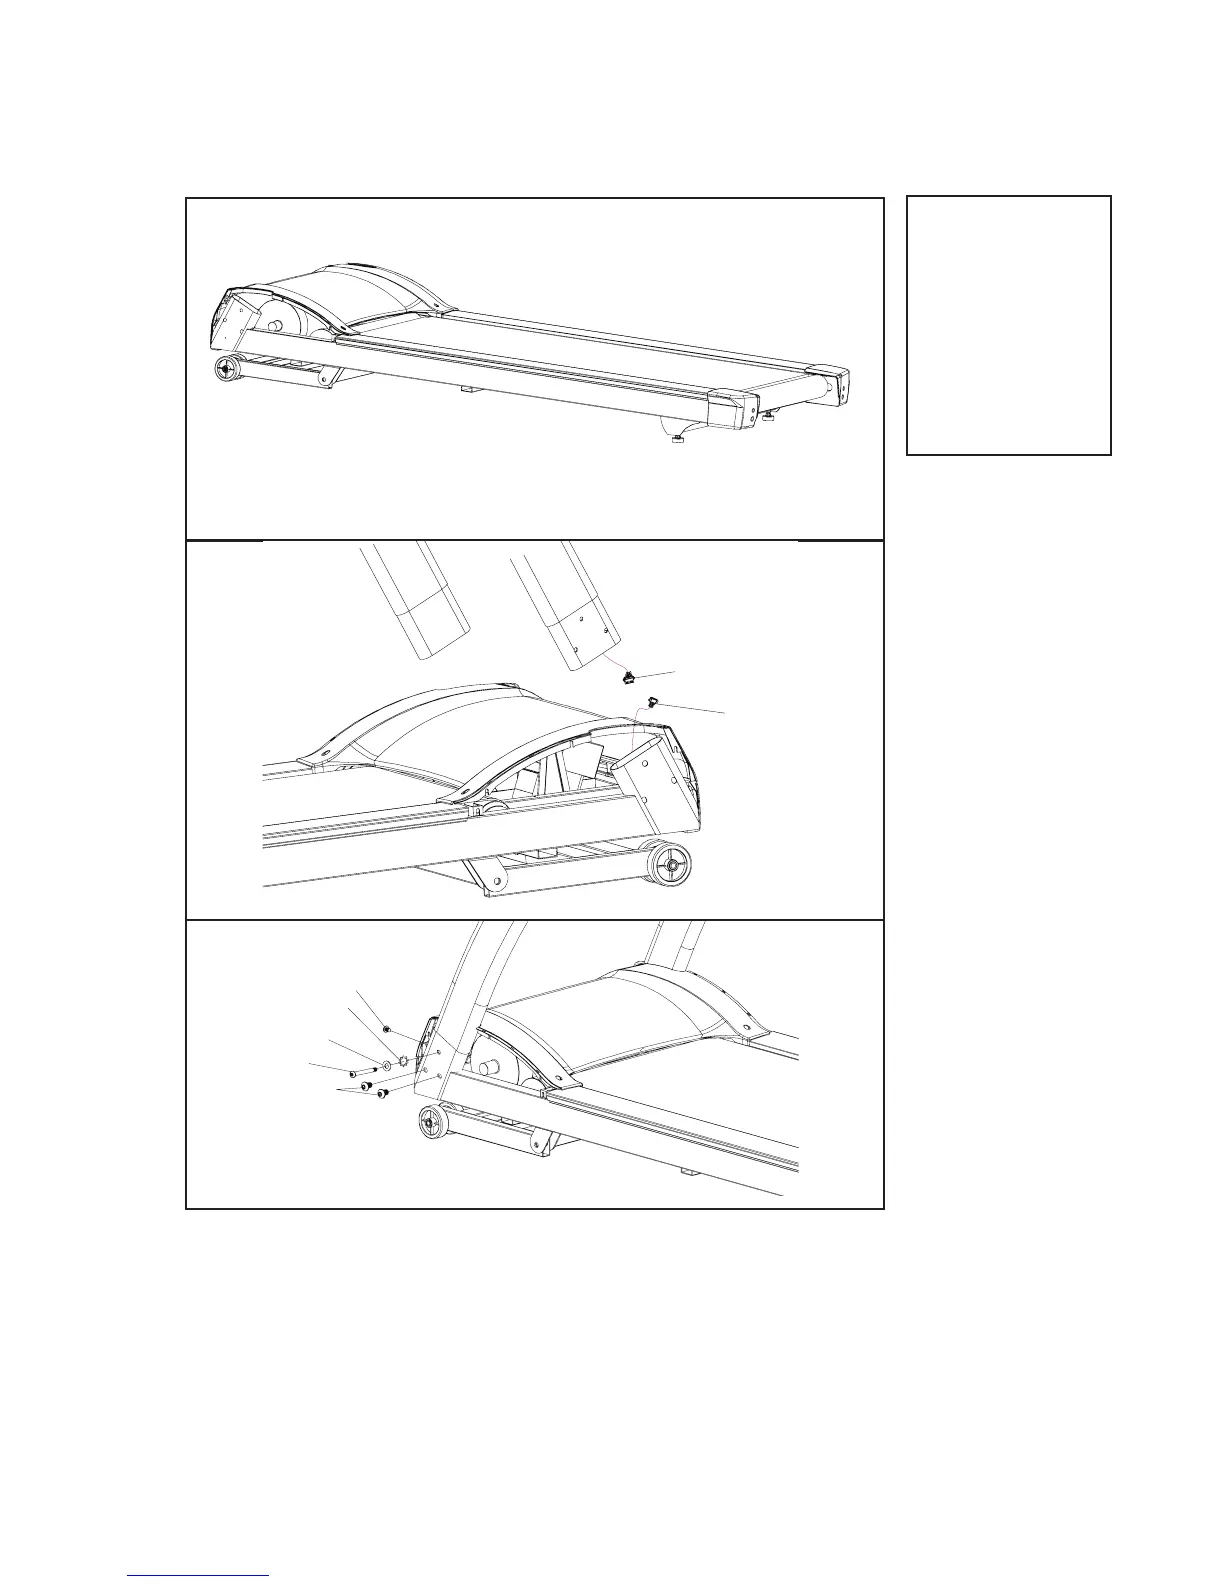
1. Take out the treadmill from the carton and lay it aside on the
smooth ground.
2. Connect the Computer Cable (Lower)(32) and Computer Cable (Middle)
(33).Connect the Upper Cable (38) to the Lower Cable (39).
3. Install the Uprights (L, R)(5,4) into the Main Frame (1) with the six Button
Head Socket Bolts (102), two Button Head Socket Bolts (103), two Spilit
Washers (108), two Star Washer (122) by using the Combination M5 Al-
len Wrench & Phillips Head Screw (111).
33
32
122
102
108
103
Hardware Step 1
#102. 5/16” x 15mm
Button Head Socket
Bolt (6 pcs)
#103. 3/8” x 2”
Button Head Socket
Bolt (2 pcs)
#108. Ø10 x 2T
Split Washer (2 pcs)
#122. Ø10
Star Washer (2 pcs)
 Loading...