9
Customer Service 1-888-707-1880 Dyaco Canada Inc. 2018
Email: customerservice@dyaco.ca
STEP 3
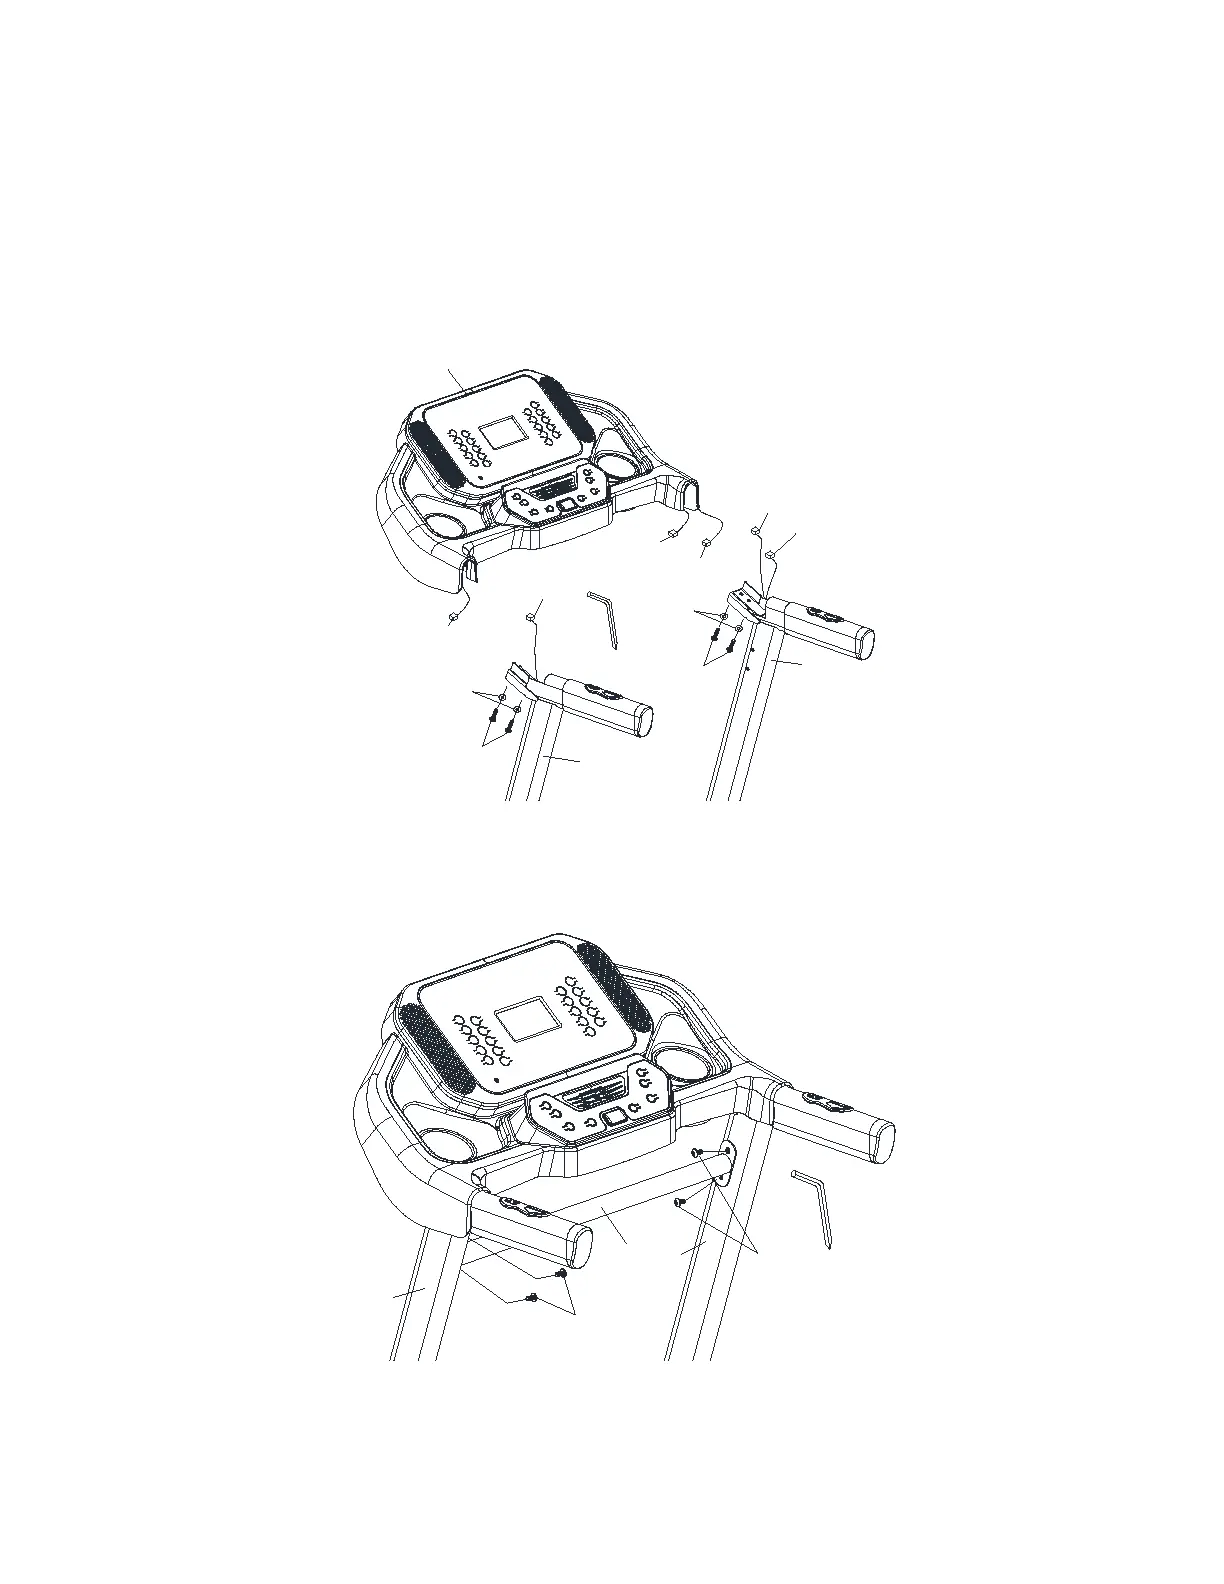
1.
Connect the Computer Cable (Middle) (54) and Computer Cable (Upper) (53).
2. Connect the Speed Adjustment Switch W/Cable (Upper) (114) and Speed/Hand Pulse
Complex (28).
3. Connect the Incline Adjustment Switch W/Cable (Upper) (115) and Incline/Hand Pulse
Complex (29).
4. Insert Console Assembly (21) into right and left Uprights (4) and (5) and secure with 4
pcs of 5/16” × 3/4” Button Head Socket Bolts (125) with 4 pcs of Ø8 × 1.5T (80) Split
Washers by using Combination M5 Allen Wrench & Phillips Head Screwdriver (102).
54
53
4
5
125
80
125
80
114
28
115
29
102
21
STEP 4
Install Handrail Support (9) between left and right Uprights (5) and (4) and use
Combination M5 Allen Wrench & Phillips Head Screwdriver (102) to tighten 4 pcs of
5/16” × 3/4” Button Head Socket Bolts (125).
NOTE: Your unit is now assembled. Ensure all nuts and bolts are firmly tightened prior to use.
 Loading...