3
xTool D1 Pro xTool D1 Pro
FIG. 6 parts list. All of the parts are clearly displayed and identified.
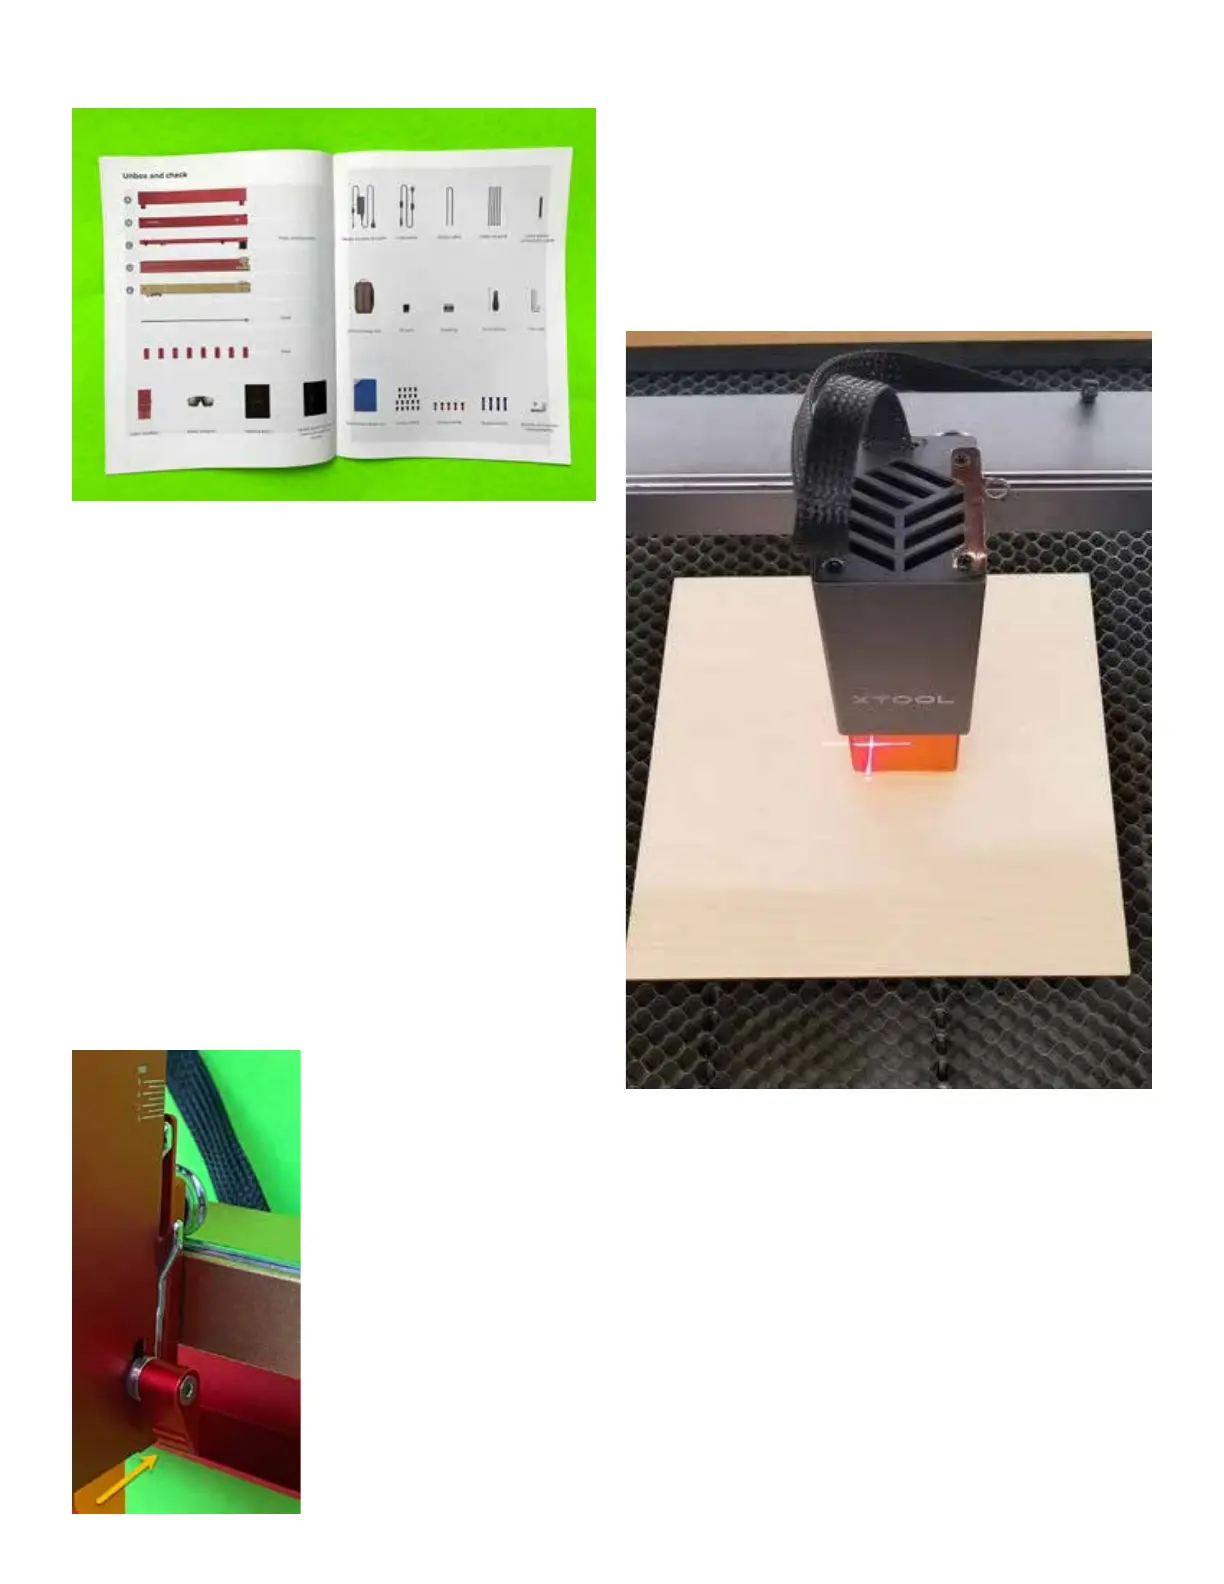
FIG. 7. e release lever on the right
side of the laser module is used to set
the position of the laser height (z-axis)
for cutting, using the increments in-
scribed in white on on the upper edge.
Laser Module Placement
e laser module, in addition to the laser itself, contains a low-power,
yet highly-visible red light crosshairs, that is used to set the starting
point for the laser operation (FIG. 8). e crosshairs are oset exactly
16mm from the actual laser point. e crosshairs are used not only
to indicate the starting position, but also to visually frame the actual
work area, so that the user can conrm the boundary, or frame, in
which the laser activity will be conned. When the laser is red it
moves 16mm to the left to compensate for the framing displacement.
Safety
FIG. 8 crosshair-fitting-material_480x480. e red crosshairs simplify
the placement of the laser head with brightly illuminated reference lines.
e D1 Pro incorporates new safety features that detect ames and
smoke, and sense frame tilt using the built-in gyroscope. Any devi-
ation from the normal operation of the machine will instantly turn
o the laser and sound an alarm. e need for safe operation and
vigilant observation cannot be stated strongly enough since re is an
ever-present danger.
Users also need to be aware of the potential dangers associated with
processing certain materials, such as those containing PVC (Polyvi-
nyl Chloride) and vinyl. If such materials are exposed to a laser they
can release toxic chlorine gas, which is very harmful to humans, and
corrosive to machine parts and the laser itself. e use of such mate-
rials voids the machine warranty.
Included with the laser engraver is a pair of laser safety goggles, which
Focus
Focusing is accomplished using the focus lever that has been shown
to accurately and quickly set the focal distance between the laser
module and the workpiece. e focus lever is built-into the right side
of the laser module, and held in place magnetically. It is activated by
swinging it out and letting it drop so that its tip protrudes down-
ward. e laser module is moved along its z-axis until the tip of the
lever touches the workpiece, and is then locked in position. e laser
is now set to engrave in focus.
If the laser will be used for cutting, the focus should be set to fall at
the base of the workpiece. e reticle engraved in the right side of the
laser module is set to correspond to the thickness of the workpiece
(FIG. 7). e scale setting 3 relates to a workpiece thickness of 6mm,
the setting 4 is equal to 8mm, and the setting of 5 conforms to a
thickness of 10mm. According to the xTool D1 Pro 20W manual:
“To cut thicker materials, you can adjust the position of the rear
plate on the laser module, based on the scale with which the focal
length setting bar is aligned, to ensure better cutting performance.”
 Loading...