Do you have a question about the Yakima SuperJoe 2 and is the answer not in the manual?
Instructions to consult the Fit Sheet for vehicle-specific measurements and notes.
How to move the frames using red triggers on outer hubs.
Guidance on positioning frames, including measurement advice.
Guidelines for positioning frames on vehicles not listed in the Fit Sheet.
Cleaning contact points on the vehicle and keeping pads free of debris.
Importance of lower support frame location and notes for vehicle.
Common locations for lower frame placement and cautions.
Where to place upper hooks as directed by Fit Sheet Notes.
How to insert upper hooks into the leading edge of the hatch or trunk.
Do not attach upper hooks to glass or plastic; limits load to 2 bikes if using Glass Hatch Hooks.
Pulling upper straps completely out of the buckles.
Opening the vehicle's hatch door.
Ensuring pads are free from contact between hatch door and vehicle frame.
Closing the hatch and pulling straps to seat the pads.
Attaching adapter straps to the carrier's top straps.
Threading the strap end back into the buckle.
Placing lower strap hooks as directed by Fit Sheet Notes.
Options for lower hook placement on unlisted vehicles.
Centering the carrier and positioning side strap hooks.
Mounting side hooks to the side of the trunk/hatch.
Pulling side straps tighter with two hands.
Pulling upper straps tighter with two hands.
Bundling excess strap ends into the provided band.
Pulling lower straps completely out of the hub.
Opening the vehicle's trunk door.
Ensuring pads are free from contact between trunk door and vehicle frame.
Inserting new straps and threading strap ends back into buckles.
Attaching top strap hooks to hold the carrier.
Centering the carrier and positioning side strap hooks.
Pulling side straps tighter with two hands.
Pulling upper straps tighter with two hands.
Bundling excess strap ends into the provided band.
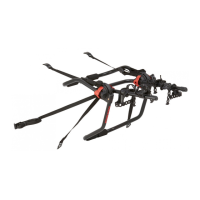
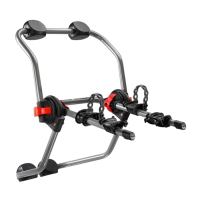
Adjusting load arms to be just above horizontal for clearance.
Guidance on loading the heaviest bike first and arranging bikes.
Tying bike frames to load arms using durable straps.
Attaching rubber straps to cradles and stabilizer for securing bikes.
Securing the remaining bikes to the carrier.
Securing the front wheel on the bike closest to the car.
Retightening upper and side straps after bikes are loaded.
Maximum weight loads for SuperJoe2, SuperJoe3/LittleJoe, and bike weight restrictions.
Must tighten straps, check tension periodically, and failure can cause injury or death.
Bike frames must be securely tied to carrier arms before transport.
Do not allow wiper to contact carrier; wiper may not be usable.
Do not use if carrier contacts spoiler; route straps under spoiler if possible.
Use Glass Hatch Hooks if hooks must attach to glass or plastic.
Do not rest carrier on convertible top or operate top while installed.
Slide hooks from outside edge; open/close trunk carefully if seams are tight.
Excessive tightening may damage softer body materials.
Never drive off-road, avoid hot exhaust, do not install on trailers/RVs, never open trunk/hatch with carrier installed.
No lubrication needed, do not immerse, remove before automatic car wash.
Contact dealer or call (888) 925-4621 for support or replacement parts.
| Category | Automobile Accessories |
|---|---|
| Capacity | 2 bikes |
| Material | Steel |
| Mounting | Trunk |
| Weight Capacity | 70 lbs |
| Compatibility | Various vehicles with roof racks |


 Loading...