EasyManua.ls Logo

Yale EC800

Yale EC800
18 pages
To Next Page IconTo Next Page
Loading...
外部面板 內部面板
Press and hold the "SET" button, and in ve seconds you will
hear "Du...Du...Du...DuDu", release the button, voice prompt
"successfully", represents reset Ok, then release the "SET"
butto.
Factory default administrator PIN Code is 123456
Note: After initializing, any CARD or factory default PIN code
123456 can unlock.
Register administrators
Press "SET" button or press "*" then "#" keys to activate the
setting mode.
Voice broadcast: "Add administrator", Please enter card
or PIN code to add.
Register Users
Touch lights up the keyboard, press " * " and then "# ";
Or short press the " SET " button, voice broadcast:
"Please verify admin" and then enter the administrator
information
Modication
Delete user information
Touch lights up the keyboard, press " * " and then " # ";
Or short press the " SET " button, voice broadcast:
"Please verify admin" and then enter the administrator
information
2.1
2.2
3.1
Enter a new PIN code (6 to 12 digits) and then press “ # ”or
swipe the RF card.
Note: The lock will exit the setting mode after 12 seconds
if no operation or press “ * ” key to exit the setting mode.
Factory default PIN code 123456 will be invalidated after
Administrator registration completed.
Voice broadcast after verication
"1 Add User 2 Delete User 3 Lock Settings 4 Add Admin"
Press 1 to enter the Add User according to Voice guide.
Enter a PIN code or card to enter user information
Note: 1.The lock will exit the setting mode after 12 seconds
if no operation or press “ * ” key to exit the setting
mode.
2.Repeated registered -PIN code is not allowed.
Voice guide after verication
"1 Add User 2 Delete User 3 Lock Settings 4 Add Admin"
Press 2 to enter the Delete User state and voice
broadcast:"Delete user"
Swipe the key card or enter the user number or PIN code
on the keyboard sensor area, press "#" to conrm the input,
and then press "#" to conrm the deletion.
Note: The lock will exit the setting mode after 12 seconds if no
operation or press “ * ” key to exit the setting mode.
Delete all user information
According to operation 3.1, enter the delete user state
and enter 000#.
Voice broadcast "DuDu" and then press " # " to conrm
deleting all users.
3.2
Note: 1.The lock will exit the setting mode after 12 seconds
if no operation or press “ * ” key to exit the setting
mode.
2.After all deletion, only users are deleted, not admini-
strators.
Add administrator
Touch lights up the keyboard, press " * " and then " # ";
Or short press the set button, voice broadcast:
"Please verify admin" and then enter registered administrator
PIN code.
2.3
Voice broadcast after verication
"1 Add User 2 Delete User 3 Lock Settings 4 Add Admin"
Press 4 to enter the Add Admin state and voice
broadcast:"add admin"
Enter a PIN code or card to enter administration information.
Note: Maximum 9 administrators can be saved.
The administrator has the authorization to enter to Setting
mode and open door.
Usage
Open Door by PIN Code
4.1
Touch the keypad. Enter 6~16 digits (PIN code and fake PIN
code) and press “ # ” to conrm. The conrmation sound will
be heard if the PIN code is correct. Then turn lever to open the
door within 8 seconds. After that, The conrmation sound will
be heard again and door will be locked.
(Fake PIN code can input before and after the PIN code.)
The RED light will ON and a voice prompt will be heard if PIN
code is NOT matched.
( RED light will be ON and the system will lock for 1 minute
after 5 consecutive failed try by key card/PIN code.)
Open Door by KeyCard
4.2
Touch the keypad. Swipe the KeyCard on keypad induction
zone. Then turn lever to open the door within 8 seconds.
The RED light will ON and a voice prompt will be heard if the
key card is NOT matched.
( RED light will be ON and the system will lock for 1 minute
after 5 consecutive failed try by key card/PIN code.)
Ver1.04
Factory Reset
1.3
Start Up
"successfully" will be heard after successful registration.
Entry door lock setting
lock setting
Voice broadcast after verication
"1 Add User 2 Delete User 3 Lock Settings 4 Add Admin"
Press 3 to enter the Lock Setting state.
Voice broadcast:
"1 Function Settings 2 Volume Setting 3 Language Settings"
Verication
administrator
1 Add User
2 Delete User
3 Lock
Settings
4 Add Admin
1 Function
Setting
2 Volume
Setting
3 Language
Setting
1 Enable Passage
2 Enable Dual Verify
3 Enable Mute
1 Volume Up
2 Volume Down
1 Chinese
2 English
Before Installation
Preparation
Door Preparation
54mm hole saw
25mm hole saw
Fixing
Screwdriver
Drill
Key x 3
M4 Machined
Screw x 3
M4 Wooden
Screw x 4
Spring
Latch
KeyCard x 2
Outside Panel Inside Panel
Alkaline Batteries
(AAA x 4)
All dimensions in millimetres
Yale EC800 Smart Lock
USER MANUAL
Components
1.1
1.2
Spindle
Chisel and hammer
StrikeDust Box
Question and Answer IconNeed help?

Do you have a question about the Yale EC800 and is the answer not in the manual?

Yale EC800 Specifications

General IconGeneral
Keyless EntryYes
Mobile AppYale Access App
Key OverrideYes
FinishSatin Nickel
ConnectivityBluetooth
Power SupplyBattery
Battery Type4 AA batteries
Battery LifeApproximately 1 year
Voice Assistant IntegrationAmazon Alexa, Google Assistant
Lock TypeDeadbolt
Unlocking MethodsKeypad, Mobile App
Auto-Lock FeatureYes

Summary

Before Installation

1.1 Components

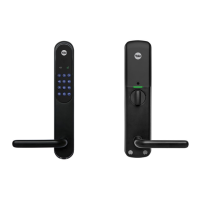
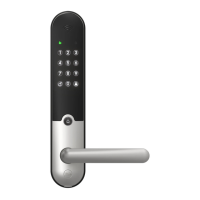
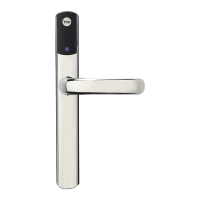
Lists all physical components included with the Yale EC800 Smart Lock.

1.2 Preparation

Details necessary tools and door modifications required before installing the smart lock.

1.3 Factory Reset

Explains the procedure to perform a factory reset on the Yale EC800 Smart Lock.

Start Up

2.1 Register administrators

Guides on adding administrator PIN codes or KeyCards to the smart lock system.

2.2 Register Users

Outlines the process for adding new user PIN codes or KeyCards to the lock.

2.3 Add administrator

Details the steps to add additional administrator accounts to the smart lock.

Modification

3.1 Delete user information

Provides instructions on how to remove a specific user's PIN code or KeyCard from the lock.

3.2 Delete all user information

Describes the procedure to delete all registered user PIN codes and KeyCards.

Usage

4.1 Open Door by PIN Code

Details how to unlock the door using a valid PIN code and the keypad.

4.2 Open Door by KeyCard

Explains the process of unlocking the door using an authorized KeyCard.

Entry door lock setting

lock setting

Overview of various lock settings accessible after administrator verification.

5.1 Function Setting

Configures advanced functions like passage mode, dual verify, and keypad mute.

5.1.1 Enable Passage (Keep unlocked)

Details how to enable or disable the passage mode, keeping the door unlocked.

5.1.2 Dual Verify

Explains how to activate or deactivate Dual Verify mode for enhanced security.

5.1.3 Mute keypad mode

Describes how to enable or disable the keypad mute function for silent operation.

5.2 Voice Volume Setting

Allows adjustment of the voice prompt volume for the smart lock.

5.3 Language Setting

Enables selection between Chinese and English voice prompts for the lock.

Built In Function

6.1 Low battery alarm

Explains the low battery indicator and voice prompts for power replacement.

6.4 Power shortage

Details how to power the lock using a Micro USB port during battery depletion.

6.5 No response

Instructs on using the "Quick Restart" button for unresponsive lock behavior.

6.6 Key Operation

Illustrates how to use the physical key for unlocking the door, even without battery power.

Specifications

KeyCard Memory

Specifies the maximum number of KeyCards and PIN codes that can be stored.

PIN Code

Defines the length and format requirements for user PIN codes.

Card Readable Distance

States the maximum distance for reading KeyCards.

Battery

Specifies the type and quantity of batteries required for operation.

Low Battery Alarm Effect

Indicates the voltage level at which the low battery alarm is triggered.

Static Consumption

Specifies the power consumption when the lock is idle.

Dynamic Consumption

Specifies the power consumption during active operation.

Operation Temperature

Defines the acceptable temperature range for operating the smart lock.

Storage Temperature

Defines the acceptable temperature range for storing the smart lock.

Relative Humidity

Specifies the acceptable range of relative humidity for the lock.

Automatically locking

States the time delay before the lock automatically re-locks.

Related product manuals