59
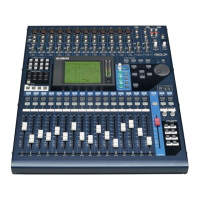
O1X
2.2.2 fs jitter
Turn on the power and after the opening screen, press the
"UTILITY" button. Then the following message appears on
the display.
UTILITY MENU SELECT
REMOTE PATCH W.CLK D.I/O OSC. MIDI PREF. MONI.
Press the encoder switch [KNOB-3] corresponding to
"W.CLK", and the following message appears on the screen.
UTILITY mLAN AUTO W.CLK [XXX : XXXXkHz] 1/2
ENABLE/DISABLE
Explanation of the string in [ ] at the upper right of the
screen.
XXX:INT or D.IN or mLAN → Current clock source
XXXX:44.1 or 48 or 88.2 or 96 → Current clock rate
If "**" appears, the clock is not received properly.
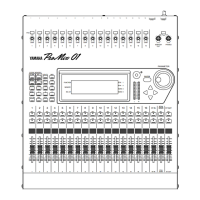
UTILITY
DISPLAY N
KNOB-1 KNOB-8KNOB-3 KNOB-7
Selecting mLAN
In the default state, mLAN AUTO W.CLK is disabled.
After pressing the encoder switch [KNOB-1] corresponding to
ENABLE, press the encoder switch [KNOB-8] corresponding
to YES on the next screen, and mLAN is selected.
→ The clock rate to be inputted is displayed.
Clock selection
Press the "DISPLAY ∨" key, and the following message
appears on the display.
UTILITY W.CLK SELECT xxxxx [XXX : XXXXkHz] 2/2
INTERNAL xEXT-D.IN xEXT-mLAN
xxxx: displayed when mLAN is selected. In that case, it is
not possible to select other clock source.
Selecting D.IN
When mLAN is the clock source, make it disabled. (Same
as above ENABLE procedure)
Press the encoder switch [KNOB-3] corresponding to xEXT-
D.IN on the above screen and the one [KNOB-8]
corresponding to YES on the next screen, and D.IN is
selected.
* The clock rate to be inputted is displayed.
Selecting INT
When mLAN is the clock source, make it disabled. (Same
as the above ENABLE procedure)
Press the encoder switch [KNOB-1] corresponding to
INTERNAL on the above screen and the one [KNOB-8]
corresponding to YES on the next screen, and INT clock
rate select screen appears. Press the encoder switch
corresponding to the necessary clock and the one
corresponding to YES, and INT is selected.
* The selected clock rate is displayed.
Check that the value of the jitter of DIGITAL STEREO OUT
is as follows.
Setting for the filter of the measuring instrument: 700Hz
to 100kHz
INTERNAL CLOCK
44.1kHz 5nsec or less
48kHz 5nsec or less
88.2kHz 5nsec or less
96kHz 5nsec or less
EXTERNAL CLOCK (D. IN)
44.1kHz 10nsec or less
48kHz 10nsec or less
88.2kHz 10nsec or less
96kHz 10nsec or less
EXTERNAL CLOCK (mLAN)
44.1kHz 10nsec or less
2.2 Regular mode
2.2.1 PHANTOM DC
Measurement condition Power ON
(1) Short between No.2 and No.3 pins of the XLR connector
of INPUT1 and INPUT2 and connect a 10kΩ resistor
between No.1 and No.2 pins.
(2) Turn on the PHANTOM SW on the rear panel and check
that the voltage measured at both ends of the 10kΩ
resistor then is DC32V to DC36V.
(3) Turn off the PHANTOM SW and check that discharging
starts immediately.