EMU00397
Installing the Propeller
cC
8 Be sure to install the thrust washer
before installing propeller, otherwise,
lower case and propeller boss may be
damaged.
8 Be sure to use a new cotter pin and
bend the ends over securely. Other-
wise, the propeller could come off dur-
ing operation and be lost.
1) Apply Yamaha Marine grease or Cor-
rosion resistant grease to the pro-
peller-shaft.
2) Install the thrust washer and propeller
on the propeller-shaft.
3) Install the spacer and washer. Tighten
the propeller nut to the specified
torque.
4) Align the propeller nut with the pro-
peller shaft hole. Insert a new cotter
pin in the hole and bend the cotter pin
ends.
NOTE:
If the propeller nut does not align with the
propeller shaft hole after tightening to the
specified torque, then tighten the nut fur-
ther to align it with the hole.
4-23
GB
EMU00393
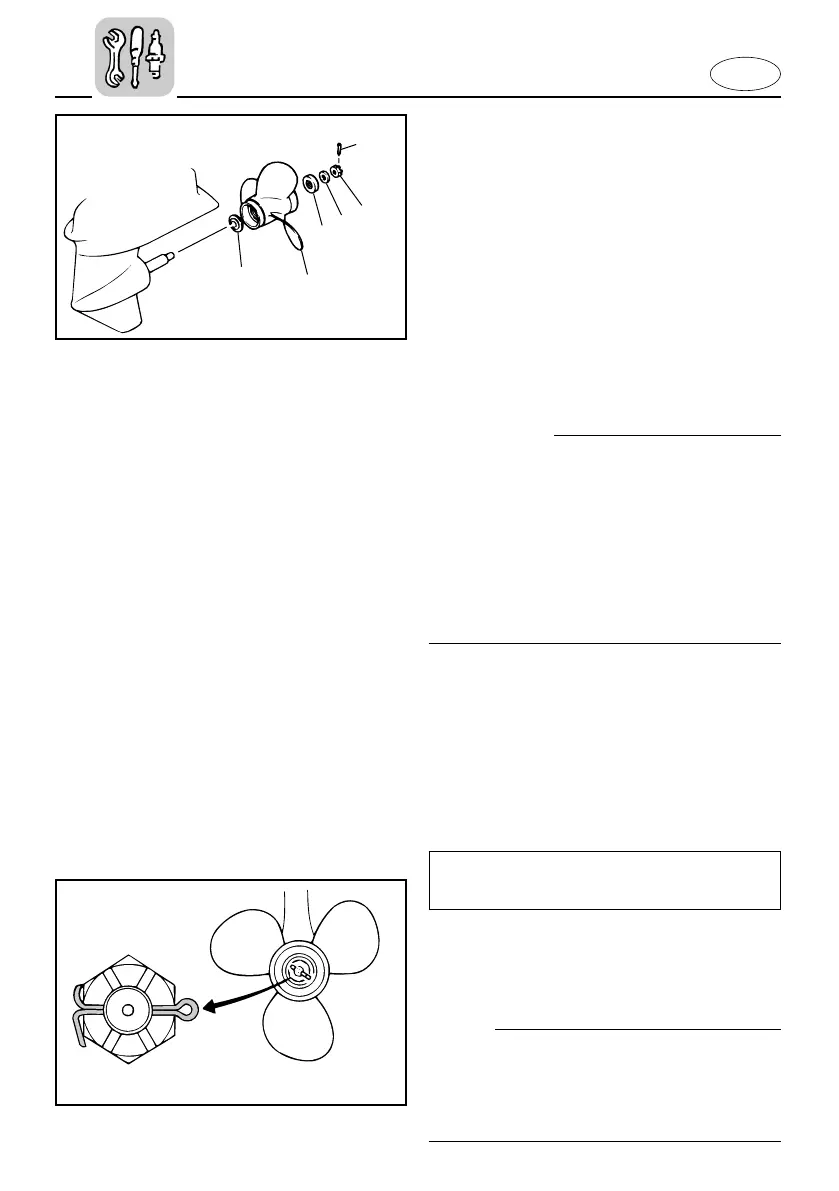
Removing the Propeller
1) Using the pliers provided, straighten
the cotter-pin and pull it out.
2) Remove the propeller nut, washer
and spacer.
3) Remove the propeller and thrust
washer.
1 Thrust washer 2 Propeller
3 Spacer 4 Washer
5 Propeller nut 6 Cotter pin
Tightening torque:
Refer to “SPECIFICATIONS” page 4-1.
602053
63B-9-78-A0-4b 3/3/03 5:26 PM Page 26
 Loading...