Do you have a question about the Yamaha Clavinova CLP-810S and is the answer not in the manual?
Ensure local AC mains voltage matches the name plate.
Explains safety symbols like caution and lightning flash for electrical hazards.
Basic precautions to avoid injury or death from electrical shock, damage, fire.
Basic precautions to avoid physical injury or damage to the instrument/property.
Identifies and explains the function of each control on the panel.
Details the pedal jack, MIDI connectors, and headphone jacks.
Instructions for turning the unit on and setting the master volume.
Explains the damper pedal's sustain and damping function.
How to shift the keyboard pitch up or down in semitones.
How to set MIDI transmit/receive channels and ALL mode using specific keys.
Guides on resolving issues like no sound, pedal problems, and interference.
Details MIDI data formats for note events and control changes.
Details MIDI data formats for volume and universal non-realtime messages.
Shows recognized MIDI channels, modes, note numbers, and velocity.
Guides on placing and securing the main unit onto the assembled stand.
Warning to be careful of fingers when positioning and installing the main unit.
Explains how to set the voltage selector for different main voltages.
Emphasizes reading all instructions before connection and use.
Covers power supply verification, cord safety, and ventilation requirements.
Warns against wet locations, discusses accessory use, and service by qualified personnel.
Advises on safe volume levels and preventing object/liquid spills.
| Type | Digital Piano |
|---|---|
| Number of Keys | 88 |
| Keyboard | Weighted |
| Sound Source | AWM (Advanced Wave Memory) |
| Effects | Reverb, Chorus |
| Metronome | Yes |
| Headphone Jacks | 2 |
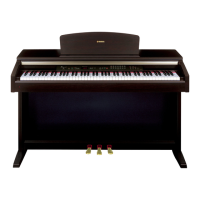
| Finish | Simulated Rosewood |
| Key Action | Graded Hammer Action |
| Polyphony | 32 notes |
| Speakers | 2 x 20W |
| MIDI | In/Out |