6-23
Fuel system
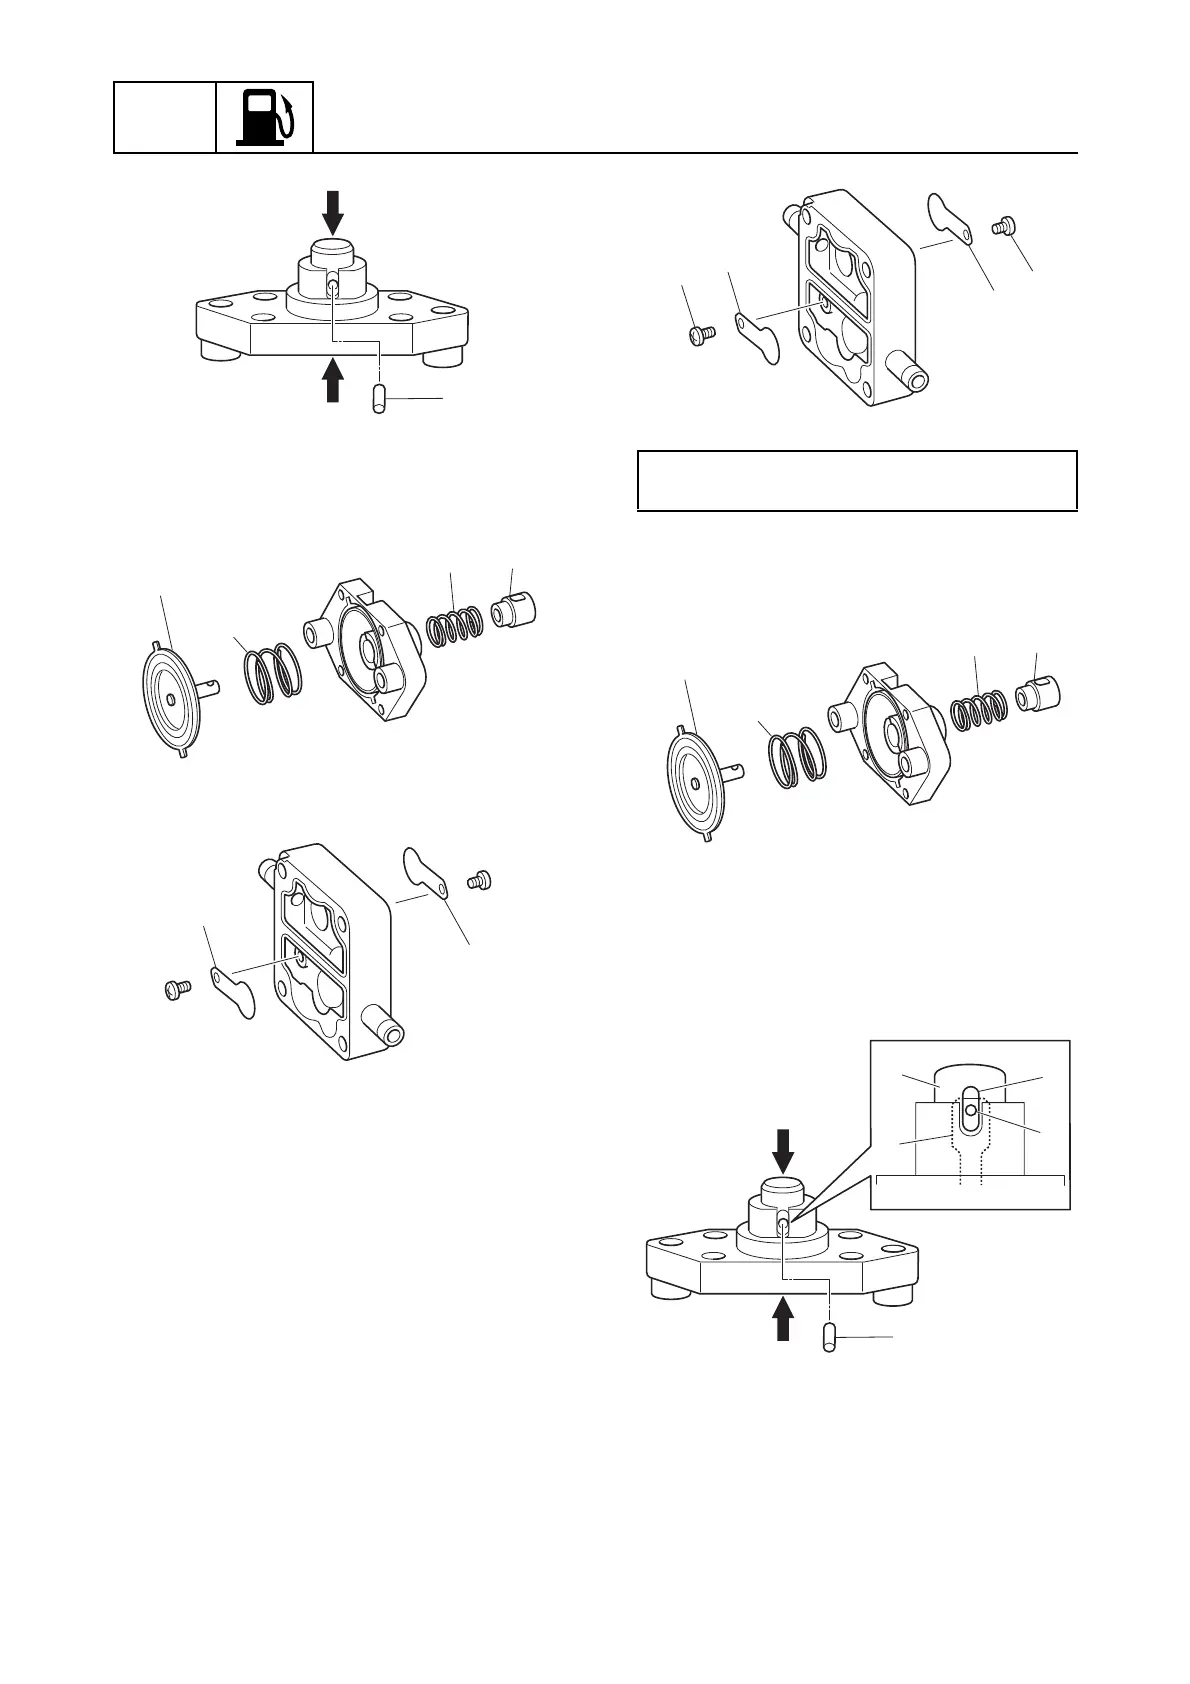
4. Remove the diaphragm g, spring h,
plunger e, and spring i.
5. Remove the valves j.
Checking the diaphragm and valve
1. Check the diaphragm. Replace if torn.
2. Check the valve. Replace if deformed or
worn.
Assembling the fuel pump
Before assembling the fuel pump, clean the
parts and soak the valves and diaphragm in
gasoline to obtain proper operation of the fuel
pump.
1. Install the valves a, and then tighten the
fuel pump valve screws b to the speci-
fied torque.
2. Install the springs c and d, plunger e,
and diaphragm f.
3. Align the hole a in the plunger e with
the hole b in the diaphragm f by
pushing the plunger and diaphragm.
4. Install the pin g.
5. Turn the plunger so that the protrusions
c in the diaphragm f fit into the slots d
in the fuel pump body 1 h.
f
j
j
Fuel pump valve screw b:
0.5 N·m (0.05 kgf·m, 0.37 ft·lb)
a
a
b
b
g
b
a
e
f