Quick Guide — Advanced Course
Creating a Voice by using the Sampling function
101
Owner’s Manual
6 Depending on whether you’re creating a Normal
Voice or a Drum Voice, follow the appropriate
instructions below.
When creating a Normal Voice in steps #4 - 5
After entering the Sampling Edit mode
([INTEGRATED SAMPLING] → [EDIT]), press the
[F1] KEYBANK button to call up the Key Bank
display. From this display, select a Waveform and
Key Bank. To specify the Key Bank, simultaneously
hold down the [INFORMATION] button and press the
desired note on the keyboard. To select Waveforms
assigned to different velocities, hold down the
[INFORMATION] button and press the [SF2] SELECT
button.
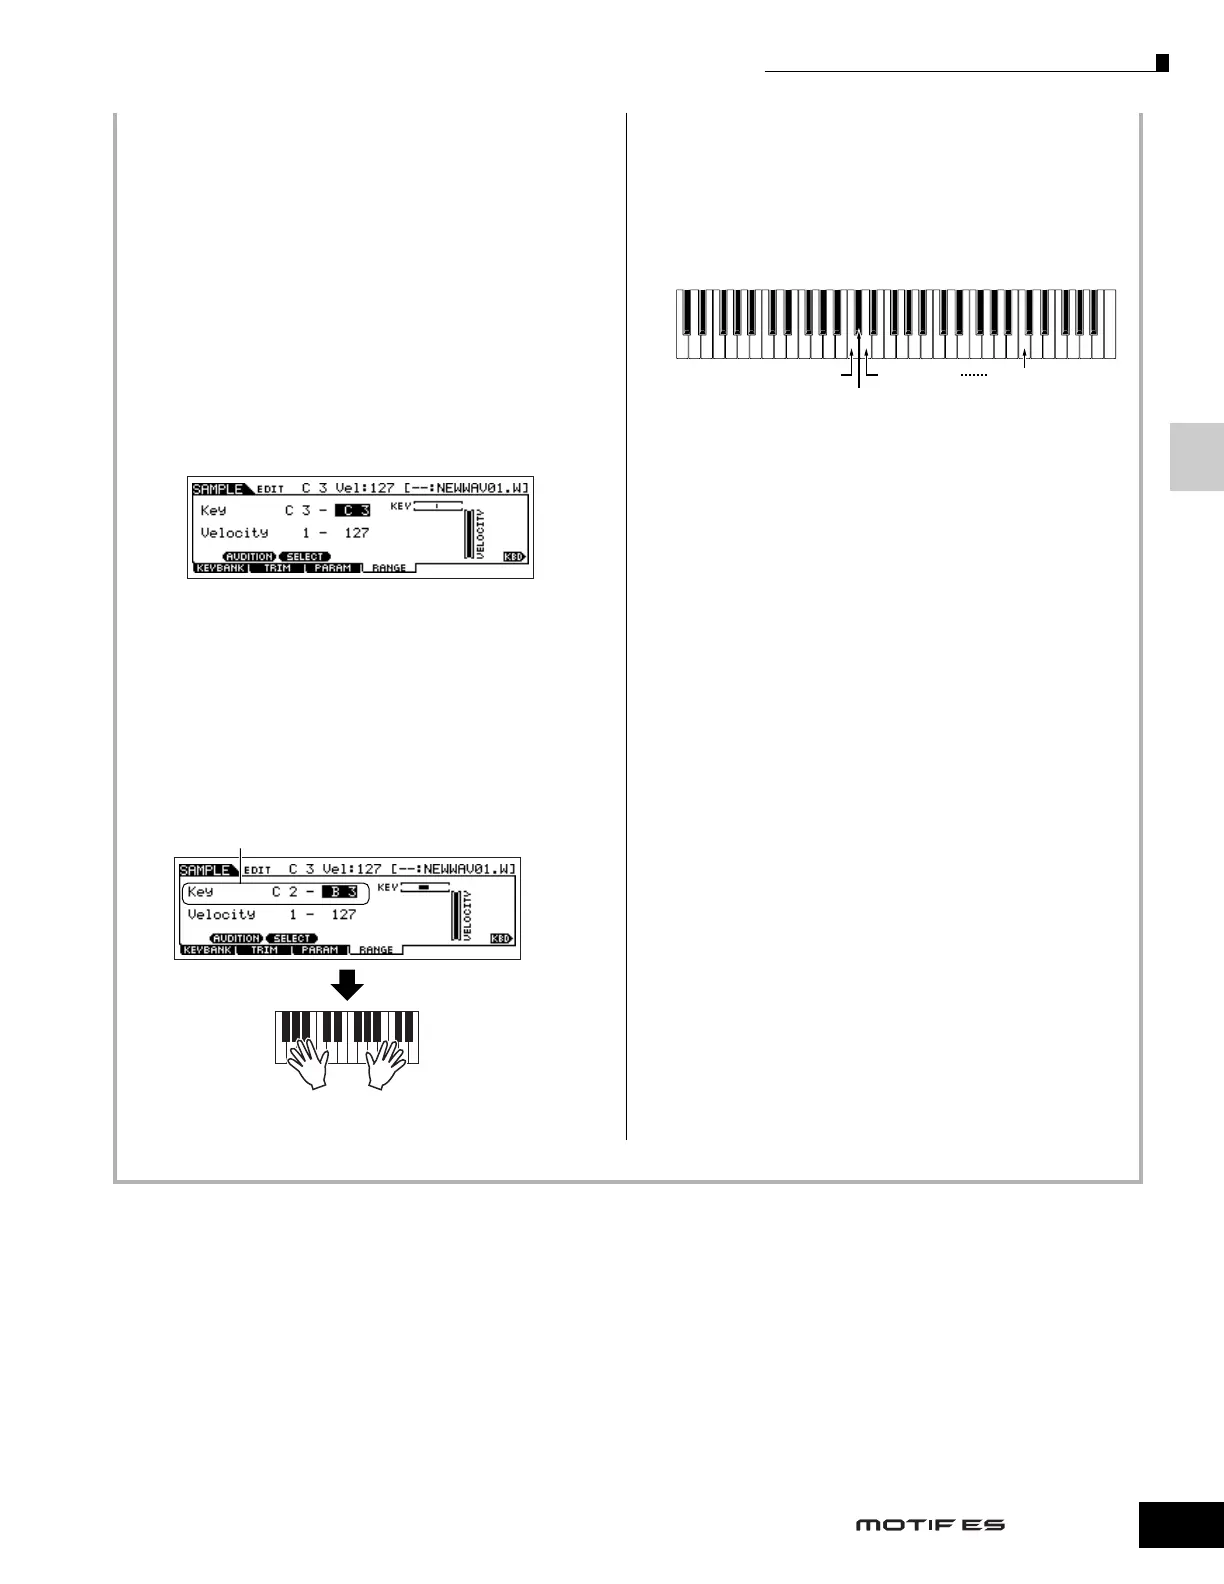
After selecting a Waveform and Key Bank above,
press the [F4] RANGE button.
Once you’ve loaded the sample in step #5, it can
only be sounded by playing the note specified in
step #4. From this display however, you can expand
the note range over which the loaded sample will
sound.
When creating a Drum Voice in steps #4 - 5
By repeating steps #5 - 8 above, you can create a Drum
Voice in which each key has a different sound (as
shown below).
After creating the Normal or Drum Voice, go on to step
#7 below.
7 Play the Voice created by the Load operation.
Press the [VOICE] button to enter the Voice Play mode,
then select the Voice number set in step #4.
Determine the Key Range.
Use the data dial, [INC/YES] and [DEC/NO]
buttons or press the note on the keyboard while
holding the [INFORMATION] button.
Play the keyboard within the Key Range set above.
You can hear the loaded sample following the pitches of the
notes you play.
Sound Effect C Sound Effect Y
Sound Effect B
Sound Effect A

 Loading...