Using the Plug-in Board
77
Owner’s Manual
Quick Guide — Playing the MOTIF ES
Using a Multi Part Plug-in Board
In this section, we’ll explain how to play back an XG for mat song, using the PLG100-XG Plug-in Board. Naturally, to get the most
out of these instructions, you should have XG song data (Standard MIDI File) stored on a SmartMedia card or USB storage device.
See page 283 for details.
n If the MIDI Port number here is set to “1” or “off,” the Plug-in Voice may
sound simultaneously with the internal Voice, when playing back
Song/Pattern data. To keep this from happening, make sure the MIDI
Port number of the Plug-in Board is set to “2” or “3” — especially when
using the Song/Pattern mode. To prevent a similar problem when
using both a Single Part Plug-in Board and the PLG100-XG together,
set each board to a different MIDI Port number.
1 Insert a SmartMedia card which contains the XG
song files into the CARD slot, or use a USB storage
device (connected to the USB TO DEVICE connector)
containing appropriate XG song files.
2 Press the [FILE] button to enter the File mode, then
set the basic parameters.
Refer to “Basic settings for using SmartMedia or a USB
storage device” on page 30.
3 Set the [FILE] → [F3] LOAD → TYPE parameter to
“Song.”
4 Move the cursor to the list of files to be loaded, select
the desired file, then press the [ENTER] button.
5 Specify the destination Song number, then press the
[ENTER] button to execute the Load operation.
Loading data to this synthesizer automatically erases and replaces any
existing data in the User memory. Make sure to save any important data
to a SmartMedia/USB storage device before performing any Load
operations.
1
After turning the power off, install the Multi Part
Plug-in Board PLG100-XG to slot 3 of this
synthesizer.
2
Switch the MOTIF ES power on.
3
Check the status of the installed Plug-in Boards
in the [UTILITY] → [F6] PLUG → [SF1] STATUS
display.
4
Set the MIDI port of the PLG100-XG to “2” or “3”
in the [UTILITY] → [F6] PLUG → [SF2] MIDI
display.
5
Press the [SONG] button to enter the Song
mode, then press the [FILE] button to enter the
File mode.
6
Load the XG song file (Standard MIDI file) from
the SmartMedia/USB storage device to the
MOTIF ES in the [FILE] → [F3] LOAD display, as
described in the sub-instructions below.
The name of the installed Plug-in Board is displayed.
7
Press the [SONG] button to enter the Song Play
mode, then select the Song number to which the
XG song file was loaded.
8
Set the MIDI transmit port of all the tracks to the
number set in step #4 from the [SONG] → [F3]
TRACK → [SF1] CHANNEL display.
9
Press the [FF
FF
] (Play) button to play the XG
song.
File/folder list
CAUTION
Set MIDI transmit ports.

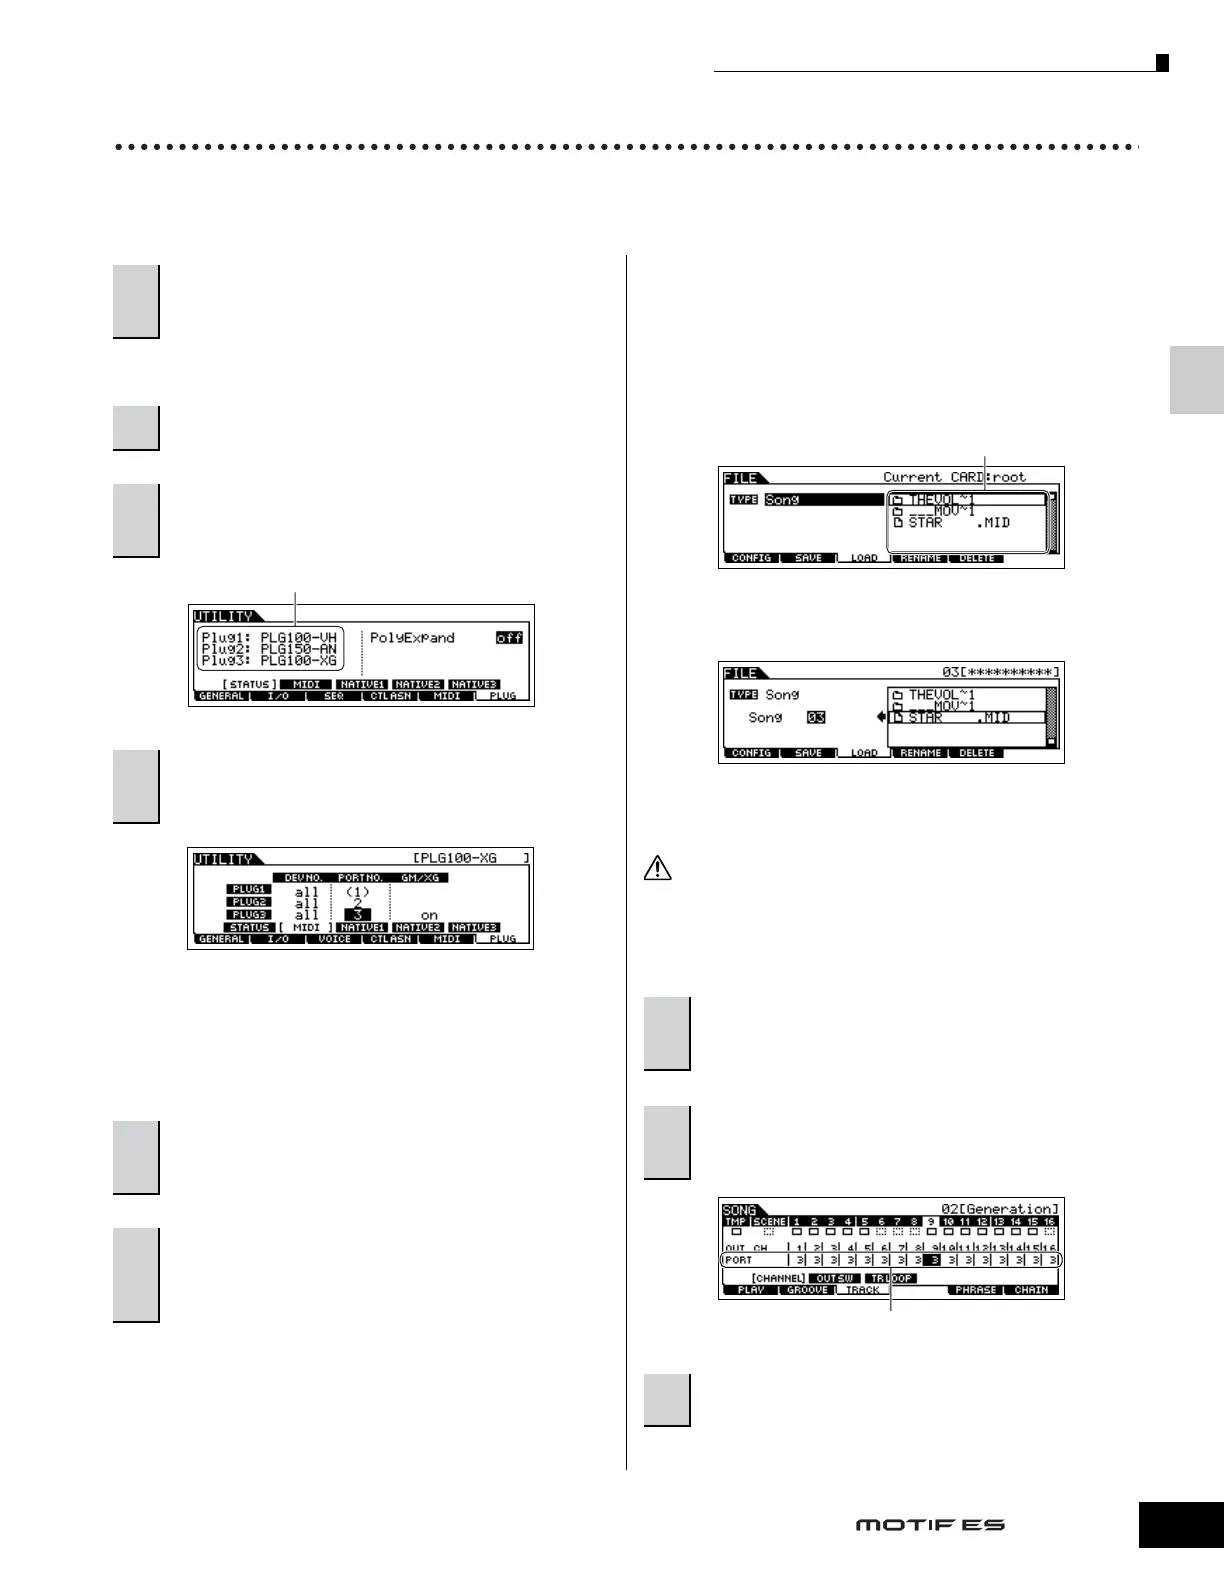 Loading...