Quick Guide — Advanced Course
Creating a Song on the MOTIF ES
107
Owner’s Manual
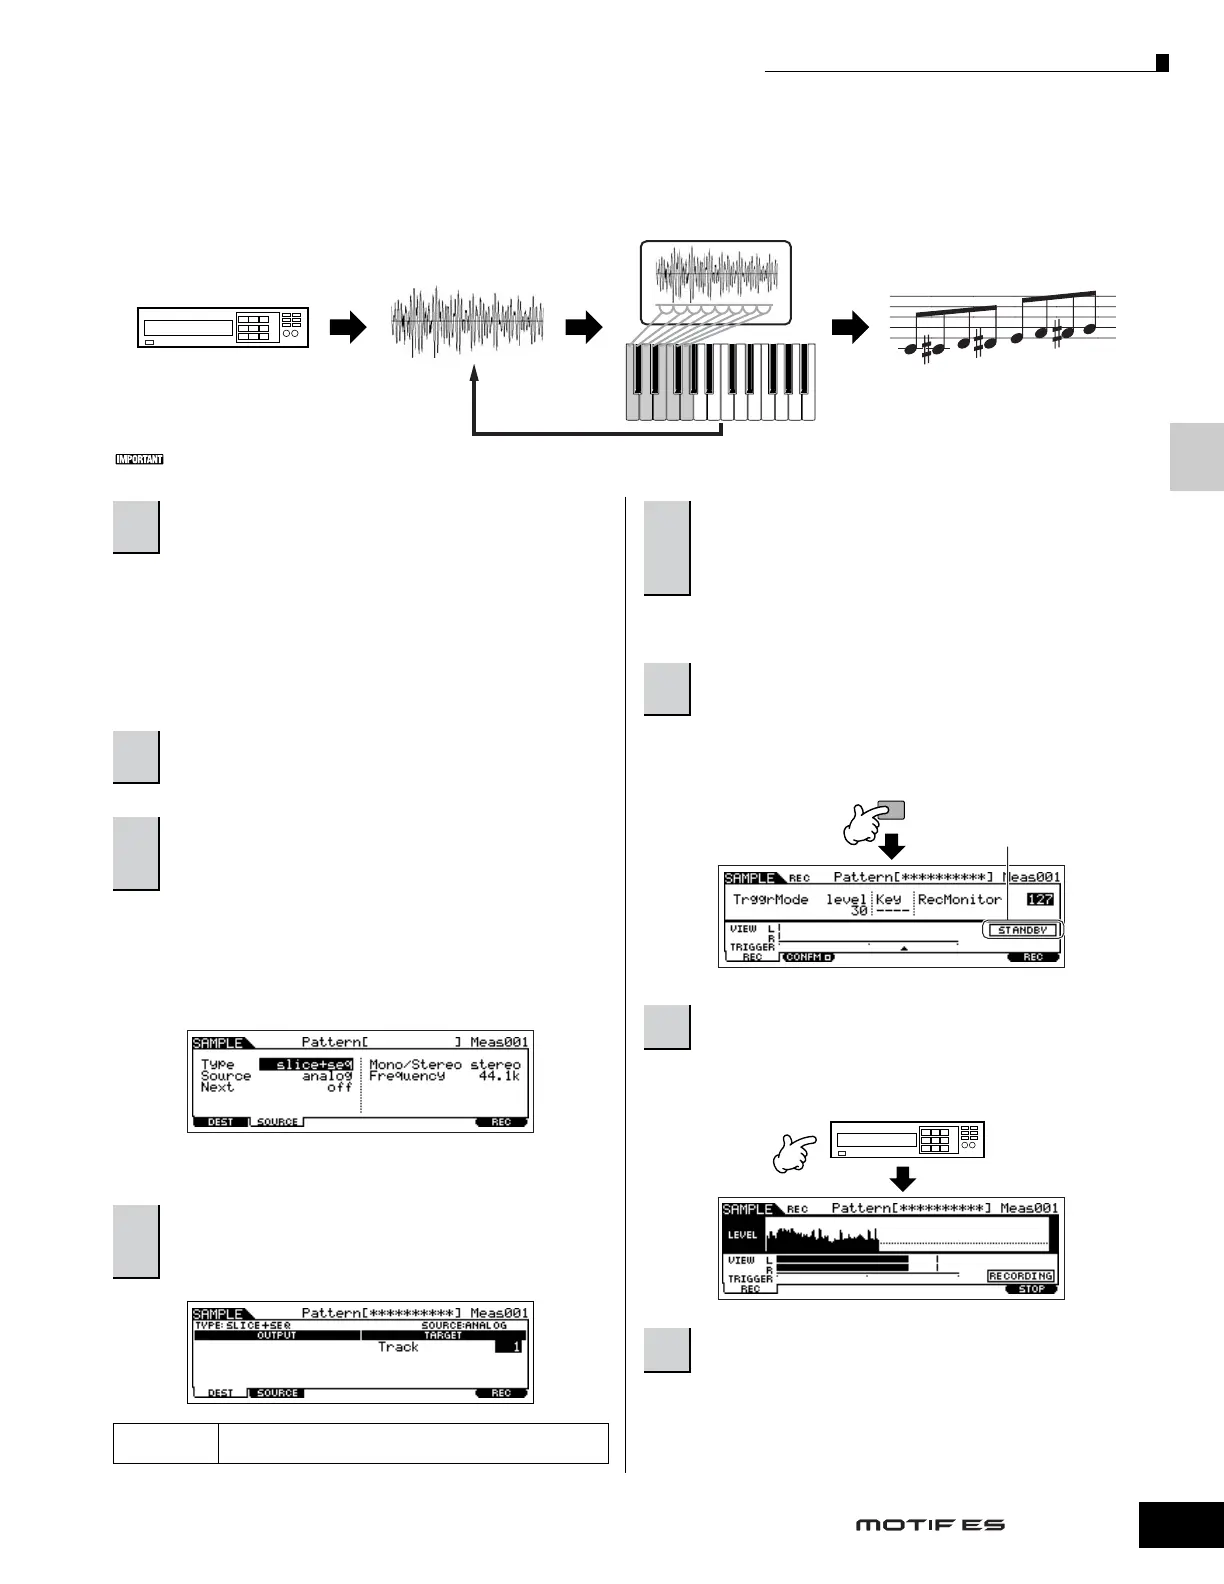
■ Sampling a rhythm loop (audio data) to a Pattern track
With this method, you can record drum loops and rhythm patterns from CDs to the MOTIF ES by using the Sampling function, then
slice the sample into separate components and assign the slices to different keys. This powerful feature lets you match the
sampled rhythm to virtually any tempo without stretching or compressing the audio, since each “hit” becomes a separate MIDI note.
In order to use the Sampling function, DIMM modules must be installed to the instrument. For details on installing DIMMs, see page 289.
Follow steps #1 - 8 on page 73, substituting the instructions
below for steps #4 and 8. In step #4, press the [PATTERN]
button to enter the Pattern mode, then select a pattern
number and section to be created. In step #8, set the related
parameters in the [PATTERN] → [MIXING] → [EDIT] →
[COMMON] → [F5] AUDIO display.
Type: slice+seq
Source: A/D
Next: off
Mono/Stereo: stereo
Frequency: 44.1k
For details about each parameter, see page 253.
Refer to step #5 on page 98.
Doing this puts sample recording on standby, waiting for an
input signal that exceeds the Trigger level.
The sampling actually starts as soon as an input signal
exceeding the specified trigger level is received.
Press the [F6] STOP button at the point you want sample
recording to stop, and the Slice display is automatically called
up. After stopping recording, stop playback of the connected
audio device.
Sampling
Sample
Slice
Sample Voice
MIDI sequence data
CANCEL
1
Connect an audio device (CD player, etc.) to the
instrument.
2
Press the [INTEGRATED SAMPLING] button in the
Pattern Play mode to enter the Sampling mode.
3
Press the [F2] SOURCE button to call up the
display for setting the Sampling Source, then set
the parameters as shown below.
4
Press the [F1] DEST button to call up the display
for setting the Sampling Destination, then set the
parameters as described below.
Track This parameter determines the Pattern track to which the
Sample Voice is assigned.
5
Press the [F6] REC button to call up the
Sampling Record display (Sampling Standby
status), then set the TrggrMode to “level” and set
an appropriate Trigger Level value.
6
Press the [F6] REC button again to enable
Sampling Trigger Waiting.
7
Start the audio device (CD player, etc.).
8
Press the [F6] STOP button to stop sampling.
F6
Indicates that sample
recording is waiting for a
signal of an appropriate level.

 Loading...