Quick Guide — Advanced Course
Creating a Song on the MOTIF ES
119
Owner’s Manual
■
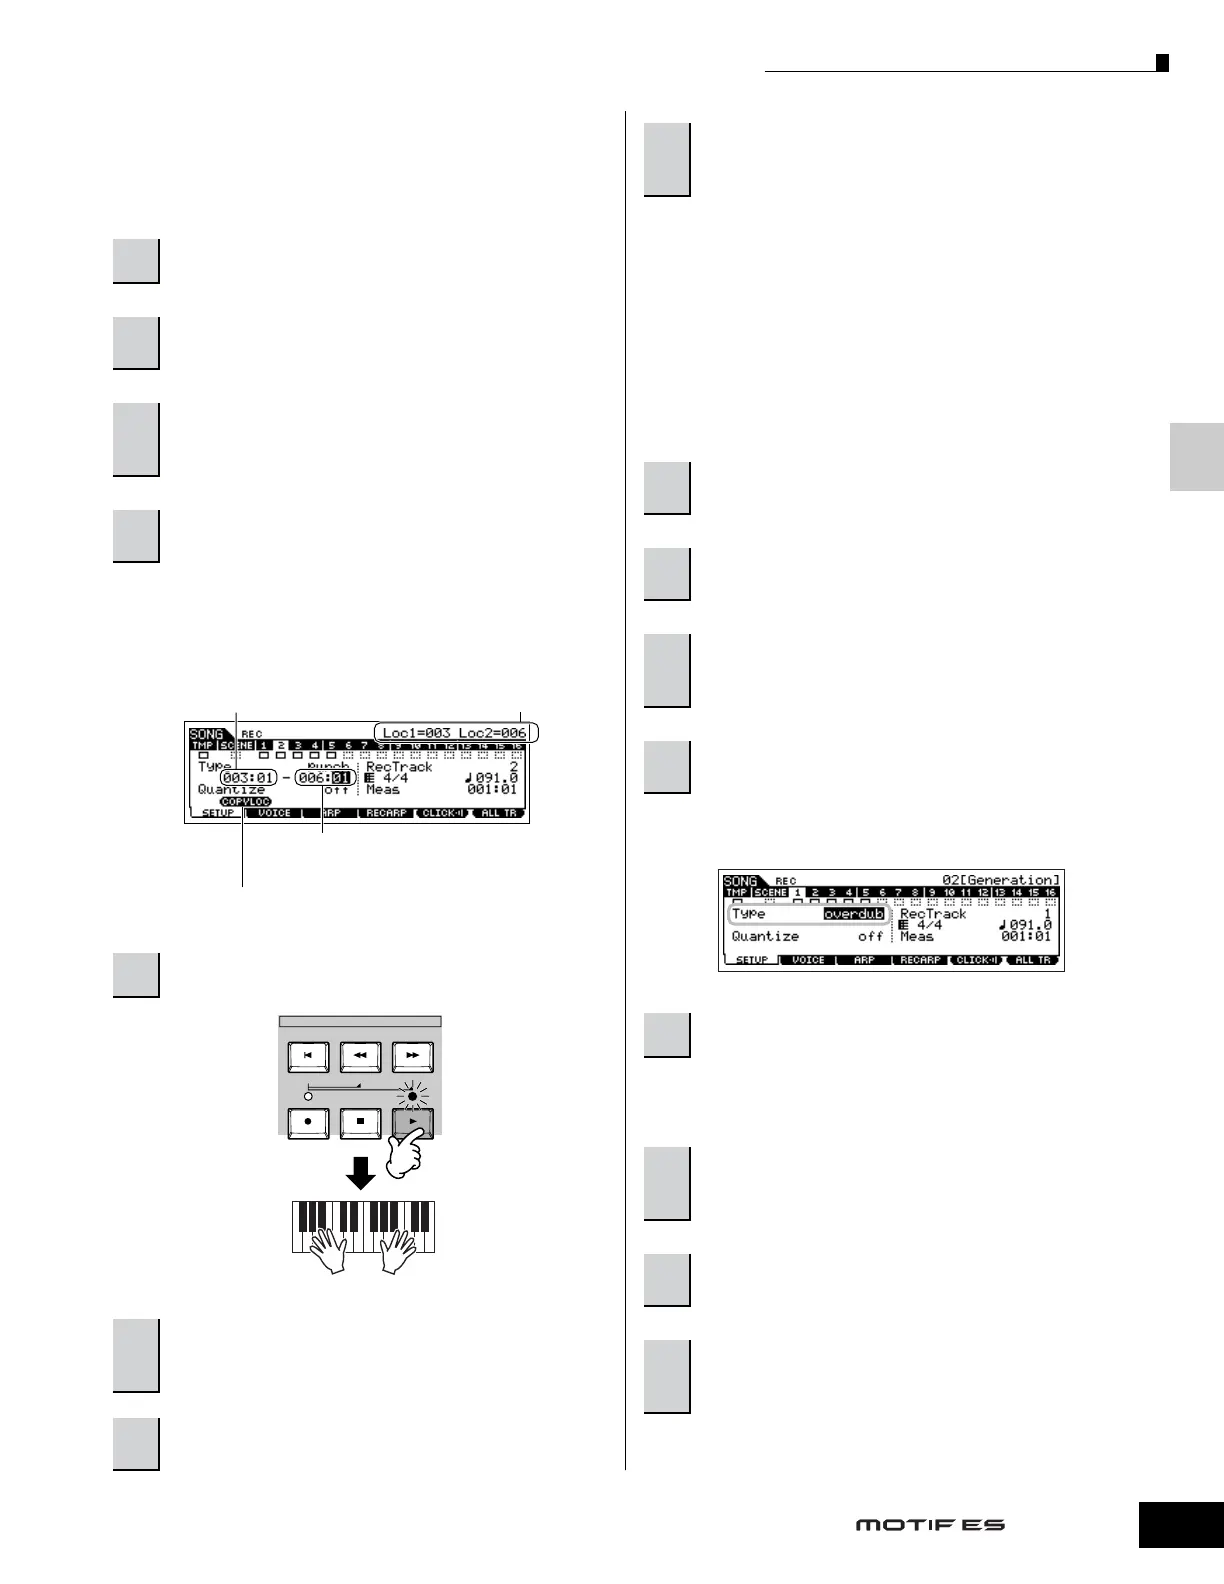
Re-recording a specific part of a Song (Punch In/Out)
Use the Punch In/Out recording method to record over only a
specific portion of the track. In the example instructions
below, you’ll see how to re-record measures three through five
of an already recorded Song.
Set the Type parameter to “punch” and specify the area to be
re-recorded.
Set other parameters as necessary. See page 222 for details.
n Punch In/Out recording is available only in the Song Record mode.
This is not available in the Pattern Record mode.
■ Recording additional notes to an already-
recorded track (Overdub)
Use the Overdub recording method when you want to add
more data to a track that already contains data. This is useful
not only for recording more notes to a track; it’s also
convenient for adding non-note, sound-shaping data, such as
that of the Knobs and Ribbon Controller.
Set the Type parameter to “overdub.”
Set other parameters as necessary. See page 222 for details.
Playback starts, and the notes (or controller data) you play
are added to the existing data.
1
In the Song Play mode, select a Song to be created.
2
Press the [●] (Record) button to enter the Song
Record mode.
3
Press the [TRACK SELECT] button (the lamp
lights), then select the desired track from the
number buttons [1] - [16].
4
Set the parameters related to recording in the
[F1] SETUP display.
5
Press the [F] (Play) button to start recording.
6
Press the [■] (Stop) button to stop recording
after the Song playback reaches the Punch Out
point.
7
Press the [F] (Play) button to hear the part
you’ve just re-recorded.
Punch In (Recording start measure : beat)
Playback of the recording track is turned off from this point, and
your keyboard performance will be recorded to the track.
Location setting
(page 58)
Punch Out (Recording end measure : beat)
Recording ends at this point and normal playback of the
recording track starts.
Press the [SF1] COPY LOC to assign the measure numbers registered to
the Locations (Loc1 and Loc2) to the Punch In and Punch Out points.
SEQ TRANSPORT
LOCATE 1 2
When Song playback
reaches the Punch In
point, play the keyboard.
Playback start
8
Save the created Song data to a SmartMedia/USB
storage device (page 132) before turning the
power off.
1
In the Song Play mode, select a song to be
created.
2
Press the [●] (Record) button to enter the Song
Record mode.
3
Press the [TRACK SELECT] button (the lamp
lights), then select the desired track from the
number buttons [1] - [16].
4
Set the parameters related to recording in the
[F1] SETUP display.
5
Press the [F] (Play) button to start recording.
6
Press the [■] (Stop) button to stop recording
after the Song playback reaches the Punch Out
point.
7
Press the [F] (Play) button to hear the part
you’ve just re-recorded.
8
Save the created Song data to a SmartMedia/USB
storage device (page 132) before turning the
power off.

 Loading...