Periodic maintenance and adjustment
6-39
6
EAU44802
Rear wheel (for non-ABS
models)
EWA14841
For the ABS model, have a Yamaha
dealer remove and install the wheel.
EAU59942
To remove the rear wheel
EWA10822
To avoid injury, securely support the
vehicle so there is no danger of it
falling over.
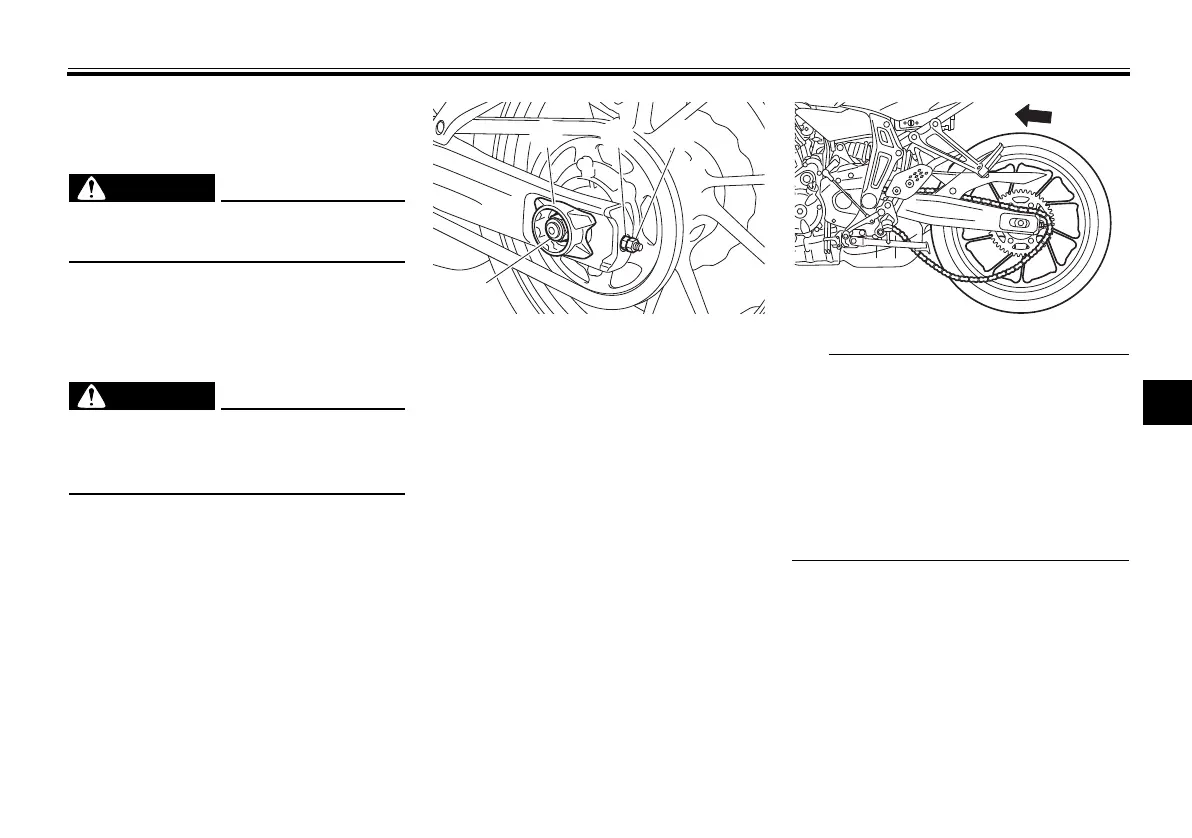
1. Loosen the locknut and drive
chain slack adjusting nut on each
side of the swingarm.
2. Loosen the axle nut.
3. Lift the rear wheel off the ground
according to the procedure on
page 6-36.
4. Remove the axle nut, washer and
the drive chain slack adjusting
plate.
5. Push the wheel forward, and then
remove the drive chain from the
rear sprocket.
If the drive chain is difficult to re-
move, remove the wheel axle first,
and then lift the wheel upward
enough to remove the drive chain
from the rear sprocket.
The drive chain does not need to
be disassembled in order to re-
move and install the rear wheel.
6. While supporting the brake caliper
and slightly lifting the wheel, pull
the wheel axle out and remove the
drive chain slack adjusting plate.
1. Drive chain slack adjusting plate
2. Drive chain slack adjusting nut
3. Locknut
4. Axle nut
U1WSE3E0.book Page 39 Monday, June 8, 2015 10:12 AM