PERIODIC MAINTENANCE AND ADJUSTMENT
6-34
6
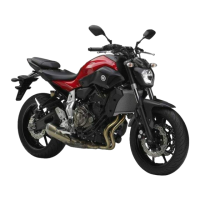
4. Place a new headlight bulb into
position, then secure it with the
bulb holder.
5. Install the headlight bulb cover,
then connect the coupler.
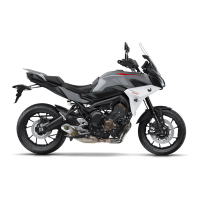
6. Install the headlight unit as shown,
and then install the washer and
bolt on each side.
7. Have a Yamaha dealer adjust the
headlight beam if necessary.
EAU46405
Replacing the auxiliary light
bulb
If the auxiliary light bulb burns out, re-
place it as follows.
1. Remove the headlight unit. (See
page 6-33.)
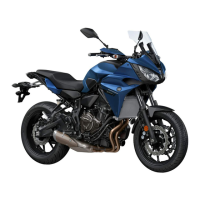
2. Remove the auxiliary light bulb
socket (together with the bulb) by
turning it counterclockwise.
3. Remove the burnt-out bulb by
pulling it out of the socket.
1. Headlight bulb holder
2. Headlight bulb
1. Auxiliary light bulb socket
U1WSE2E0.book Page 34 Tuesday, October 7, 2014 9:17 AM