PERIODIC MAINTENANCE AND ADJUSTMENT
6-40
6
If the drive chain is difficult to re-
move, remove the wheel axle first,
and then lift the wheel upward
enough to remove the drive chain
from the rear sprocket.
The drive chain does not need to
be disassembled in order to re-
move and install the rear wheel.
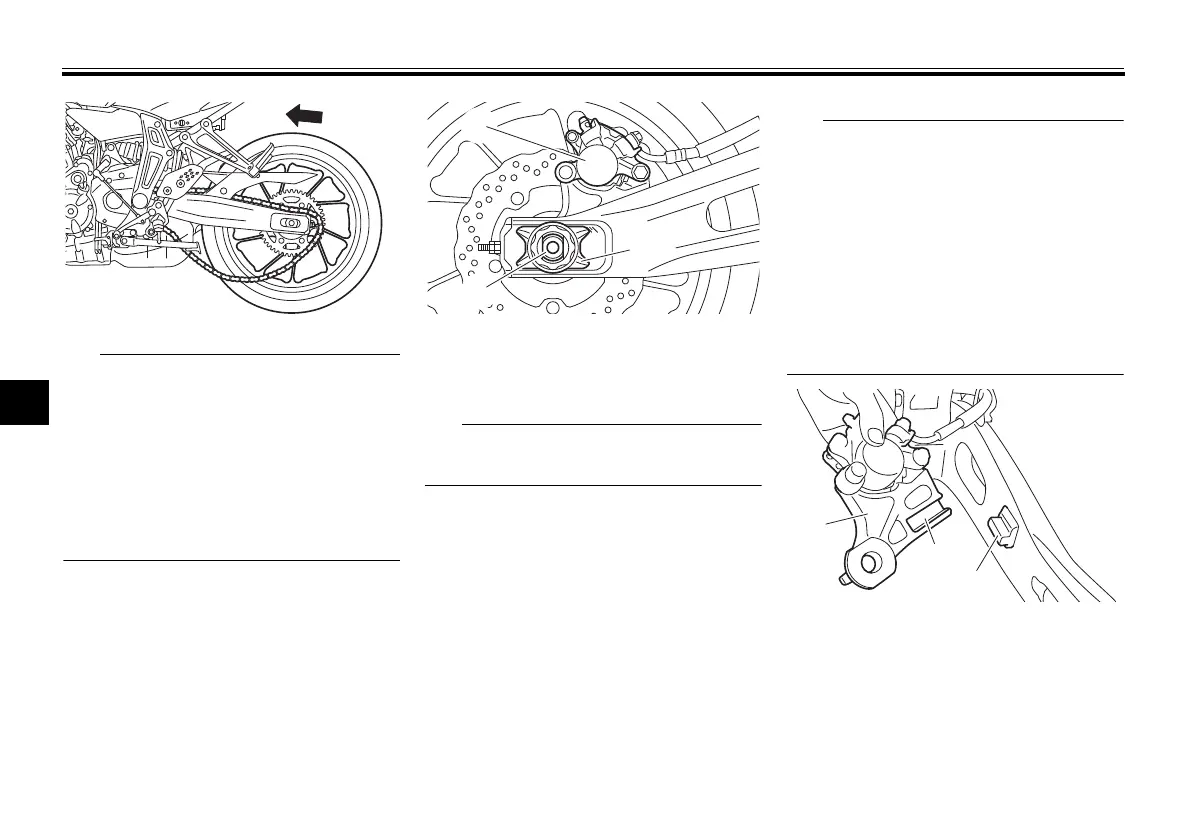
6. While supporting the brake caliper
and slightly lifting the wheel, pull
the wheel axle out and remove the
drive chain slack adjusting plate.
A rubber mallet may be useful to tap
the wheel axle out.
7. Remove the wheel. NOTICE: Do
not apply the brake after the
wheel and brake disc have been
removed, otherwise the brake
pads will be forced shut.
[ECA11073]
To install the rear wheel
1. Install the wheel, the brake caliper
bracket, and the drive chain slack
adjusting plate by inserting the
wheel axle from the right-hand
side.
Make sure that the slot in the
brake caliper bracket is fit over the
retainer on the swingarm.
Make sure that there is enough
space between the brake pads
before installing the wheel.
If the chain puller is removed,
make sure that the arrow mark on
each chain puller is pointing up-
ward.
1. Brake caliper
2. Drive chain slack adjusting plate
3. Wheel axle
1. Brake caliper bracket
2. Slot
3. Retainer
U1WSE2E0.book Page 40 Tuesday, October 7, 2014 9:17 AM