4-8
1
2
3
4
5
6
7
8
9
10
FUEL
INTAKE MANIFOLD
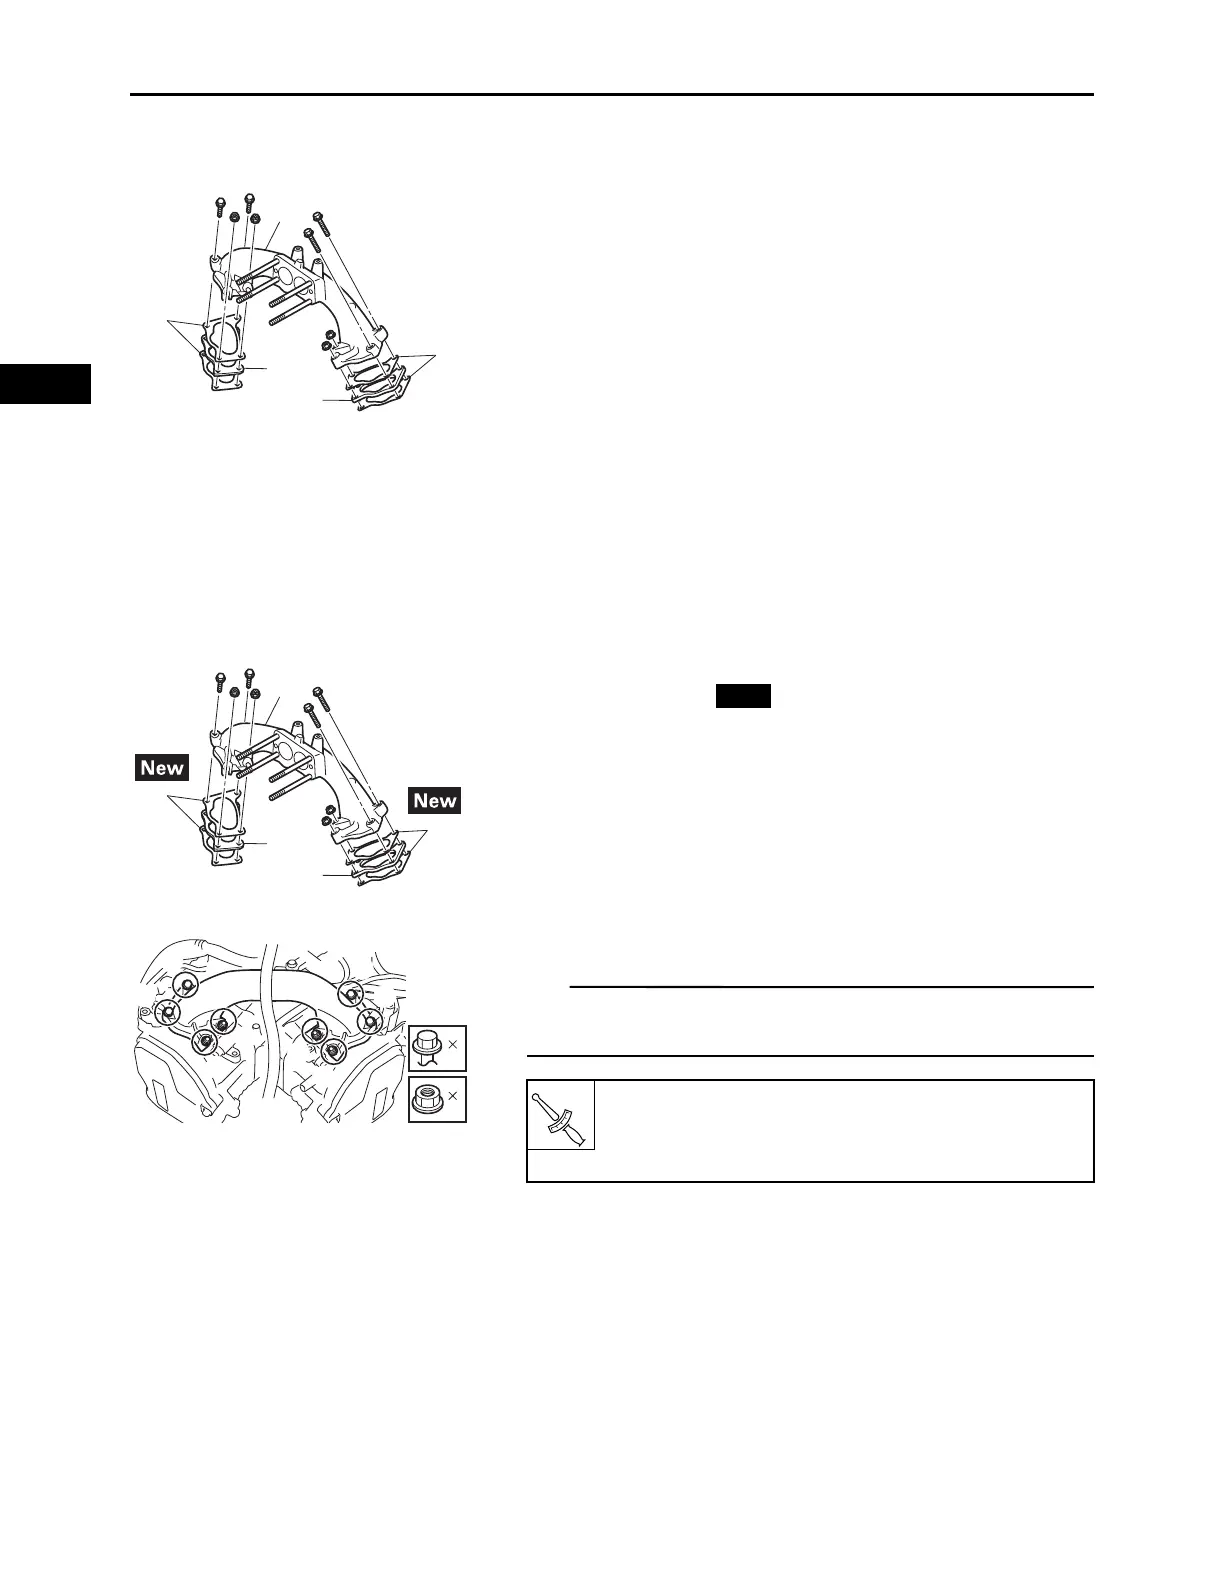
REMOVING THE INTAKE MANIFOLD
1.
Remove:
• Intake manifold “1”
• Intake manifold joints “2”
• Gaskets “3”
CHECKING THE INTAKE MANIFOLD
1.
Check:
• Intake manifold
• Intake manifold joints
Cracks/damage Replace.
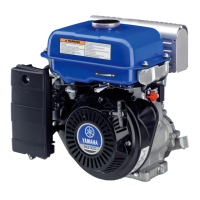
INSTALLING THE INTAKE MANIFOLD
1.
Install:
• Gaskets “1”
• Intake manifold joints “2”
• Intake manifold “3”
2.
Install:
• Intake manifold nuts “1”–“4” and bolts “5”–“8”
Tighten the bolts and nuts to the specified torque in two
steps and in order from “1” to “8”.
Intake manifold nut and bolt:
1st: 3.0 N·m (0.30 kgf·m, 2.2 lb·ft)
2nd: 7 N·m (0.7 kgf·m, 5.2 lb·ft)