20
DRX-730/NX-E700
DRX-730/NX-E700
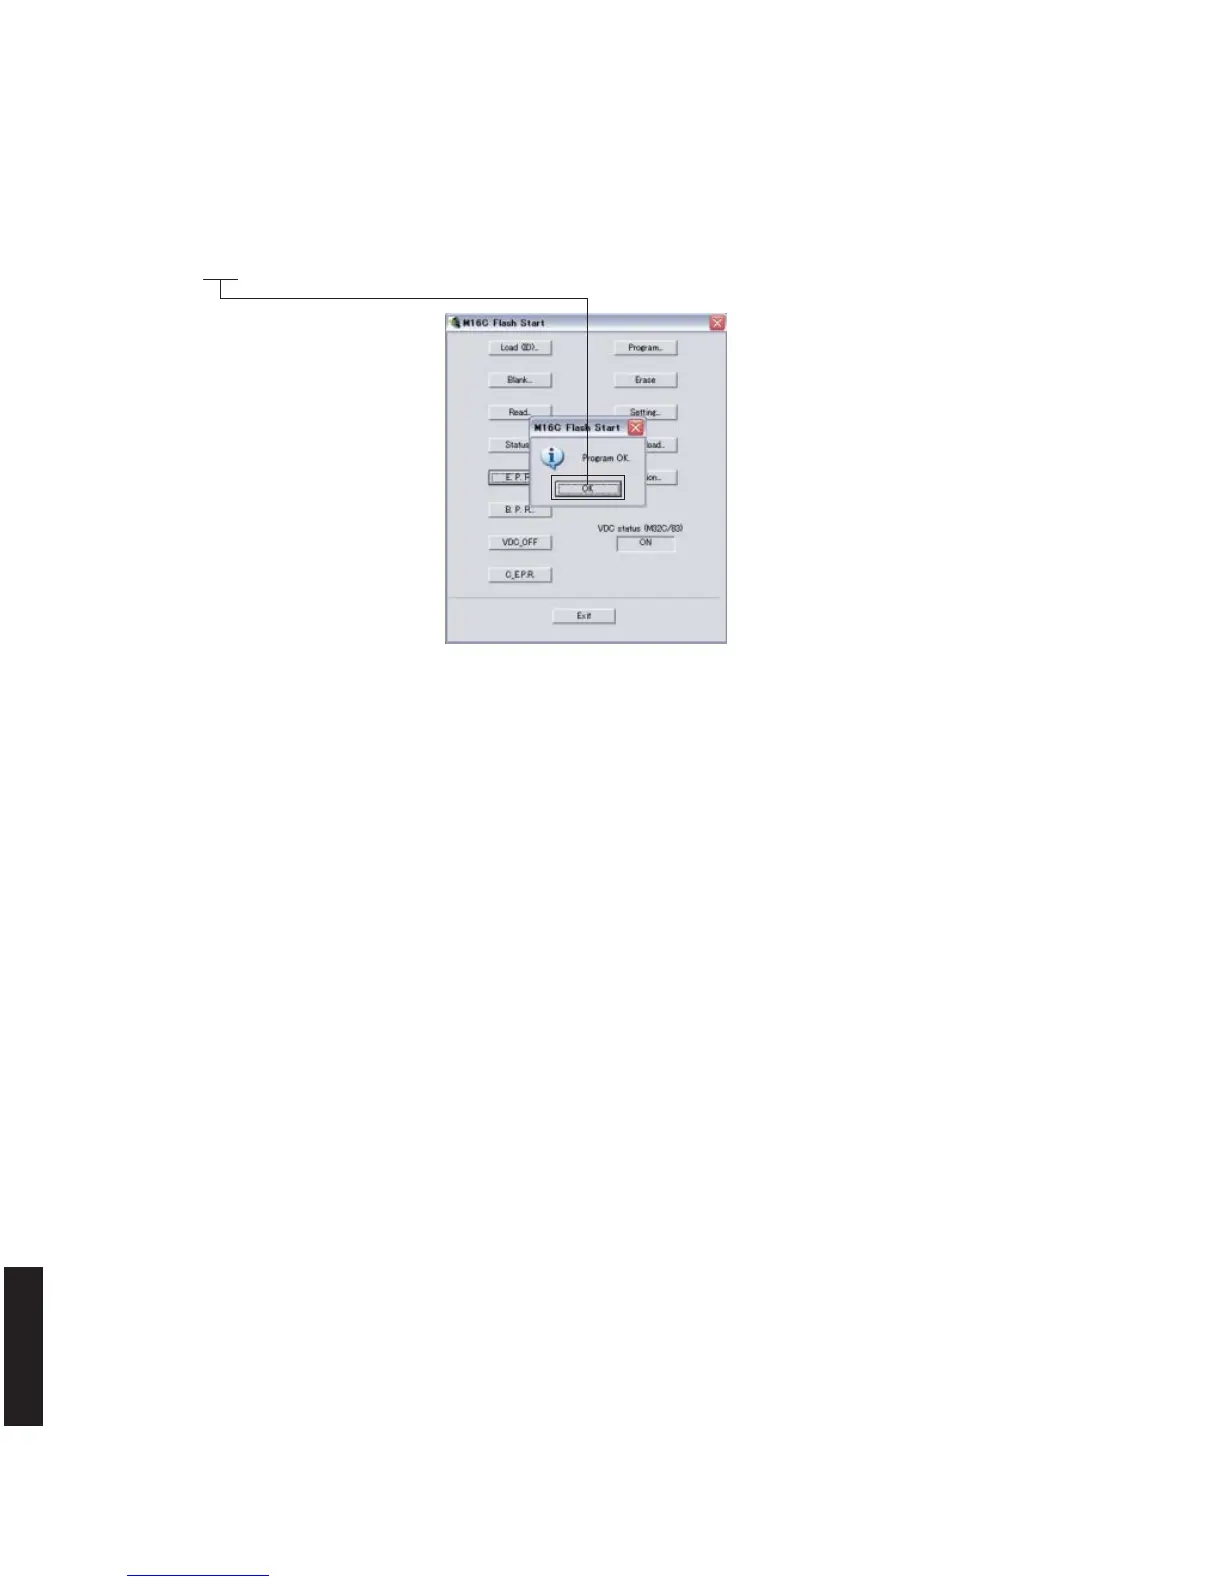
7. When the program transmission is completed, the screen appears as shown below. (Fig. 5)
Click [OK] to end the procedure. (Fig. 5)
Fig. 5
8. Using the self-diagnostic function menu, check that the firmware is updated successfully.
* When the displayed firmware version and checksum are different from written ones, perform the “Writing to the
microprocessor” procedure all over again.
9. End “FlashSta.exe”.
10. Disconnect the power cable of this unit from the AC outlet.
11. Disconnect the RS232C cross cable, RS232C conversion jig and flexible flat cable.