23
DRX-730/NX-E700
DRX-730/NX-E700
Upgrade File DETECTED
Upgrade ?
Press Play To Start
File Copying
UPGRADING
Upgrade File DETECTED
Upgrade ?
Press Play To Start
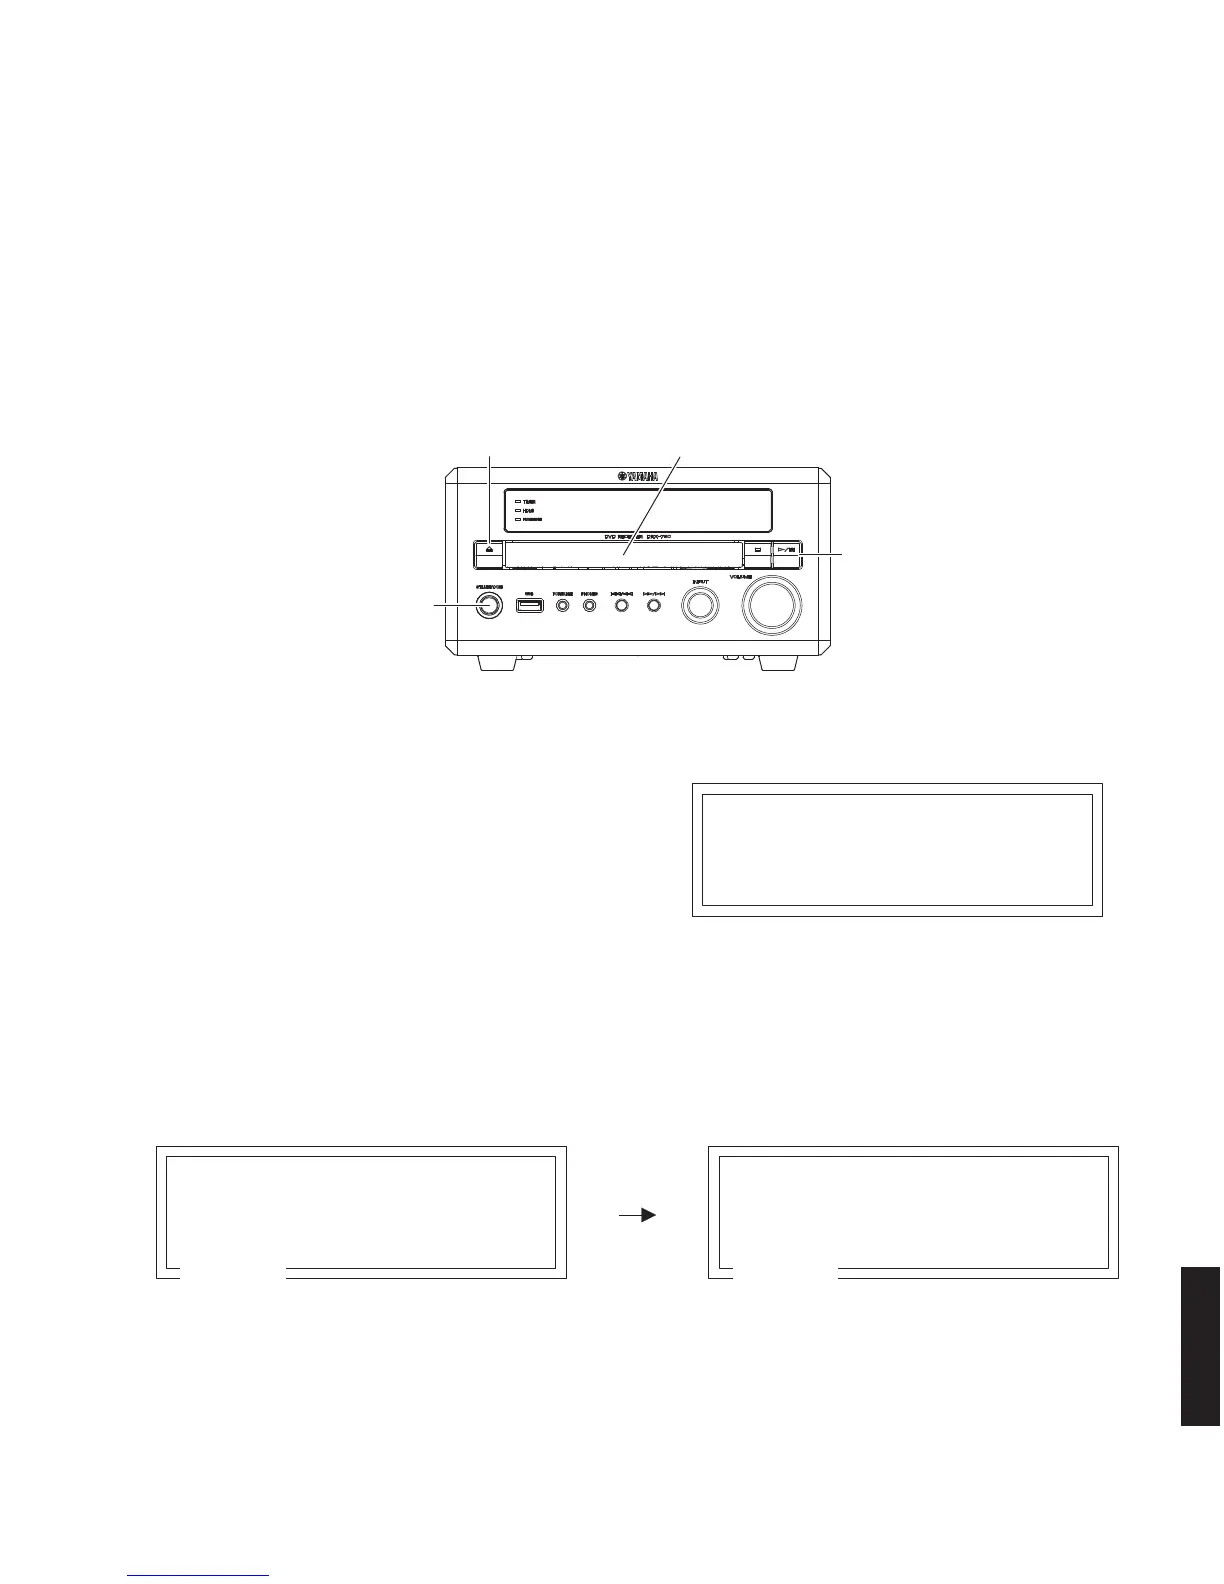
"STANDBY/ON" key
"OPEN/CLOSE" key
"PLAY/PAUSE" key
Disc tray
Upgrade File DETECTED
Upgrade ?
Press Play To Start
Fig. 10
8. After a few seconds, the disc tray opens automatically.
Remove the firmware CD and close the disc tray.
* At this time, do not turn off the power as writing of the firmware is going on in this unit.
* Writing takes about 1 minute.
9. When writing is completed, the display on the TV monitor disappears.
Press the “STANDBY/ON” key of this unit to turn off the power.
10. Check that the firmware version. (See “Confirm of Firmware Version”)
* When the displayed firmware version and checksum are different from written ones, perform the “Writing to the
microprocessor” procedure all over again.
Writing is being executed.
●
Operation Procedures
CAUTION: Do not turn off the power while updating the firmware.
1. Connect the VIDEO OUT terminal of this unit to the VIDEO IN terminal of the TV monitor with a video pin cable.
2. Connect the power cable of this unit to the AC outlet.
3. Press the “STANDBY/ON” key of this unit to turn on the power. (Fig. 8)
4. Press the “OPEN/CLOSE” key of this unit to open the disc tray. (Fig. 8)
5. Put the firmware CD on the disc tray and close the disc tray.
Fig. 8
Fig. 9
6. “Upgrade?” is displayed on the TV screen. (Fig. 9)
7. Press the “PLAY/PAUSE” key of this unit, and then
writing of the firmware is started. (Fig. 8)