Do you have a question about the Yamaha P-450 and is the answer not in the manual?
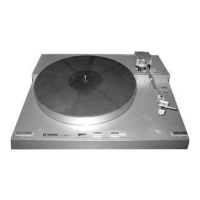
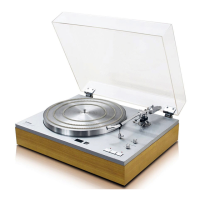
Overview of the P-450 as a sophisticated fully automatic belt drive turntable.
Handle the P-450 with care; jarring may misadjust settings like tonearm tracking force.
Avoid placing the tonearm side near your amplifier's power transformer.
Locate on a flat, level surface away from sun, vibration, dust, heat, moisture, and speakers.
Relocate the P-450 with care, using original packing if possible.
Clean the P-450 with a clean, dry cloth; avoid chemical solvents.
Keep the stylus tip clean for best sound reproduction.
Clean records to prolong stylus life; replace stylus after 200-300 hours.
Consult troubleshooting section; keep manual for future reference.
Covers Speed Switch, Speed Control Knob, Play Switch, Cut Switch, and Repeat Switch.
Details Cueing Slide Lever, Anti-Skating Knob, Arm Rest/Lock, and Headshell.
Includes Stroboscope for speed indication and Record Size Selector Switches.
Instructions for fitting the belt, platter, and rubber mat onto the turntable.
Guide to connecting headshell leads, mounting the cartridge, and adjusting overhang.
Steps for mounting the main weight and headshell onto the tonearm.
Procedure to achieve horizontal balance of the tonearm.
Align weight with scale marking for the cartridge's rated tracking force.
Align anti-skating knob index line with scale marking for tracking force.
Use stroboscope and speed control knob to match speed to power line frequency.
How to use the cueing switch to raise and lower the stylus during playback.
Instructions for fitting the dust cover hinges into the cabinet receptacles.
Connect output cords and ground wire to the audio amplifier's terminals.
Step-by-step guide from checking connections to starting record playback.
Details on drive system, motor, platter, speed, and signal-to-noise ratio.
Details on arm type, length, overhang, tracking force, and mass.
Information on power, cabinet, dimensions, and weight.
Lists accessories like 45 adaptor and overhang gauge.
Read all safety and operating instructions before use.
Keep safety and operating instructions for future reference.
Adhere to all warnings on the appliance and in instructions.
Follow all operating and use instructions.
Do not use near water, in damp basements, or swimming pools.
Use only with a cart or stand recommended by the manufacturer.
Mount to wall or ceiling only as recommended by manufacturer.
Do not block ventilation openings; ensure air flow is not impeded.
Situate away from radiators, stoves, or other heat-producing appliances.
Connect to the specified power supply type or as marked on the appliance.
Take precautions to ensure grounding/polarization means are not defeated.
Route cords to prevent damage from walking on or pinching.
Clean the appliance only as recommended by the manufacturer.
Unplug the power cord when left unused for a long period.
Take care to prevent objects falling or liquids spilling into openings.
Refer to qualified service personnel for damaged cords, spills, rain exposure, abnormal operation, or drops.
User should not service beyond instructions; refer all other servicing to qualified personnel.
Locate outdoor antennas away from power lines.
Follow national electrical code for antenna system grounding for surge protection.
| Drive method | Belt drive |
|---|---|
| Motor | DC servo motor |
| Overhang | 16 mm |
| Type | Manual turntable |
| Speeds | 33 1/3, 45 rpm |
| Tonearm | Static balance |
| Cartridge weight range | 4.5 - 6.5 g (including headshell) |