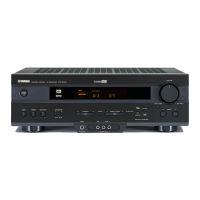
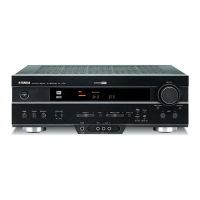
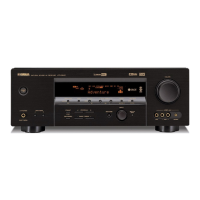
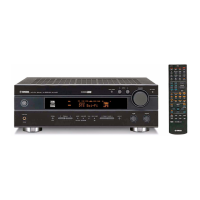
Do you have a question about the Yamaha RX-V420 and is the answer not in the manual?
Record the model and serial numbers in the designated space for future service reference.
Built-in amplifier providing specified RMS output power for main, center, and rear channels.
Multi-mode digital sound field processing for enhanced audio experiences.
Instructions for correctly inserting AAA batteries into the remote control.
Adjust speaker impedance settings before powering on the unit.
Overview of the 5-speaker system configuration for optimal sound.
Recommended placement for main, rear, and center speakers for optimal sound staging.
Detailed placement guidelines for each speaker type for best acoustic performance.
Cautionary advice regarding speaker placement near video monitors to prevent interference.
Important instructions to follow before connecting any audio or video devices.
Guidelines for correct cable connections and examples of signal types.
Connecting digital audio sources via optical or coaxial terminals.
Connecting MD/CD/Tape recorders and notes on digital/analog signal priority.
Connecting external decoders and CD players, including input assignment.
Conveniently connect video devices to the front panel inputs.
Instructions for connecting speakers to the main speaker terminals (A or B).
Guidelines for connecting rear and center speakers securely.
Caution: Do not operate while the unit is powered on. Ensure switch is fully engaged.
Use test tones to adjust speaker volume levels for optimal balance.
Use +/- buttons to match speaker levels to the main speakers.
Select input sources using front panel buttons or remote control.
Enjoy virtual surround sound without rear speakers.
Experience powerful surround sound through headphones.
Automatically scans for strong radio signals for efficient tuning.
Manually scans for radio signals, useful for weaker reception.
Options for selecting storage range and tuning direction for auto-tuning.
Use A/B/C/D/E buttons to select the group for saving presets.
Press MEMORY button again to store the selected frequency number.
Use PRESET/TUNING buttons to select the specific preset number (1-8).
Special considerations for recording DTS software, including potential noise issues.
SET MENU includes 9 items for configuring speaker modes and other settings.
Select how LFE signals are output (Subwoofer, Main, Both).
Configure Dolby Digital settings, including LFE Level.
Configure DTS LFE signal volume level.
Adjust tone controls for headphones (Bass and Treble).
Adjust the volume level of LFE signals for Dolby Digital sources.
Adjust center speaker delay time to synchronize sound.
Use PRG+/- buttons to navigate and select menu items.
Assign digital input/output terminals to specific devices.
Adjust dynamic range for Dolby Digital signals (MAX, STD, MIN).
Adjust the brightness of the front panel display.
Enable memory protection to prevent accidental changes to settings.
Use +/- buttons to adjust the settings for the selected menu item.
Configure settings for main speakers (LARGE, SMALL).
Configure settings for center speaker (LARGE, SMALL, NONE).
Configure settings for rear speakers (LARGE, SMALL, NONE).
Use display information and remote to adjust delay time and volume.
Use +/- buttons to adjust speaker delay time or volume levels.
Function to protect settings from power interruptions.
Adjusts the time difference between main and effect speaker sounds.
Using DSP with Dolby Pro Logic, Dolby Digital, or DTS decoders.
Adjusts delay time for effect sounds relative to main sounds.
Adjusts output levels for center, rear, and subwoofer speakers.
Controls for CD player, including power and playback functions.
Controls for DVD/LD players, including power and disc-related functions.
Controls for VCR, including power and playback/recording functions.
Procedure to reset all remote control modes to factory default.
Controls for accessing DVD menus on compatible players.
Controls for Cable/Satellite TV tuners.
Controls for TV, including power and channel functions.
Input the 4-digit manufacturer code using the numeric buttons.
Test remote operation after setting codes.
Reset specific modes to factory defaults using code '0000'.
Test remote operation after setting codes.
Try different codes if remote control is unresponsive.
Controls for TAPE/MD deck, including power, playback, and recording functions.
Emulates cinema sound environments for 4-channel or 6-channel sources.
Programs designed for high-fidelity audio reproduction.
Selection of DSP programs for various audio sources.
Programs designed to emulate cinema sound environments.
Selection of Cinema DSP programs for various audio sources.
Automatic switching of DSP programs based on input signal type.
Programs for Dolby/DTS surround sound sources.
Common problems related to the main unit and their solutions.
Troubleshooting power issues, including no power or return to standby.
| Type | AV Receiver |
|---|---|
| Channels | 5.1 |
| Weight | 9.5kg |
| Digital Audio Inputs | 2 Optical, 1 Coaxial |
| Surround Sound | Dolby Digital, DTS |
| Frequency Response | 20Hz-20kHz |
| Signal-to-Noise Ratio | 100 dB |
| Dimensions (W x H x D) | 435 x 151 x |
| Video Inputs/Outputs | 3 Composite Inputs, 1 Composite Output |
| Input Sensitivity | 200 mV |