MODES & FUNCTIONS
50
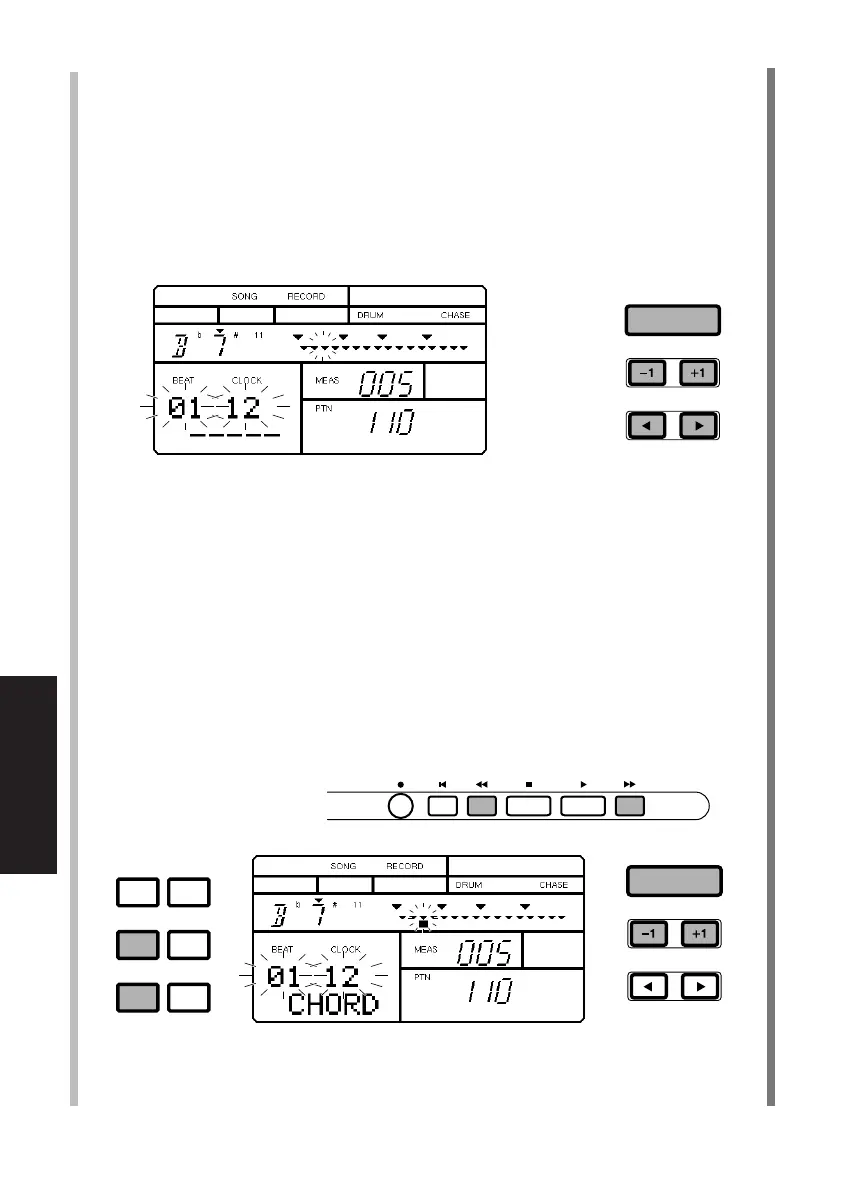
■ DESIGNATING A CHORD ROOT AND TYPE - After selecting the measure
and specifying the clock, press [E] twice to position the flashing cursor
over the Chord Root, and press [-1] and [+1] to select the Chord Root.
Next, press [F] once to position the flashing cursor over the Chord
Type, and press [-1] and [+1] to select the Chord Type. Then press
[ENTER]. Recorded chord data will be displayed as a black square at
the specified location.
■ DELETING A CHORD BY EVENT - Even after recording a song, you can
go back and delete an unwanted chord at any time at a specific event
location, or clock position. First, in Song Record Mode, press [CHORD]
to access Chord Assign. Next, locate the measure containing the chord
you want to delete, by pressing [FWD] and [BWD]. Then, move the
cursor to the beat/clock position and press [+1] or [-1] to locate a
specific beat/clock position. (A small black square will display beneath
a clock position where chord change data exists.) Finally, hold [DELETE]
and press [ENTER] to delete the chord data.
ACCENT MODE
DELETE
AUDITION
CHORD
PAD BANK
REC TOP BWD STOP PLAY FWD
ENTER
ENTER
PDF03_E.qx 6/2/99 5:51 PM Page 50