Instrument and control functions
6-36
6
4. Install the windscreen by installing
the bolts, and then tighten the
bolts to the specified torque.
WARNING! A loose windscreen
could cause an accident. Be
sure to tighten the screws to the
specified torque.
[EWA21590]
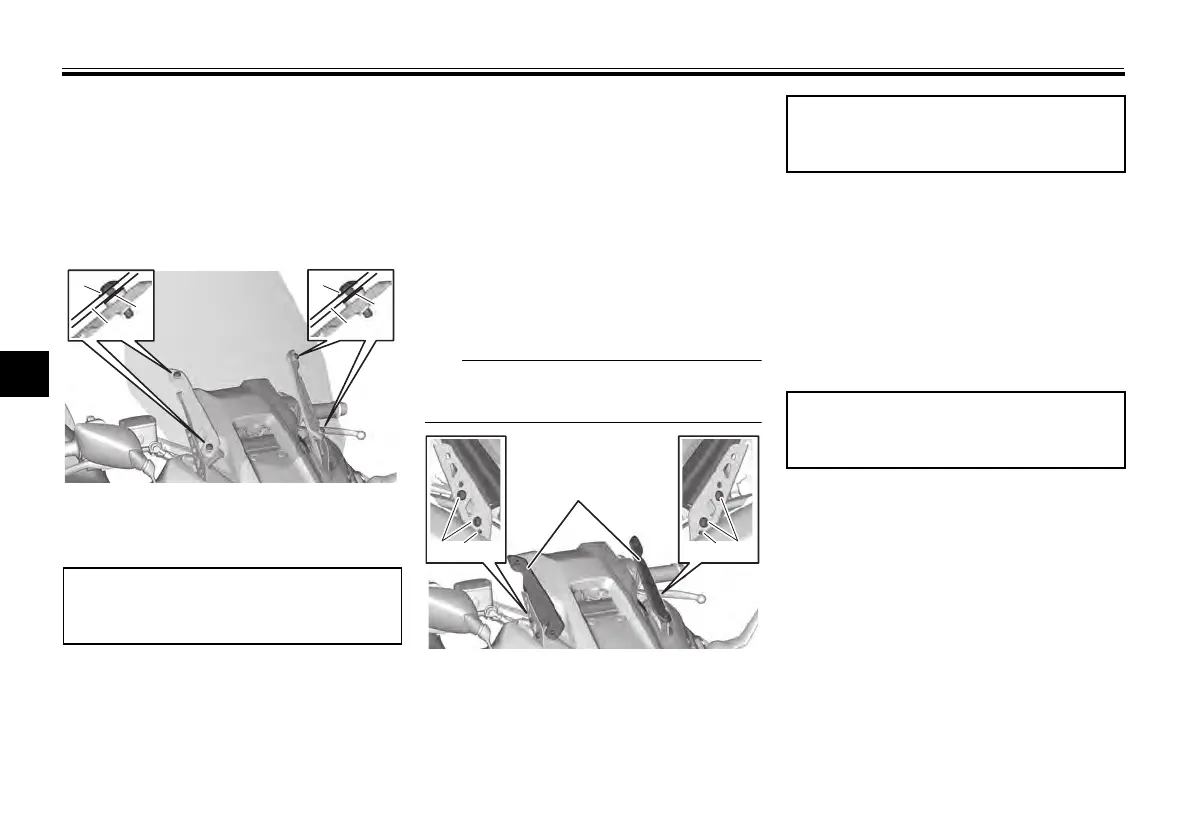
To change the windscreen height to
the low position
1. Remove the windscreen by re-
moving the bolts.
2. Remove the bracket by removing
the bolts.
3. Install the bracket to the low posi-
tion by installing the bolts, and
then tighten the bolts to the spec-
ified torque. WARNING! A loose
windscreen could cause an ac-
cident. Be sure to tighten the
screws to the specified torque.
[EWA21590]
Make sure the projection is inserted in
the hole.
4. Install the windscreen to the low
position by installing the bolts, and
then tighten the bolts to the spec-
ified torque. WARNING! A loose
windscreen could cause an ac-
cident. Be sure to tighten the
screws to the specified torque.
[EWA21590]
1. Bolt
2. Washer
3. Windscreen
Tightening torque:
Windscreen bolt:
0.8 N·m (0.08 kgf·m, 0.59 lb·ft)
1. Bolt
2. Bracket
3. Projection / Hole
Tightening torque:
Bracket bolt:
7 N·m (0.7 kgf·m, 5.2 lb·ft)
Tightening torque:
Windscreen bolt:
0.8 N·m (0.08 kgf·m, 0.59 lb·ft)
UBBVE0E0.book Page 36 Tuesday, February 8, 2022 7:29 AM











 To Next Page