22 23
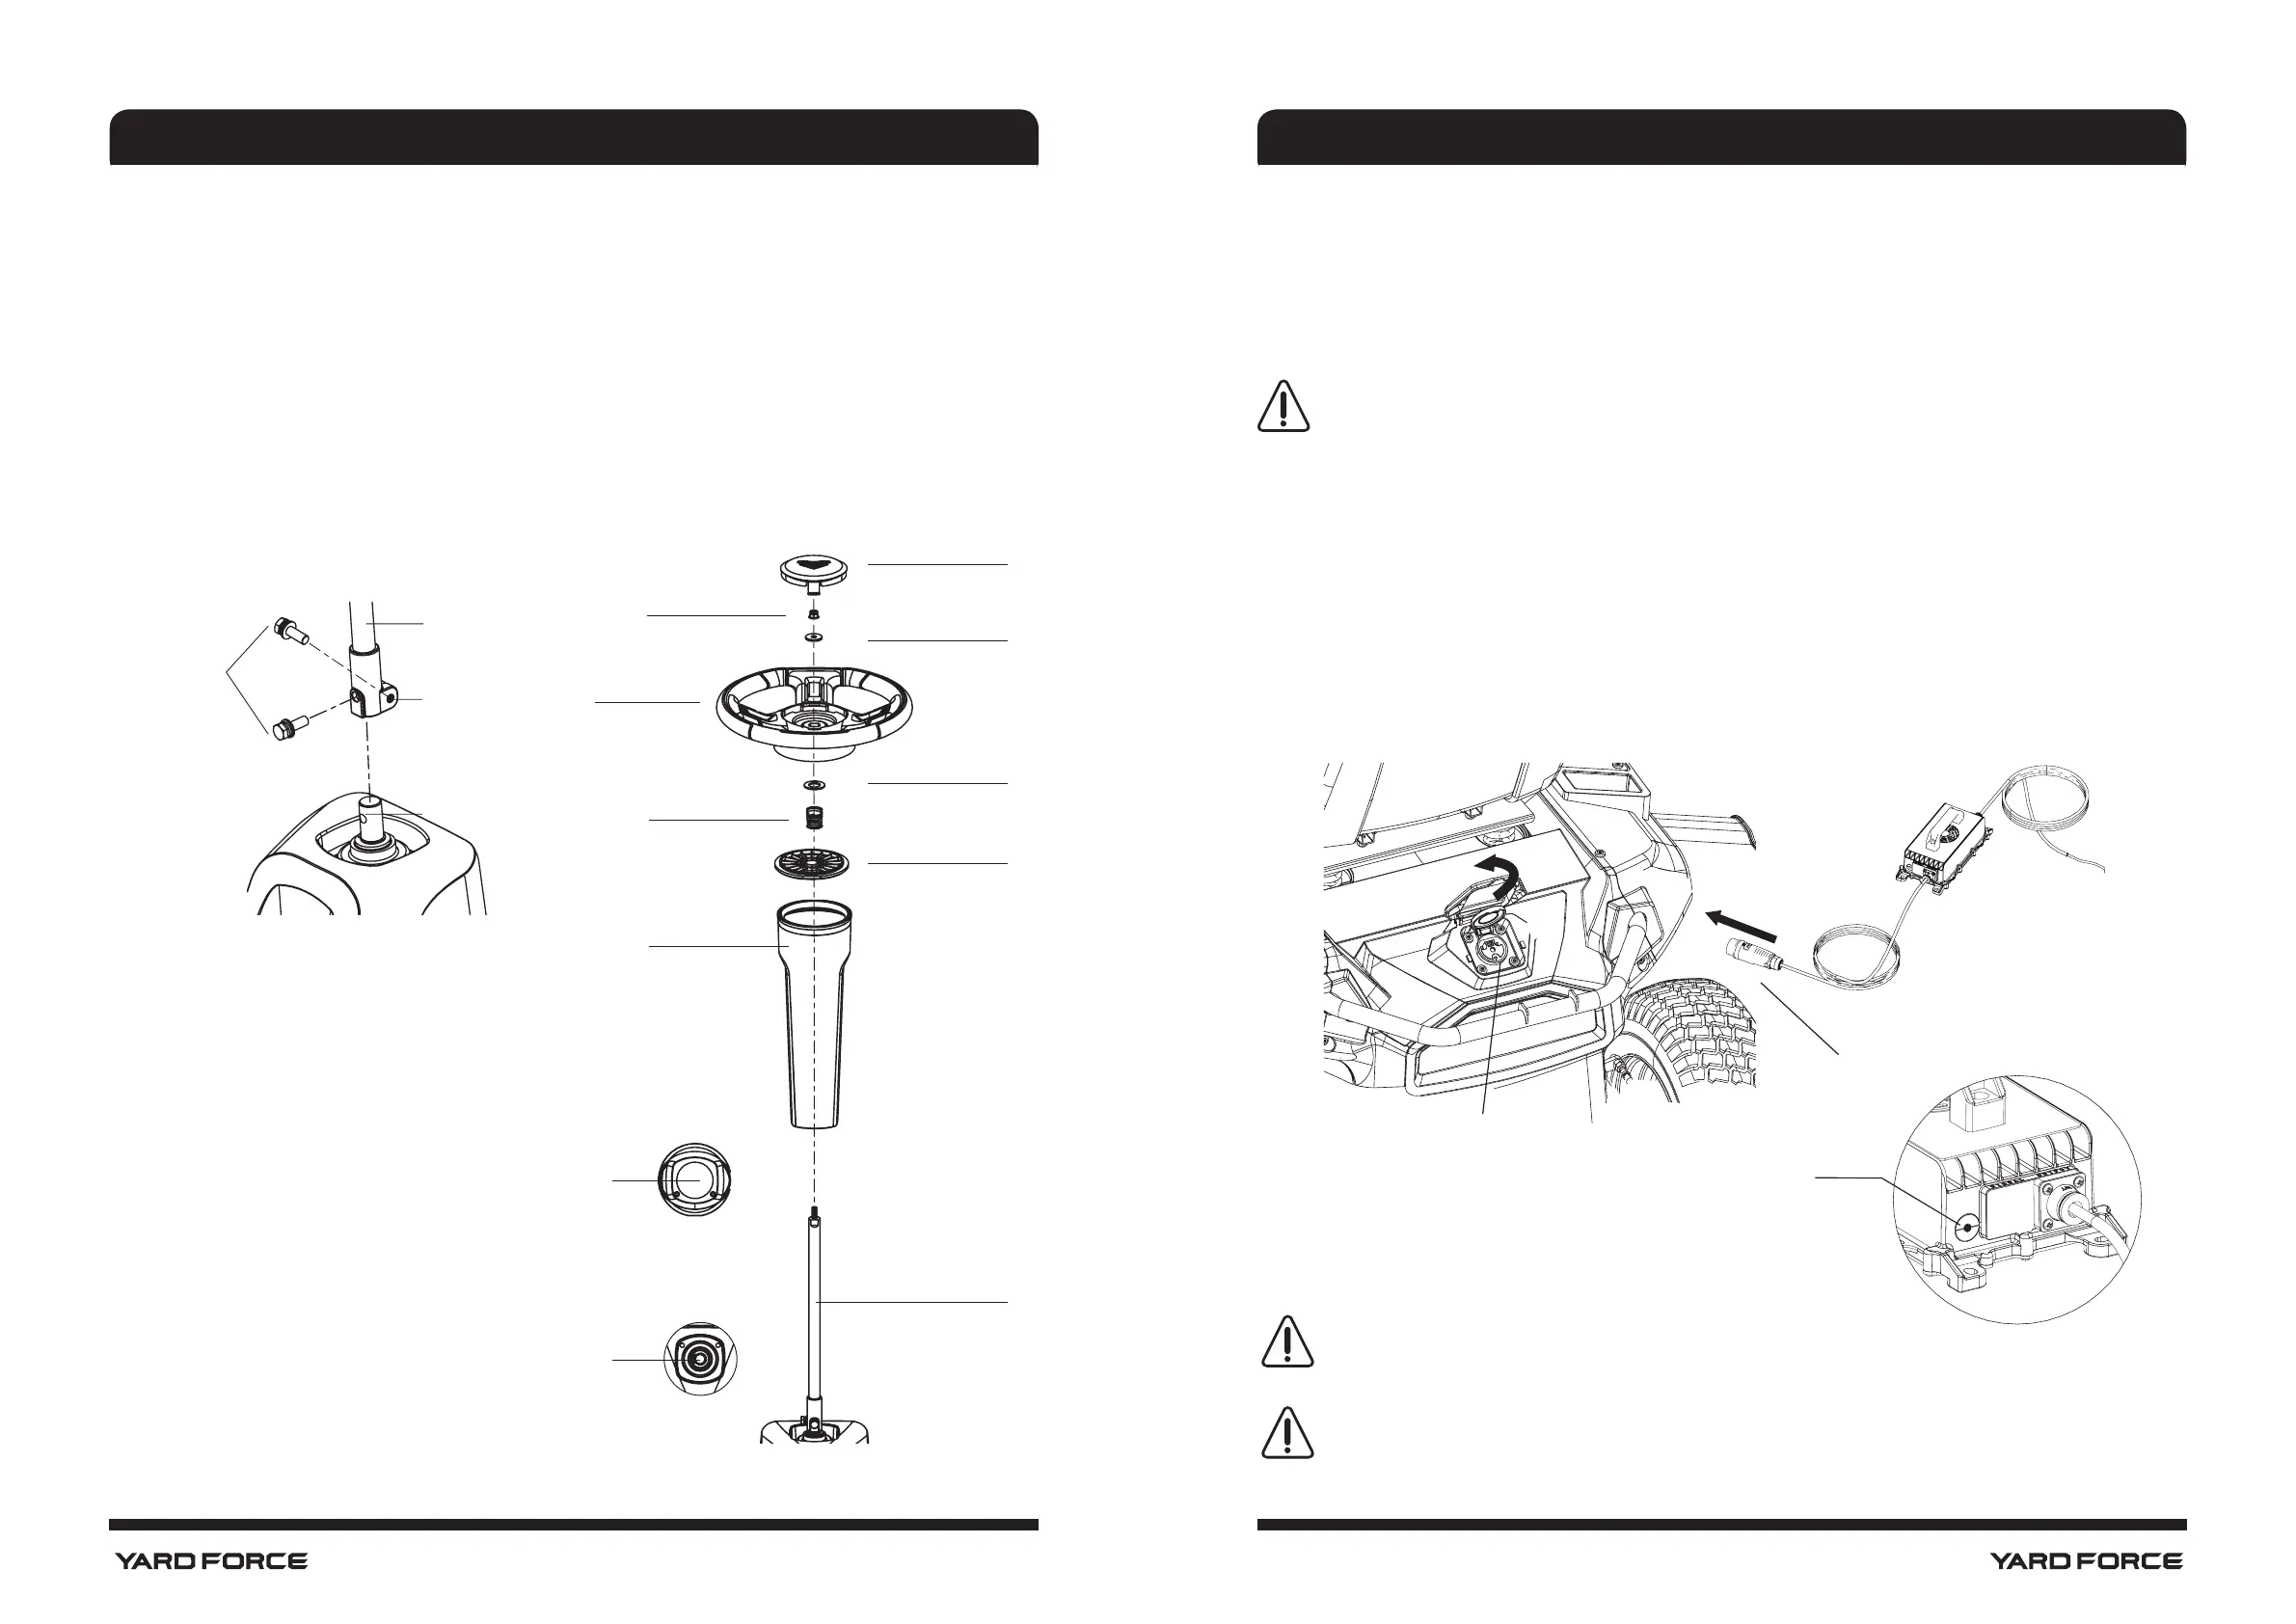
ASSEMBLE THE STEERING COLUMN
• Install the upper steering shaft onto the lower steering shaft, rotate as needed to align the holes in both
shafts.
• Install the bolt with spring washer (F) and tighten securely. Torque to 8 Nm.
• Insert steering column over shaft. Note the tabs on the bottom of the steering column that t into the
holes in the opening and make sure steering column is securely seated.
• Align the groove on the steering column cover with the top of the steering column then install the
steering column cover. The upper steering shaft will protrude through the opening in the cover.
• Install spring (C) and washer (D) onto the upper steering shaft.
• Make sure the mower's wheels are pointed straight ahead, then install the steering wheel onto the upper
steering shaft.
• Install washer (E) and ange nut (A), tighten securely, torque nut to 8 Nm.
• Install the steering wheel cover.
INSTALLATION
FINAL PREPARATION
CHECK TYRE PRESSURE
Check the air pressure in all tyres before use. Improper air pressure will affect handling, steering response,
traction, tyre life, level cutting, and operator comfort. Be sure tyres are inated to the pressure shown below.
NOTE: Tyre pressure should only be measured or adjusted when tyres are cold.
Recommended Pressure: 1.4 bar
WARNING!
Check the tyre pressure carefully while inating. Too much air in the tyre could cause the tyre to
burst, causing serious personal injury.
CHARGE THE MOWER
Mower batteries must be fully charged before rst use. To verify mower batteries are fully charged, check
the battery level indicator. It is recommended the batteries are charged for minimum 4 hours before rst use
regardless of battery level indicator reading 100% charge.
To charge:
• Lift the battery charging port cover, Insert charger plug into charging port on mower, making sure it is
properly connected.
• Connect charger to power supply using normal household current of 100~240V, 50~60HZ.
• Do not charge in an area of extreme heat or cold.
• Remove the charger from the mower once it is fully charged (solid green LED, see picture below) and
ready for use.
WARNING!
To avoid accidental starting or movement of the mower that could result in serious personal injury,
always remove the start key and set the parking pedal when leaving the mower unattended.
NOTICE!
After use charge mower always to 100%, disconnect cable afterwards, check capacity monthly and
recharge if less than 30%.
INSTALLATION
Charger
Plug
Charging
Port
Solid Green
(Fully Charged)
Upper Steering Shaft
Bolt Hole
Lower Steering Shaf
Bolt with
spring washer (F)
teering Wheel
ove
Steering Wheel
Flange Nut (A)
Washer (E)
Washer (D)
Steering Column Cover
Upper Steering Shaft
Spring (C)
Steer Colume
Tab
Hole