16 17
The safe use of this product requires an understanding of the information on the product and in this
operator’s manual as well as a knowledge of the project you are attempting. Before use of this product,
familiarize yourself with all operating features and safety rules.
• ACCELERATOR PEDAL
The accelerator pedal controls the speed of the mower.
• BATTERY LEVEL INDICATOR/ODOMETER/PARKING BRAKE INDICATOR
The battery level indicator shows the amount of battery charge remaining. The odometer tracks the total
distance the mower has been used (key in ON position) for maintenance purposes.
• BLADE ENGAGE KNOB
Pull the blade engage knob up to activate the mower’s cutting blades. Push the knob down to stop the
cutting blades.
NOTE: For cutting in reverse, the reverse mode button must also be activated.
• BRAKE PEDAL
The brake pedal is used for slowing down and stopping the mower.
• CHARGER
The mower’s charger has wall mounting holes for convenient mounting or space saving storage. When
mounting the charger, use screws in both holes of the mounting ange to secure in place. Always mount
in such a way that the charger’s LED status light is visible while charging.
• CRUISE CONTROL BUTTON (CCS)
The cruise control button allows you to continue forward at a set speed without needing to press the
accelerator pedal. While active, pressing the brake pedal or CCS button will stop cruise control.
• DECK HEIGHT ADJUSTMENT LEVER
The deck height adjustment lever is used to raise or lower the cutting deck.
• DIRECTION CONTROL SWITCH
The direction of movement of the mower is controlled using the direction control switch. Available
settings are forward (F), neutral (N) and reverse (R).
• HEADLIGHT BUTTON
Turn the headlights ON and OFF using the headlight button.
• MEDIA HOLDER
The media holder offers a convenient place to store your cell phone or MP3 player when charging with
the USB port.
• MULCH COVER
Your mower is equipped with a mulch cover that covers the side discharge opening, which allows the
mower blade to cut and recut for ner clippings.
• PARKING PEDAL
Use the parking pedal to lock the mower in the braked position. Brake pedal must be depressed before
the parking pedal will lock.
• POWER SWITCH WITH START KEY
The power switch is used to turn the mower ON and OFF. The start key must be inserted before the
switch can be operated.
DESCRIPTION OF PRODUCT
• REVERSE MODE BUTTON
Press the reverse mode button to allow the mower to cut when maneuvering in the reverse direction.
The blades will disengage if mower is operated in reverse without rst pressing the reverse mode
button. Once the button is engaged the mower will remain in both reverse and forward mowing mode
until the button is pressed again or the blades are disengaged. NOTE: The blade engage knob must also
be pulled up for mowing to occur when driving in reverse.
• SEAT ADJUSTMENT LEVER
Use the seat adjustment lever to move the seat to the desired position.
• USB PORT
The USB charging port provides charging power of 5 Volts DC at up to 2 amps for your cell phone,
MP3 player, or other USB devices. Consult the owner’s manual for your device for specic charging
requirements. Connect one end of a USB cable (not provided) to your device and the other end to the
USB charging port on the mower, to begin charging your device.
NOTE: The USB port is only powered when the start key is in the ON position.
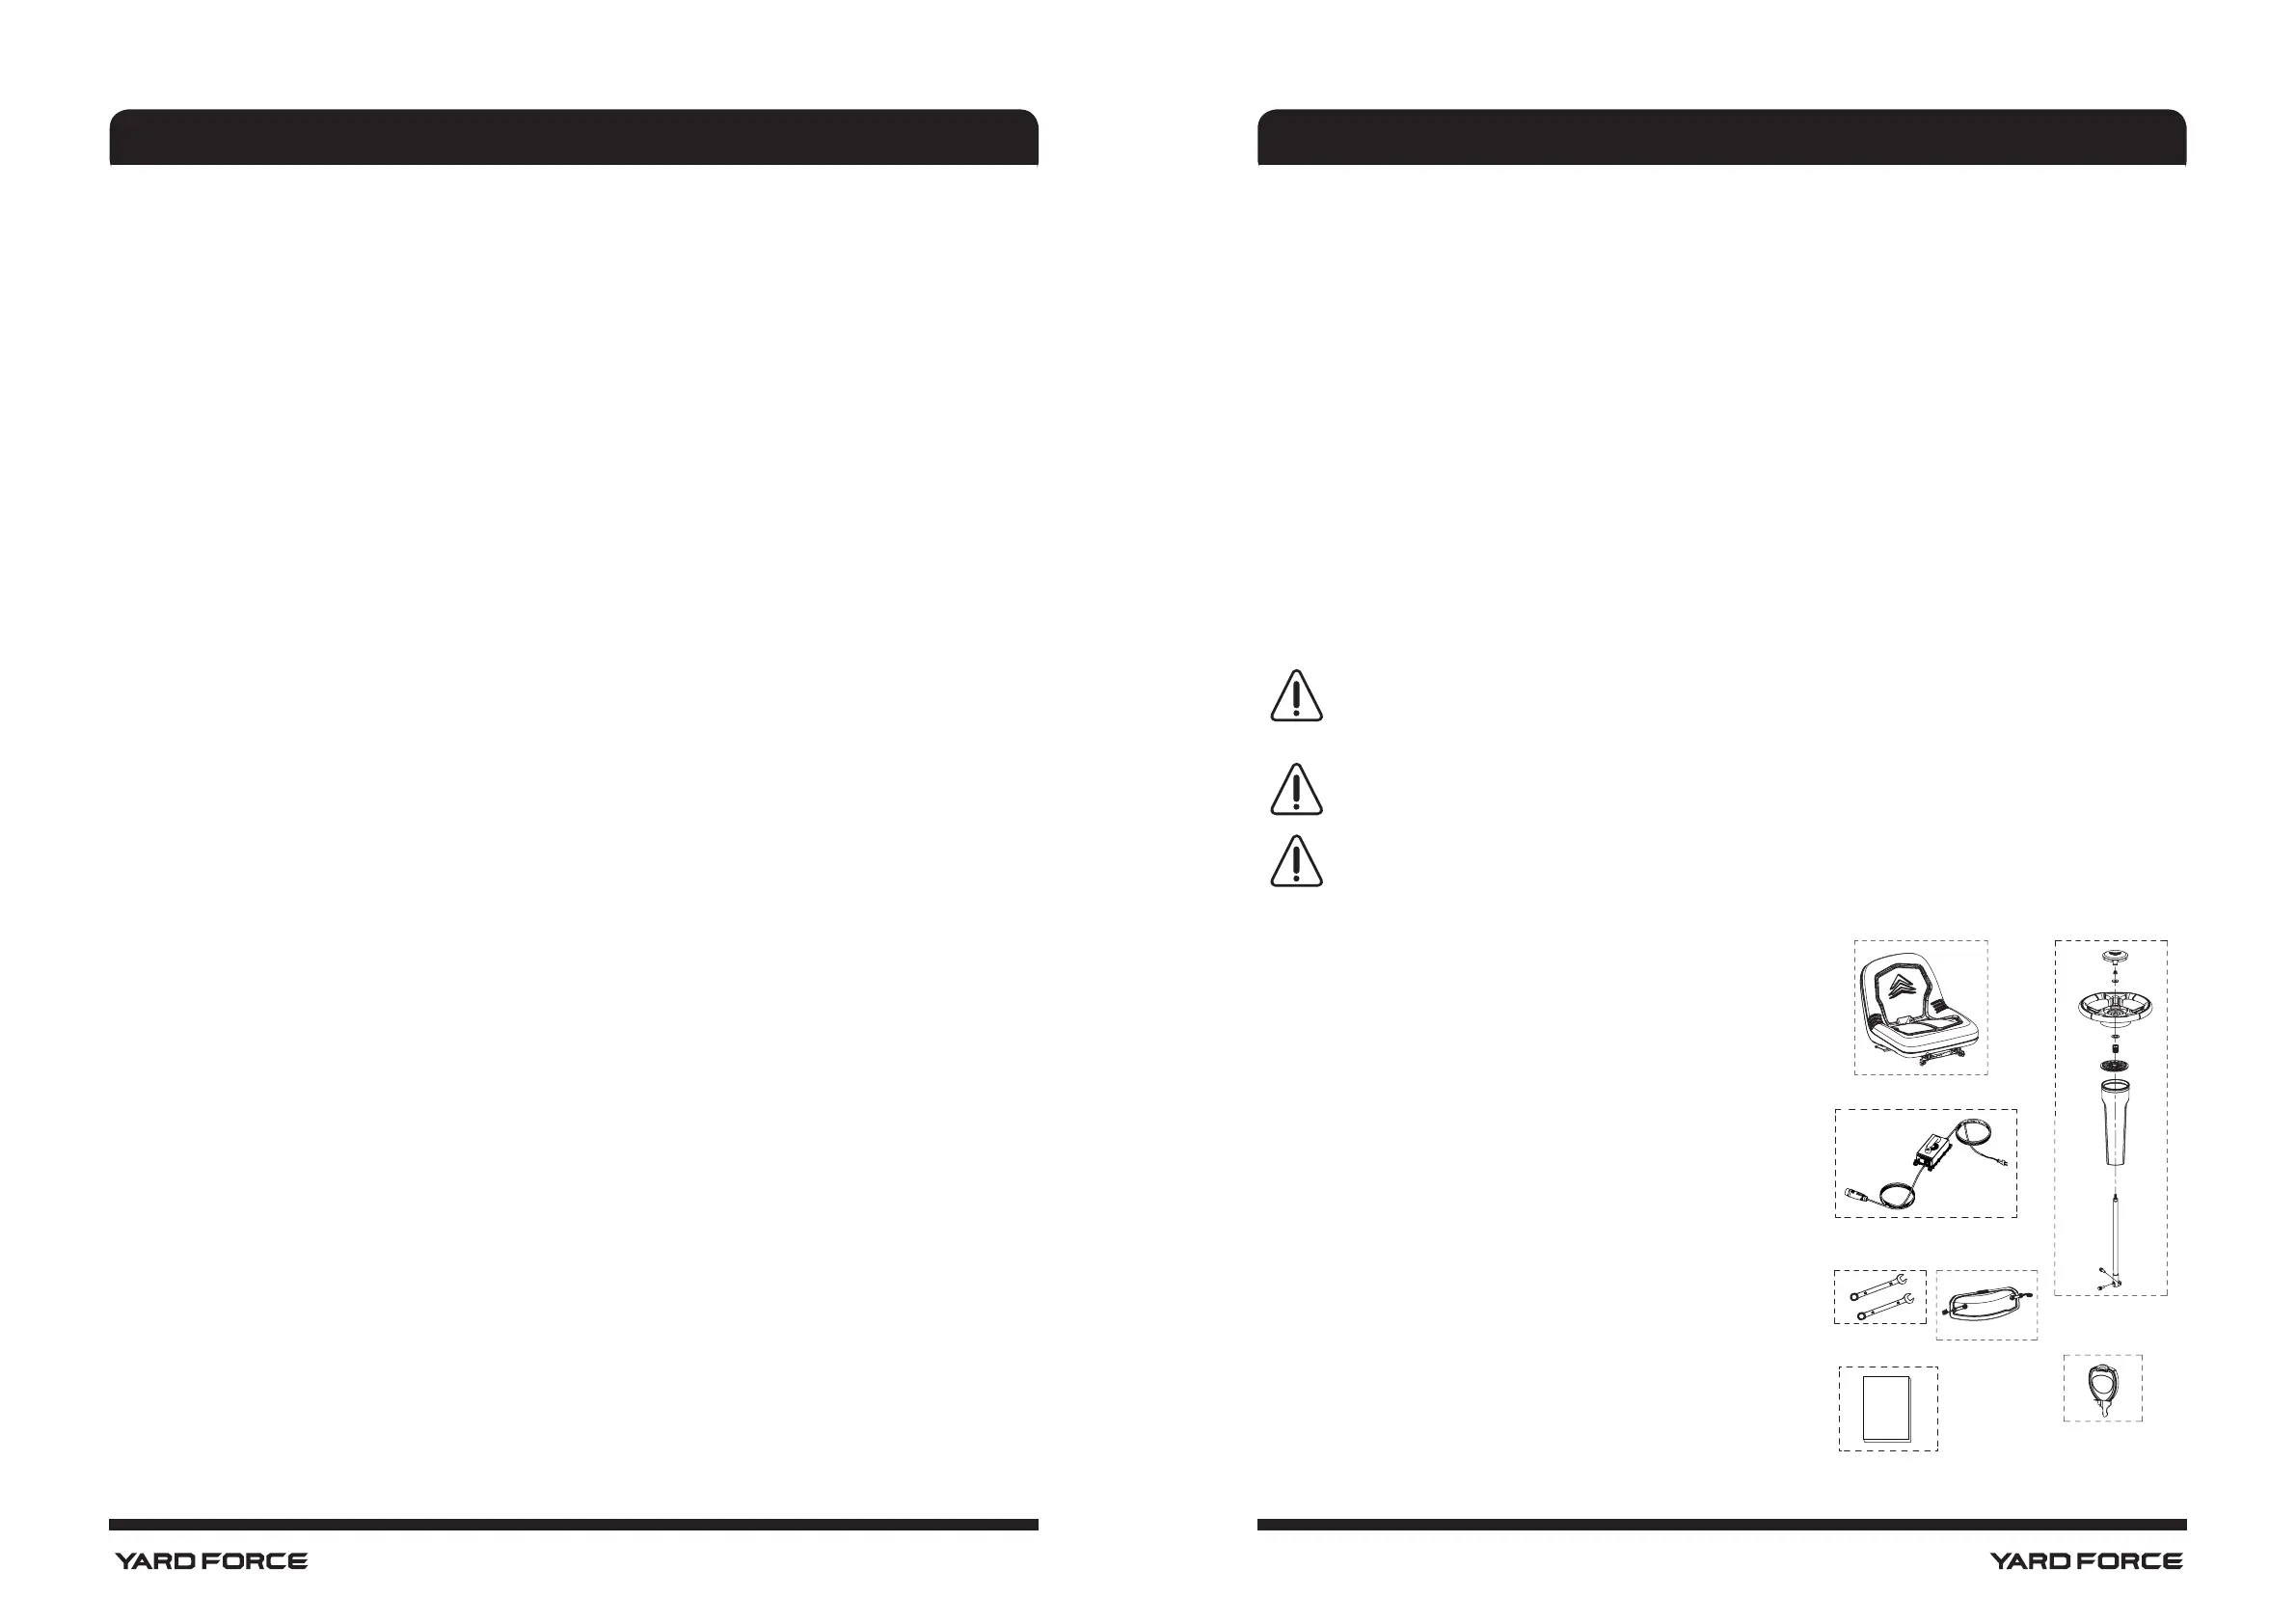
CHECK THE DELIVERY PARTS
Carefully remove all parts from their packaging and check that the following parts are included.
WARNING!
If any parts are damaged or missing, do not operate this lawn mower until the missing parts are
replaced. Failure to heed this warning could result in serious personal injury.
NOTICE!
Always recycle the packaging in accordance with local recycling programs.
WARNING!
This item requires a two-person lift to remove from the packaging. Make sure that you have
sufficient space to put the lawn mower down. Keep your feet apart so that you have a stable
position, bend at the knees and keep your back straight.
A. Seat Assembly with Safety Interlock Cable x1
B. Steering Column Assembly x1
C. Charger x1
D. Wrenches x2
E. Mulch Cover x1
F. Key x3
G. Owner’s Manual x1
DESCRIPTION OF PRODUCT
AA
BB
CC
DD
EE
FF
MANUALMANUAL
GG
 Loading...