23 support@yardistrystructures.com
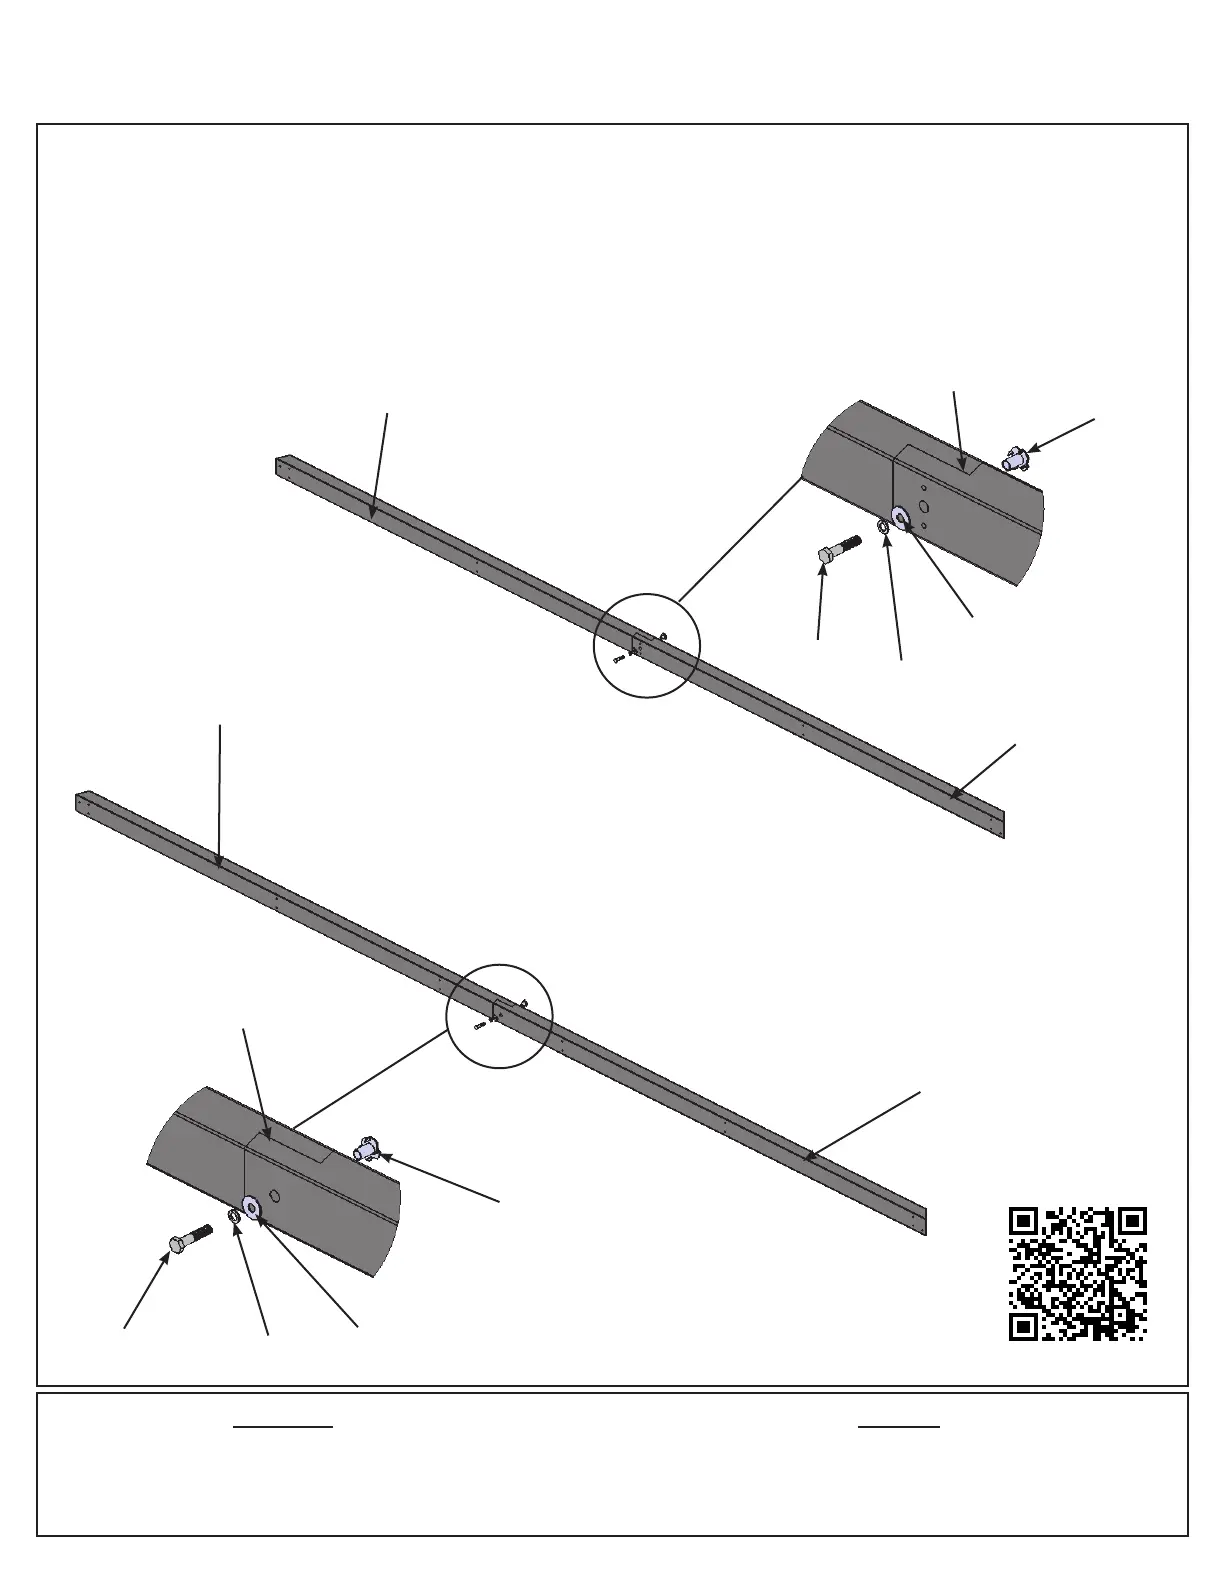
A: Tightly connect one (443) Fascia Left and one (444) Fascia Right using one 5/16 x 1-1/2” Hex Bolt (with 5/16”
lock washer, 1/4-5/16” large washer and 5/16” t-nut) as shown in g. 7.1 and 7.2. Repeat to make a second Fas-
cia Beam Assembly.
B: Tightly connect one (435) Fascia Left - Large Roof and one (436) Fascia Right - Large Roof using one 5/16
x 1-1/2” Hex Bolt (with 5/16” lock washer, 1/4-5/16” large washer and 5/16” t-nut) as shown in g. 7.3 and 7.4.
Repeat to make a second Large Fascia Beam Assembly.
Step 7: Fascia Beam Assemblies
Fig. 7.1
Fig. 7.2
HardwareWood Parts
2 x (443) Fascia Left 38.1 x 82.6 x 1853 mm (1-1/4 x 3-1/4 x 72-15/16”)
2 x (444) Fascia Right 38.1 x 82.6 x 1853 mm (1-1/4 x 3-1/4 x 72-15/16”)
2 x (435) Fascia Left - Large Roof 38.1 x 82.6 x 2157.7 mm (1-1/4 x 3-1/4 x 84-15/16”)
2 x (436) Fascia Right - Large Roof 38.1 x 82.6 x 2157.7 mm (1-1/4 x 3-1/4 x 84-15/16”)
4 x 5/16 x 1-1/2” Hex Bolt
(5/16” lock washer, 1/4-5/16” large washer, 5/16” t-nut)
(444) Fascia
Right
(443) Fascia
Left
(436) Fascia Right
- Large Roof
5/16”
T-nut
5/16 x 1-1/2”
Hex Bolt
Tight
Fig. 7.3
Fig. 7.4
5/16” Lock
Washer
(435) Fascia Left
- Large Roof
5/16”
T-nut
5/16 x 1-1/2”
Hex Bolt
Tight
5/16” Lock
Washer
1/4-5/16”
Large Washer
1/4-5/16”
Large Washer
http://bit.ly/gazebo7-9