Do you have a question about the Yardistry YM12784 and is the answer not in the manual?
Details on what the product is NOT intended for, including safety barriers and load-bearing uses.
Warnings about snow load, climbing on the roof, flame retardancy, and sharp edges.
Information on cedar wood, factory stain, knots, checks, and annual sealant application.
Details on the 1-year material/workmanship warranty, 5-year rot/decay warranty, and exclusions.
Explains residential use only, disclaimers, and consumer legal rights varying by location.
Guidance on checking metal parts for rust, tightening hardware, and checking for sharp edges.
Advice on applying water repellent, checking wood for deterioration, and managing natural wood checks.
Explains key symbols used in instructions and lists required tools for assembly.
Recommendations for working on a raised surface and keeping connections flush during pre-assemblies.
Advice on handling sharp metal edges, removing plastic, and avoiding damage to roofing material.
Details on required footing squareness, solidity, levelness, and checking for underground utilities.
Illustrates how to anchor the structure to concrete patios and wood decks, including clearance.
Lists and illustrates main structural wood components like posts, plinths, and beams with part numbers.
Identifies various rafter, strap, and fascia components used in roof assembly with part numbers.
Lists different beam types, straps, and uprights with identification numbers and dimensions.
Details all types of bolts, screws, nuts, and washers used in the assembly with quantities and part numbers.
Identifies roof panels, edges, clips, and decorative caps with part numbers and quantities.
Lists various brackets, post mounts, spring clips, and necessary tools with part numbers.
Instructions for inventorying parts, contacting support for issues, and reviewing safety information.
Details on inserting T-Nuts and attaching post mounts to the main posts using bolts and screws.
Instructions for flush-mounting plinths to the posts using wood screws, ensuring rounded edges are on top.
Steps for inserting T-Nuts and attaching post mounts to mid posts using bolts and screws.
Guidance on flush-mounting plinths to mid posts using wood screws, with rounded edges facing up.
Instructions for connecting short beam left/right and short beam center/end sections using hex bolts.
Steps for joining the short beam L-R assemblies with short beam end assemblies using wood screws.
Connecting outer ends to beams and attaching beam inserts using hex bolts and wood screws.
Connecting inside middle beams to inside beams and attaching beam ends using hex bolts.
Joining inside beam assemblies to outer beam assemblies using wood screws, ensuring angled ends match.
Securing short beam assemblies to main posts using hex bolts, washers, and lock nuts.
Attaching gussets (RT and LT) to short side assemblies and main posts using hex bolts and lag screws.
Positioning and attaching long beam assemblies to main posts using hex bolts, washers, and lock nuts.
Centering mid posts and attaching steel cables with brackets using hex bolts and lock nuts.
Attaching gussets to long beam assemblies and posts using hex bolts, lag screws, and washers.
Attaching beam assemblies to main and mid posts using lag screws and referring to anchoring examples.
Mounting large centre roof brackets to mid posts and long beam assemblies using pan screws.
Tightly connecting left and right fascia beams using hex bolts, washers, and t-nuts to form fascia beams.
Attaching corner rafters to a main rafter and then attaching the fascia beam assembly using wood screws.
Positioning and attaching short and center rafters to the fascia beam assembly using wood screws.
Placing and attaching top, mid, and bottom straps into rafter notches using wood screws.
Attaching rafters to corner assemblies and securing straps to rafters using wood screws.
Placing and attaching soffit panels to rafters and fascia beams using pan screws.
Warnings and advice on handling sharp roofing edges, avoiding scratches, and using gloves.
Critical warning against overtightening roofing screws to prevent damage to the material.
Instruction to remove all plastic covering from aluminum panels and trim before installation.
Placing and attaching long roof panels to the small roof assembly using roofing screws.
Attaching short roof panels and ensuring panels are flush at corners, avoiding bottom row screws.
Attaching roof edges and ridge clips to the small roof assembly using roofing and wood screws.
Attaching corner rafters and end fascias to middle rafters for left and right corner roof assemblies.
Positioning and attaching rafters to corner roof assemblies using wood screws.
Securing top, mid, and bottom straps to the rafters of corner roof panels using wood screws.
Attaching rafters and straps to corner roof assemblies, ensuring proper alignment and screw placement.
Placing and attaching soffit ends to corner roof assemblies using pan screws.
Loosely attaching roof to beam brackets to the underside of corner roof assemblies using hex bolts.
Attaching long and short roof panels to corner roof assemblies, ensuring proper alignment and screw placement.
Attaching roof edges to the bottom of corner roof assemblies using roofing screws.
Attaching ridge clips and weather seals to the top edges of corner roof assemblies using wood screws.
Attaching middle rafters to rafter tops and mid fascias to middle rafters using wood screws.
Positioning and attaching centre rafters to mid fascias and rafter tops using wood screws.
Placing and attaching centre straps into rafter and centre rafter notches using wood screws.
Attaching soffits to mid fascias and spacers to rafter tops using pan and wood screws.
Loosely attaching roof to beam brackets to the underside of large roof assemblies using hex bolts.
Placing and attaching middle roof panels to the large roof assembly, ensuring overlap and alignment.
Attaching roof panels to rafters, rafter tops, and centre straps using roofing screws, avoiding bottom row.
Attaching ridge edge middle pieces to the bottom of large roof assemblies using roofing screws.
Attaching ridge clips and weather seals to the top edges of large roof assemblies using wood screws.
Lifting and positioning large roof assemblies onto the frame, connecting them together with hex bolts.
Repeating assembly steps and connecting large roof assemblies to centre roof brackets and middle rafters.
Attaching middle rafters from connecting large roof assemblies using hex bolts.
Attaching roof to beam brackets to centre rafters and tightening all assembly bolts.
Assembling centre peak caps, peak cap links, and peak cap details using pan bolts and nuts.
Inserting carriage bolts with washers and attaching peak posts and spring clips to the peak cap assembly.
Placing corner roof assemblies and attaching them to the frame with hex bolts and connecting soffit ends.
Attaching beam to rafter brackets to middle rafters of corner roof assemblies and tightening all bolts.
Lifting and loosely attaching small roof assemblies to the frame, aligning rafters and tightening bolts.
Attaching small and corner roof assemblies together at fascia and end fascias using wood screws.
Placing and attaching corner caps to fascia and end fascias using sheet metal screws.
Attaching roof to beam brackets to rafters of small roof assemblies using hex bolts and pan screws.
Sliding and securing long and short ridge caps over ridge clips and peak cap assemblies using sheet metal screws.
Removing and reattaching screws for roof edges and placing centre roof edges over seams.
Sliding and securing middle ridge caps over ridge clips at connections using sheet metal screws.
Inserting nuts into peak loops, attaching peak brackets to carriage bolts, and securing them with pan screws.
Placing remaining peak brackets over carriage bolts and attaching peak loops to secure the assembly.
Attaching tie wrap brackets to ties and securing them to centre rafters using pan screws.
Attaching double tie wrap brackets to ties and middle rafters using pan screws and pre-drilling.
Placing and attaching centre beam long and short pieces, and securing centre beam bottoms with wood screws.
Attaching the centre beam assembly to middle rafters and mid posts using wood screws and flat brackets.
Attaching centre uprights and centre gussets to the centre beam assembly and mid posts.
Measuring and attaching 45° twist brackets to main posts and corner rafters using pan screws.
Installing optional metal hooks for wiring and attaching the gazebo ID plaque using pan screws.
| Product Type | Gazebo |
|---|---|
| Category | Outdoor Furnishing |
| Assembly Required | Yes |
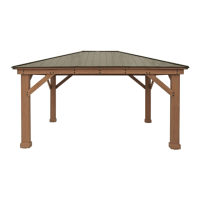
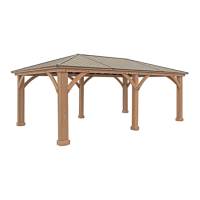
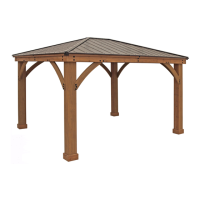
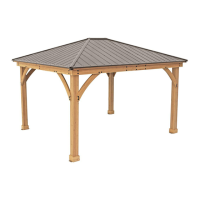
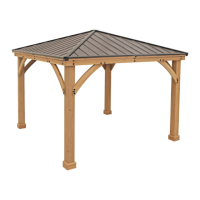
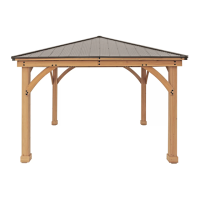
| Product Name | Yardistry 12' x 14' Meridian Gazebo |
| Material | Cedar wood |
| Included Hardware | All hardware included |
| Warranty | 5-year limited warranty |
 Loading...