73 support@yardistrystructures.com
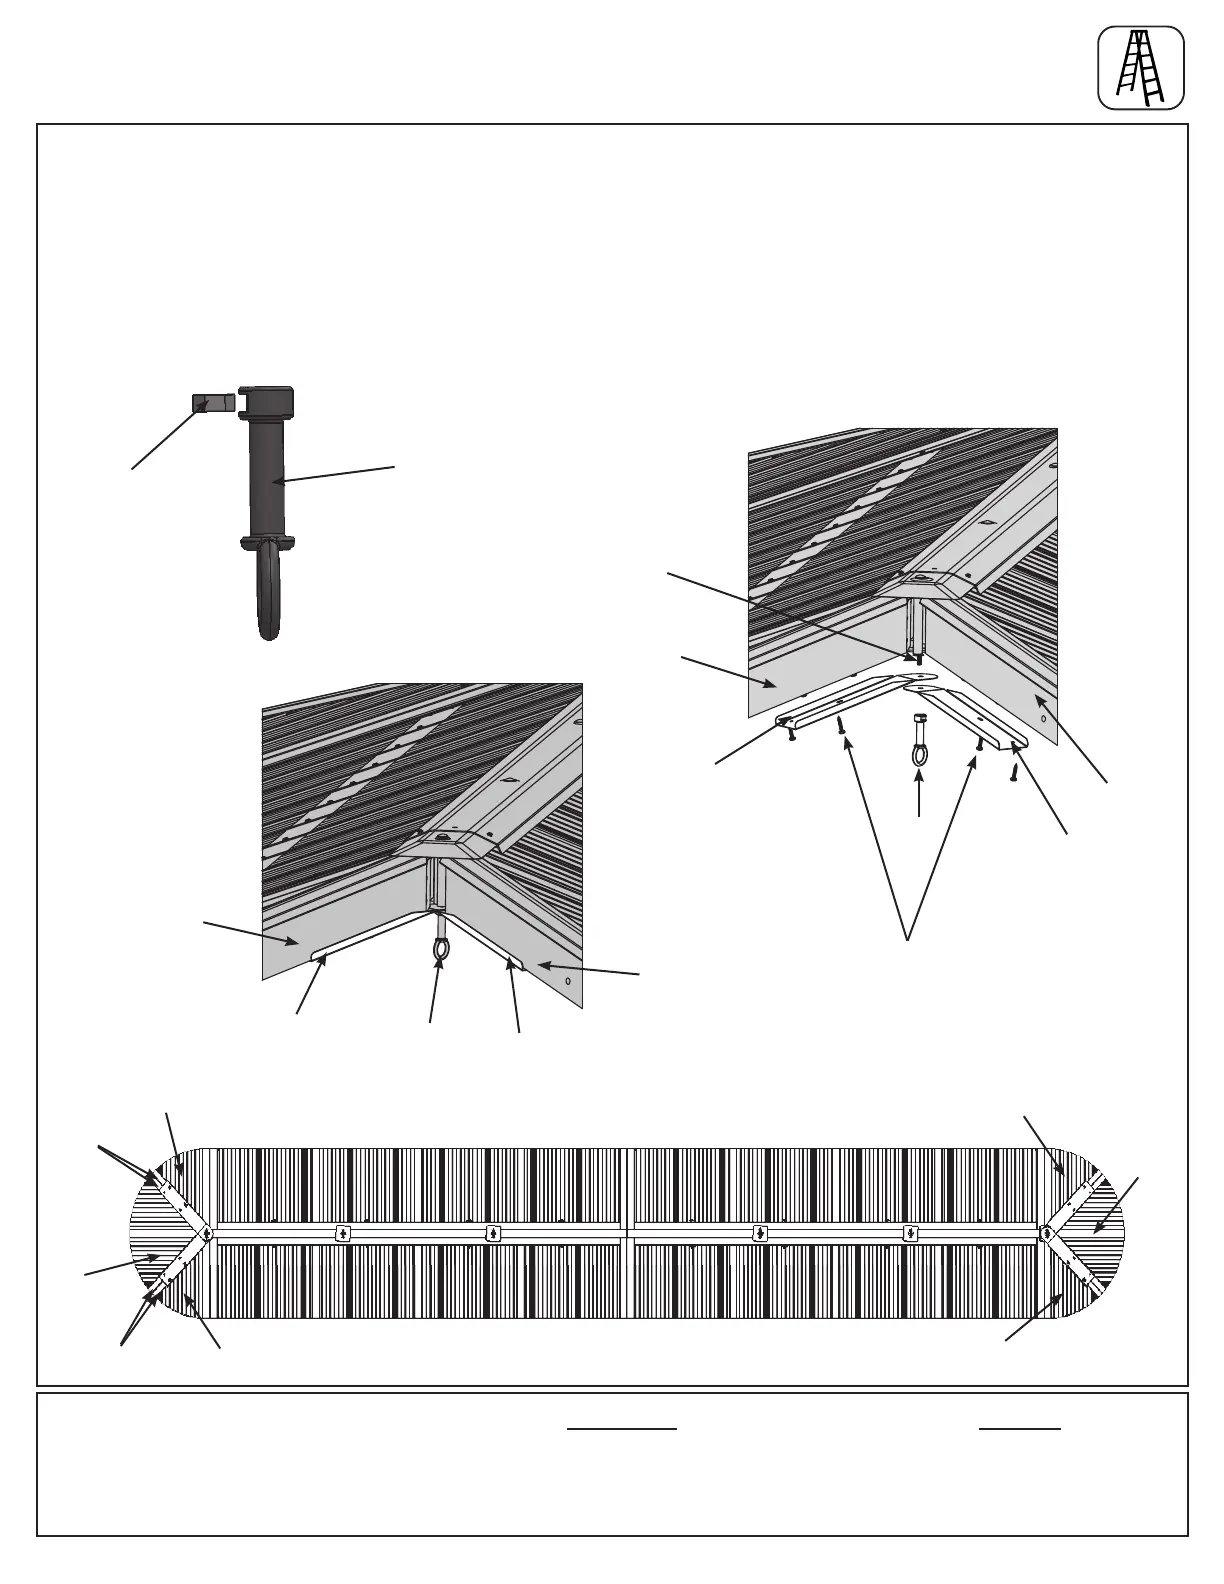
Peak
Loop
1/4” Nut
A: Insert one 1/4” Nut into each Peak Loop. Be careful nut is loose and will fall out until attached to Carriage
Bolt. Only 2 are used in Part 1, the remaining 4 will be used in Part 2. (F31.1)
B: Insert two Roof Peak Brackets through each end Carriage Bolt, so they t over the Rafter Corners, and attach
Peak Loop to Carriage Bolts then twist to tighten. (F31.2, F31.3 and F31.4)
C: Attach each set of Roof Peak Brackets to the Rafter Corners of the connected Corner and Small Roof
Assemblies in the slotted holes with four #10 x 1-1/4” Pan Screws per bracket. (F31.2, F31.3 and F31.4)
F31.1
Components
6 x Peak Loop
6 x 1/4” Nut
4 x Roof Peak Bracket
Step 31: Secure Roof Peak Detail
Part 1
F31.2
F31.3
F31.4
Carriage Bolt
Peak
Loop
Roof Peak
Bracket
Rafter
Corner
Rafter
Corner
Rafter
Corner
Rafter
Corner
Peak
Loop
Roof Peak
Bracket
Roof Peak
Bracket
Roof Peak
Bracket
#10 x 1-1/4” Pan Screw
x 4 per bracket
Rafter
Corner
Rafter
Corner
Small
Roof
Assembly
Hardware
16 x #10 x 1-1/4” Pan Screw
Parts removed
for clarity
Small
Roof
Assembly
Corner Roof
Assembly
Corner Roof Assembly
Corner Roof Assembly
Corner Roof
Assembly