52 support@yardistrystructures.com
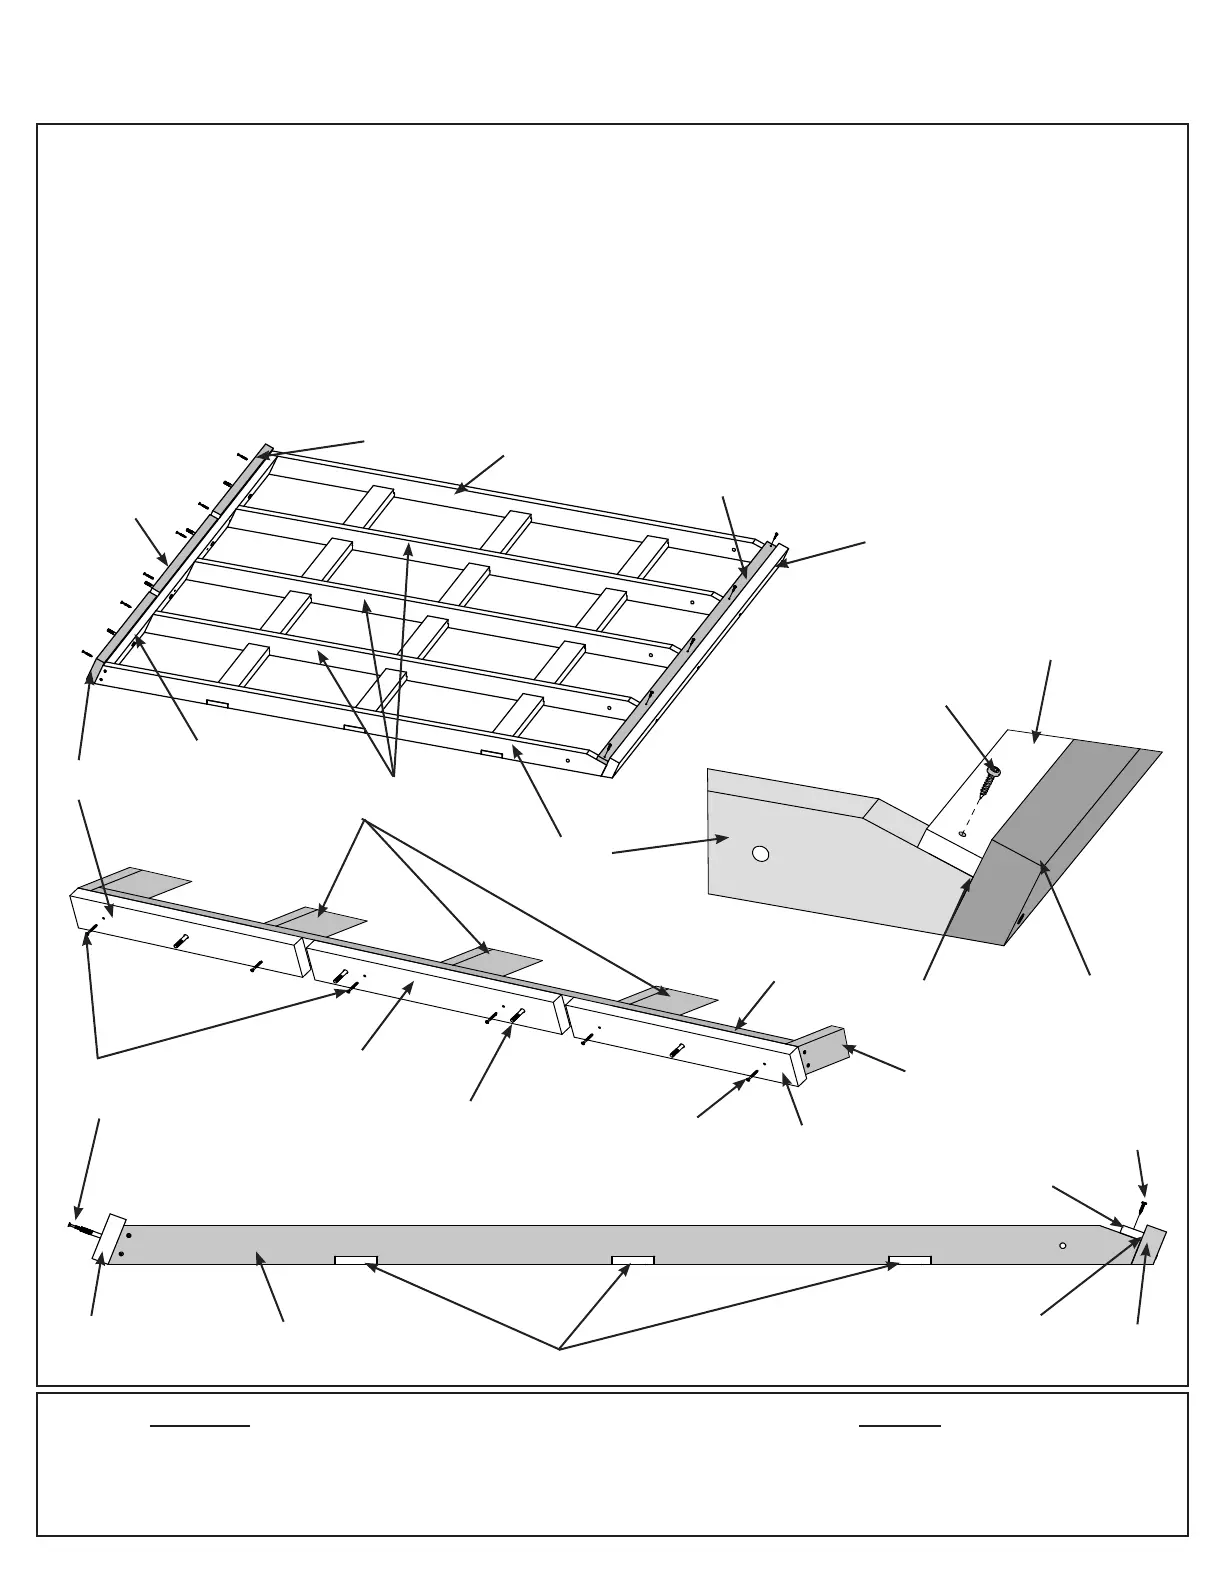
Step 18: Large Roof Assembly
Part 4
4 x (1195) Sot
4 x (645) Spacer
2 x (1200) Spacer Long
F: Turn over each Large Roof Assembly then place one (1195) Sot tight to the top of (1192) Mid Fascia. (1195)
Sot must be ush with the outside edge of (675) Middle Rafter. Attach (1195) Sot to each (675) Middle Rafter
and each (633) Centre Rafter with ve #8 x 1” Pan Screws. Install (1195) Sot on each Large Roof Assembly.
(F18.11, F18.12 and F18.14)
G: On only two Large Roof Assemblies place one (645) Spacer at each end of (1194) Rafter Top and one (1200)
Spacer Long evenly spaced between the (645) Spacers. To nd the correct placement of each spacer insert one
1/4 x 4-1/4” Hex Bolt through (1194) Rafter Top into each (645) Spacer and (1200) Spacer Long. The bolts are
for placement only, they are to be removed at the end of this step. Attach each spacer to (1194) Roof Top with
two #8 x 2-1/4” Wood Screws per spacer. Remove bolts, to be used in Step 24. (F18.11, F18.13 and F18.14)
HardwareWood Parts
20 x #8 x 1” Pan Screw
12 x #8 x 2-1/4” Wood Screw
4 x 1/4 x 4-1/4” Hex Bolt (for placement
purposes only)
Side View
F18.11
F18.12
Flush and
Tight
#8 x 2-1/4”
Wood Screws
x 2 per spacer
(1195) Sot
(633) Centre
Rafter
(1192) Mid
Fascia
(675)
Middle
Rafter
(1194) Rafter Top
(675)
Middle
Rafter
(1193) Centre Strap
(1195) Sot
(1192) Mid
Fascia
#8 x 1” Pan
Screws
(675) Middle
Rafter
#8 x 2-1/4”
Wood Screws
x 2 per spacer
1/4 x 4-1/4” Hex Bolt
in each spacer (for
placement purposes
only, to be removed)
(1200)
Spacer
Long
(645)
Spacer
(645)
Spacer
(645)
Spacer
Back View
Top
Bottom
#8 x 1” Pan
Screws x 5
F18.13
(1195) Sot
(1192) Mid
Fascia
F18.14
(1194) Rafter Top
(675)
Middle
Rafter
(645)
Spacer
(1200) Spacer
Long
Flush and
Tight