64 support@yardistrystructures.com
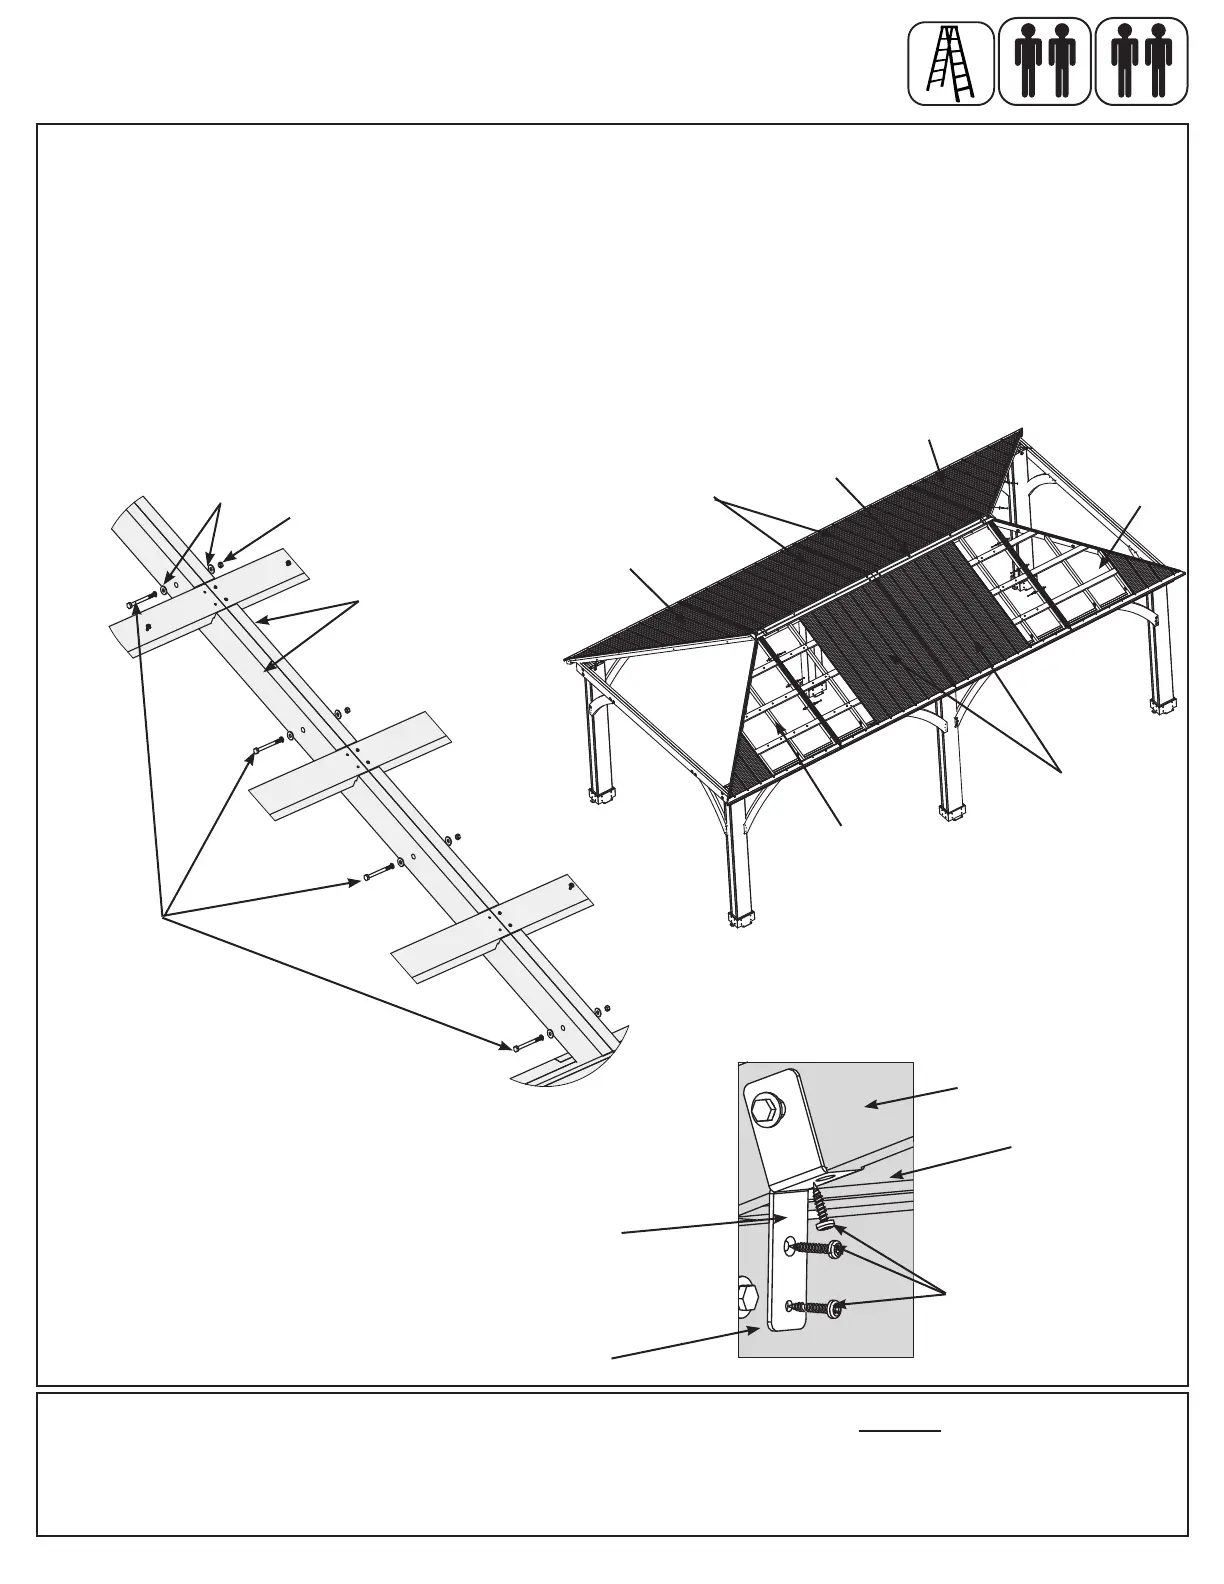
A: Place Left Corner Roof Asssemblies on the left side of each Large Roof Assembly and the Right Corner Roof
Assemblies on the right sides. You will need to lift Peak Cap Assembly to get the top under it. Make sure fascia on
each panel are ush then attach (675) Middle Rafters from each connecting assembly with four 1/4 x 3” Hex Bolts
(with two 1/4-5/16” large washers and one 1/4” lock nut) per Corner Roof Assembly. (F25.1 and F25.2)
B: Push panels up from the outside and inside top to make sure each Sot End on the Corner Roof Assemblies
are against the Long Beam Assembly then fasten each Roof to Beam Bracket with three #12 x 1-1/2” Pan Screws
per bracket. Install top screw into the rafter rst then install the other two into the beam. Slight gaps are normal.
Complete one Corner Roof Assembly before starting the next. (F25.1 and F25.3)
Step 25: Attach Corner Roof Assemblies to Frame
Part 1
F25.1
Corner Roof
Assembly
x 3
One assembler to support
roof panel(s) at all times until
secure
Large Roof
Assembly
Corner Roof
Assembly
(675) Middle
Rafter
Hardware
16 x 1/4 x 3” Hex Bolt
(1/4-5/16” large washer x 2, 1/4” lock nut)
24 x #12 x 1-1/2” Pan Screw
1/4” Lock
Nut
1/4-5/16”
Large Washer
1/4 x 3”
Hex Bolt
Parts removed
for clarity
F25.2
Large Roof
Assembly
Corner Roof
Assembly
Corner Roof
Assembly
Roof to
Beam
Bracket
#12 x 1-1/2”
Pan Screw
Long Beam
Assembly
F25.3
Rafter
Peak Cap
Assembly