54 support@yardistrystructures.com
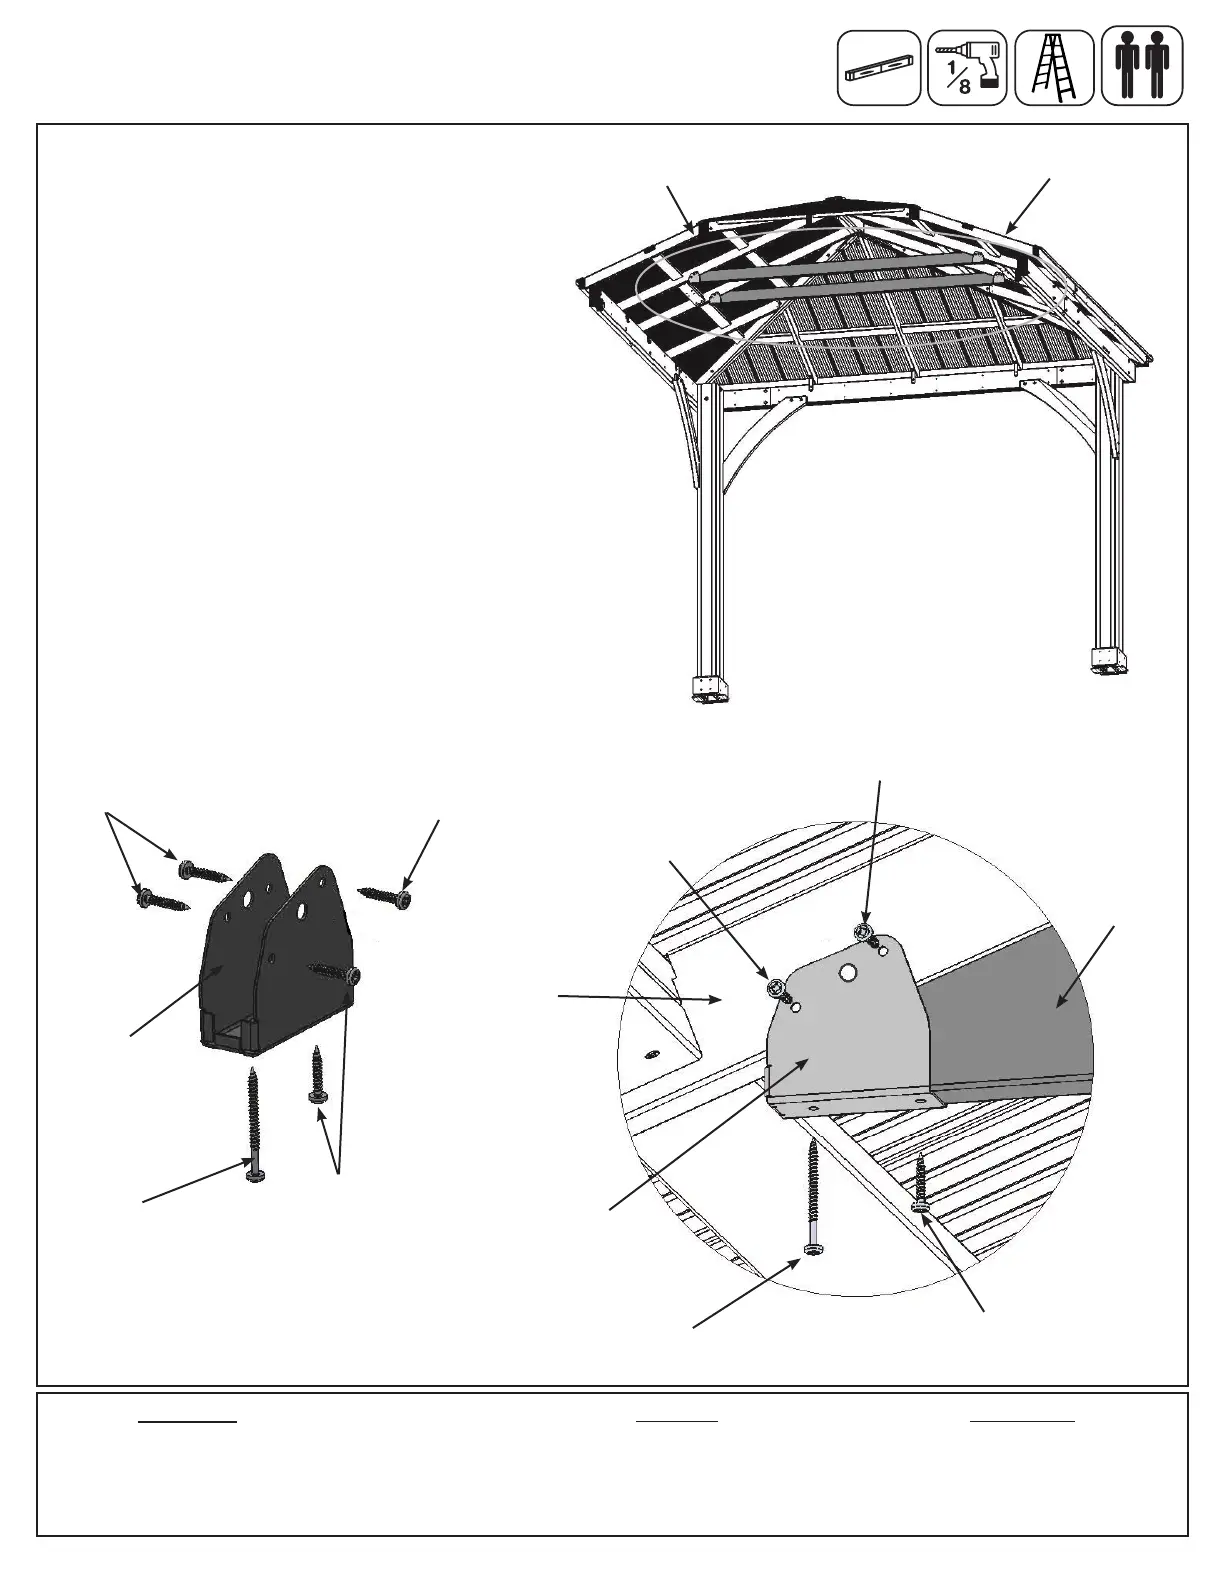
A: Attach one Tie Wrap Bracket to each end of
one (461) Tie with one #10 x 1-1/4” Pan Screw
per bracket using the inside holes. (461) Tie is
tight to end of bracket. (g. 25.1, 25.2 and 25.3)
B: With a helper place (461) Tie with brackets
against a (440) Rafter on each Large Roof Panel
so (461) Tie is tight to (440) Rafters and level.
Attach Tie Wrap Bracket to (440) Rafters with two
#10 x 1-1/4” Pan Screws on both sides of each
bracket (g. 25.1, 25.2 and 25.3)
C: Pre-drill with a 1/8” drill bit and secure Tie
Wrap Brackets to (461) Tie and (440) Rafter with
one #10 x 2-1/2” Pan Screw per bracket. (g.
25.1, 25.2 and 25.3)
D: Repeat Steps A to C for a second (461) Tie.
Componets:
4 x Tie Wrap Bracket
Wood Parts
2 x (461) Tie 31.8 x 88.9 x 2336.8 mm (1-1/4 x 3-1/2 x 92”)
Hardware
20 x #10 x 1-1/4” Pan Screw
4 x #10 x 2-1/2” Pan Screw
Fig. 25.1
#10 x 1-1/4”
Pan Screw
#10 x 2-1/2” Pan Screw
(pre-drill before installing)
#10 x 1-1/4”
Pan Screw
#10 x 1-1/4”
Pan Screw
(461) Tie
(440)
Rafter
Tie Wrap
Bracket
Parts removed
for clarity
Step 25: Attach Tie Wrap Brackets and Ties
Fig. 25.2
Fig. 25.3
#10 x 1-1/4”
Pan Screw
#10 x 1-1/4”
Pan Screw
#10 x 1-1/4”
Pan Screw
Tie Wrap
Bracket
#10 x 2-1/2”
Pan Screw
Large Roof
Panel
Large Roof Panel