63 support@yardistrystructures.com
Parts removed
for clarity
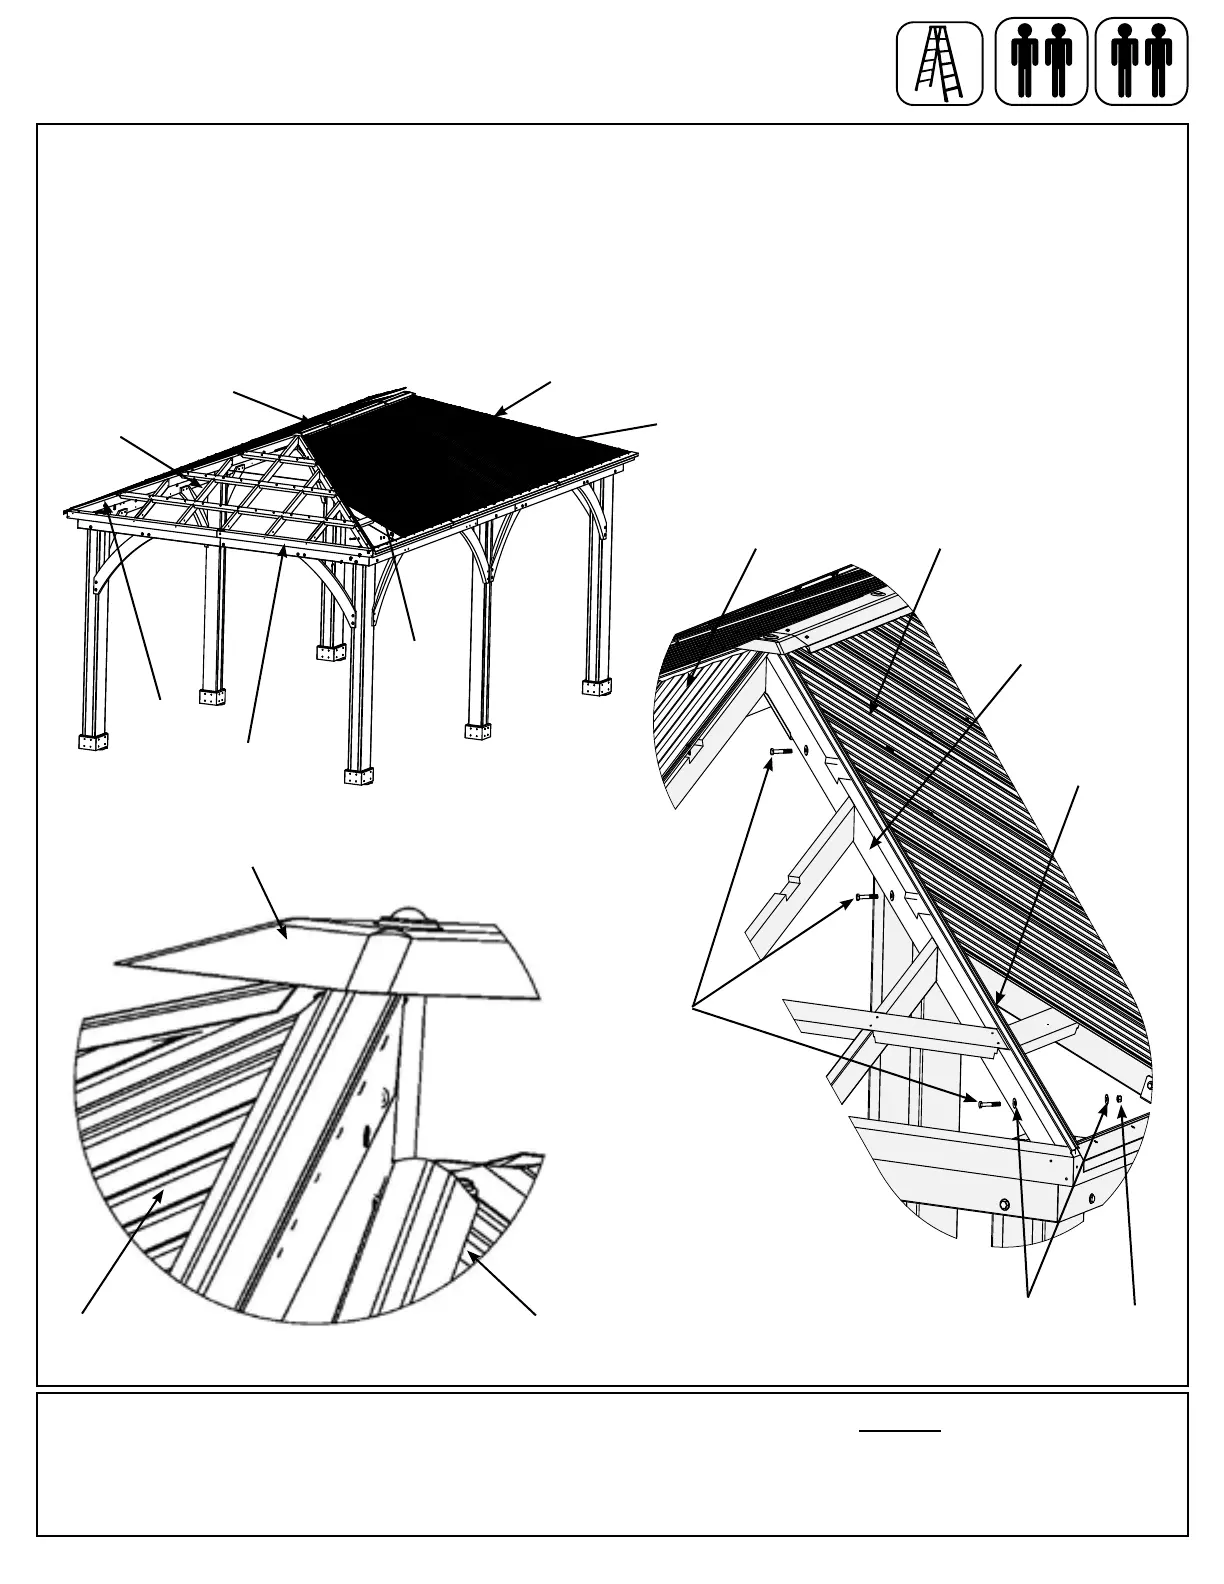
A: With all four assemblers lift one Small Roof Assembly up and over the Short Beam Assembly. You will need
to lift the Peak Cap Assembly to get the top under it. Loosely attach each (623) Rafter Corner Right to each (624)
Rafter Corner Left with three 1/4 x 2-3/4” Hex Bolts (with two 1/4-5/16” large washers and one 1/4” lock nut) per
side. To align bolt holes helper in the centre may have to push up the centre of the panels and others make sure
corners are aligned. Make sure all bolts are tight. Joining rafters must be ush at the top. (F26.1, F26.2 and
F26.3)
B: Repeat Step A for second Small Roof Assembly.
F26.1
Small Roof
Assembly
(not shown)
x 3
One assembler to support
roof panel(s) at all times
until secure
Short Beam
Assembly
Step 26: Attach Small Roof Assemblies to Frame
Hardware
12 x 1/4 x 2-3/4” Hex Bolt
(1/4-5/16” large washer x 2, 1/4” lock nut)
Small Roof
Assembly
Small Roof
Assembly
Corner Roof
Assembly
(623) Rafter
Corner Right
1/4”
Lock
Nut
1/4-5/16”
Large Washer
1/4 x 2-3/4”
Hex Bolt
(624) Rafter
Corner Left
Small Roof
Assembly
Corner Roof
Assembly
Corner Roof
Assembly
Corner
Roof
Assembly
(624) Rafter
Corner Left
F26.3
F26.2
Peak Cap
Assembly
Peak Cap
Assembly