31
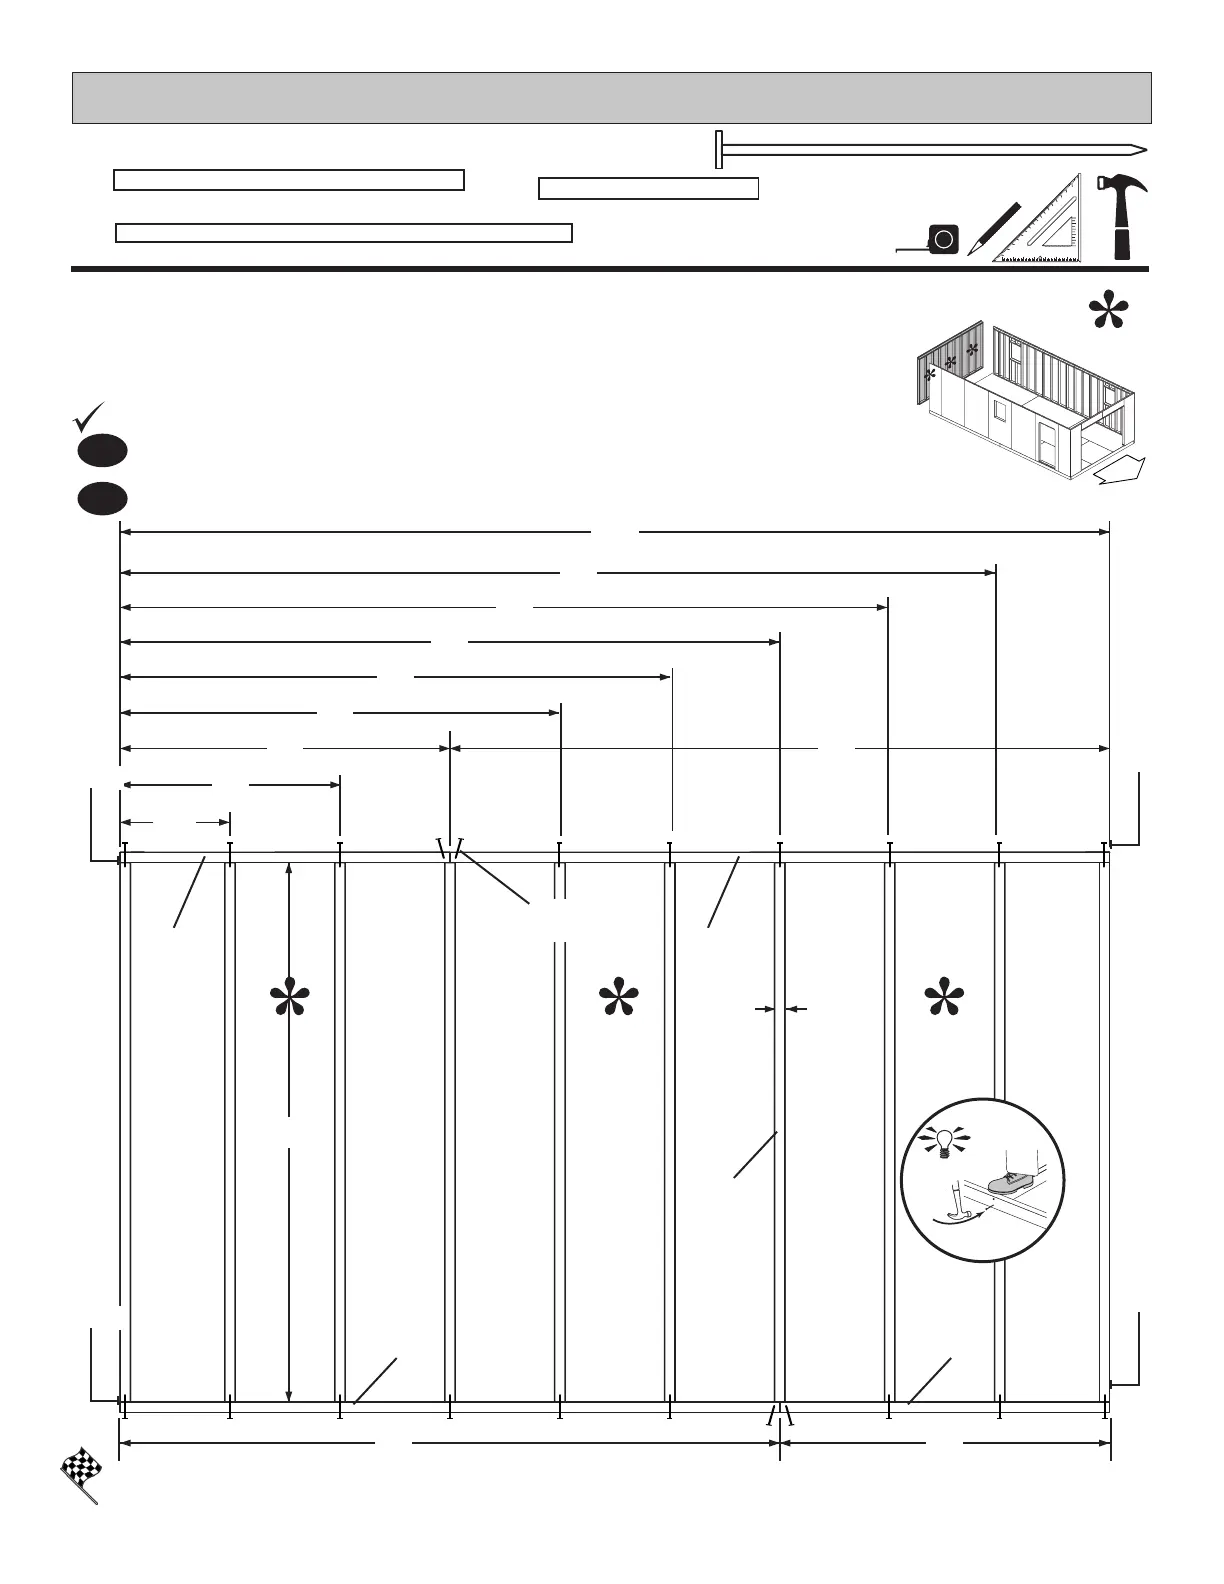
BACK WALL FRAME
3" (7,6 cm)
PARTS REQUIRED:
1-1/2"
(3,8 cm)
48"
96"
96"
144"
78 1/2"
(121,9 cm)
64"
(162,6 cm)
80"
(203,2 cm)
32"
(81,3 cm)
16"
(40,6 cm)
(243,8 cm)
48"96"
(243,8 cm)
112"
(284,5 cm)
128"
(325,1 cm)
(365,8 cm)
(199,4 cm)
2 x 4 x 48" (5,1 x 10,2 x 121,9 cm)
SP
2 x 4 x 78-1/2" (5,1 x 10,2 x 199,4 cm)
AI
2 x 4 x 96" (5,1 x 10,2 x 243,8 cm)
TP
AI x10
1
Orient parts on edge on oor as shown.
Nail using (2) 3" nails at each connection. Use (4) nails at seams.
Nails
You have nished building your back wall frame.
FINISH
HINT:
TP
TPSP
SP
Flush
Flush
Flush
Flush
DOOR
See page
17
At this time, add in any window, door or solid wall frames to the 48" frame
openings.
Refer to pages 21 - 23 for detailed window, door and solid wall frame
instructions. NOTE : Wall shown is a generic image.