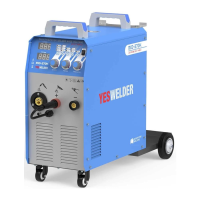
Do you have a question about the Yeswelder MIG PRO-200 and is the answer not in the manual?
Connect the power input cable to AC380V power supply for machine operation.
Connect CO2 gas bottle and output cable to the machine.
Coordinate welding current and arc voltage for high-quality welding based on wire diameter, droplet transfer, and efficiency.
Provides recommended welding current and voltage for various welding wire diameters.
Adjust welding speed for quality and efficiency; keep below 30m/h for actual production.
Optimize penetration and efficiency by adjusting wire extension length; avoid excessive length to prevent burnout.
Adjust CO2 flow based on welding mode for optimal gas protection.
Operate in dry conditions (humidity <90%), 10°C to 40°C, avoiding rain, dust, and strong airflow.
Machine has overvoltage, overcurrent, overheat protection. Avoid overloading.
Perform maintenance by qualified personnel; disconnect power, check connections, clean dust, protect from water.
Check welding torch, wire feeder parts, and deformation for troubleshooting.
Check front panel, fan, power supply, and outer area for proper function and wear.
Inspect nozzle, contact tip, and conductor tube for firm installation, damage, and wear.
Check tension arm, wire guide tube, wire driving wheel, and pressure wheel for proper function and wear.
Inspect welding torch cable and power output cable for wear, damage, and connections.
Verify input/output terminals, fuse reliability, and insulation integrity.
Inspect circuit break and connection of earth cables for safety and to prevent power leakage.
| Output Current | 30-200A |
|---|---|
| Duty Cycle | 60% at 200A |
| Protection Class | IP21S |
| Input Voltage | 110/220V |
| Welding Process | MIG |
| Welding Thickness | Up to 5/16 inch (8mm) |
| Wire Diameter | 0.6-1.0mm |
