Do you have a question about the Yeswelder MIG PRO-250 and is the answer not in the manual?
Connects the machine to AC380V power supply.
Connects CO2 gas bottle and regulator to the machine.
Coordination of welding current and arc voltage for high quality welding.
Provides recommended welding current and voltage for different wire diameters.
Explains how welding speed affects quality and efficiency.
Discusses the impact of wire extension length on penetration and efficiency.
Rates CO2 flow for gas protection effect and provides flow recommendations.
Specifies conditions for dry environment, temperature, and avoiding rain or dust.
Highlights the machine's protection devices and precautions against voltage/current overload.
Inspection keypoints for power supply location, front panel, cooling fan, and outer area.
Inspection keypoints for nozzle, contact tip, and conductor tube.
Inspection keypoints for tension arm, wire guide tube, wire driving wheel, and pressure wheel.
Inspection keypoints for cable of welding torch, power output, input, and ground cable.
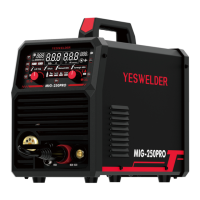
This document serves as a user manual for the YESWELDER IGBT Inverter CO2/MIG Welding Machine, specifically for product models MIG PRO-200 and MIG PRO-250. It provides essential information for the installation, operation, and maintenance of the welding machine, emphasizing safety precautions throughout.
The welding machine is designed based on internationally advanced inverter technology. Its core principle involves converting 50/60Hz alternative current into direct current, which is then inverted into high-frequency alternative current (20KHz) by IGBT components before being rectified. This sophisticated process allows the machine to offer a range of features that enhance welding performance and user experience.
The YESWELDER IGBT Inverter CO2/MIG Welding Machine is a versatile tool capable of performing multiple welding functions, including CO2/MIG, MAG, GASLESS MIG, MMA (Manual Metal Arc), and LIFT TIG welding. This multi-process capability makes it suitable for various welding applications and materials.
For CO2/MIG and MAG functions, the user connects the joint to the red socket and the earth clamp to the black socket. The welding torch is then plugged into the front panel and tightened, with the welding wire inserted from the built-in wire feeder. When using the Gasless function, the joint is plugged into the black socket and the earth clamp into the red socket, with the torch and wire connected similarly. For MMA and LIFT TIG functions, an electrode holder is plugged into the red socket and the earth clamp into the black socket.
The machine incorporates IGBT Inverter technology with current mode control, ensuring reliable quality and stable performance. It features closed-circuit feedback with constant voltage output, providing good resistance to voltage fluctuations (up to ±15%). An electric reactor control system contributes to a stable welding process, characterized by minimal splash, a deep welding pool, and a clean, beautiful welding seam.
A key operational feature is the slow wire-feeding mechanism for arc start and tip ball removal after welding. This design ensures a high success rate for arc initiation, improving efficiency and reducing rework. The machine is suitable for welding thin and medium metal sheets, specifically those with a thickness of 0.8mm or more.
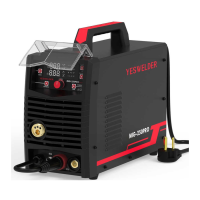
The YESWELDER welding machine is designed for ease of operation, making it practical and economical for users. Its compact size and light weight contribute to its portability and convenience in various work environments. The efficiency of the machine is notably high, exceeding 85%, which translates to significant energy savings—over 30% compared to conventional welding machines.
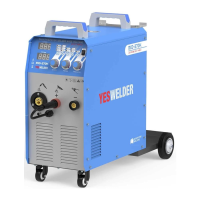
Installation involves connecting the power input cable to an AC380V power supply. For CO2/MIG welding, the CO2 gas bottle must be firmly connected to the CO2 inlet on the back of the machine using a gas-carrying hose, and a gas regulator is required.
Wire spool installation is a straightforward process. The wire spool is mounted to the shaft of the wire feeder and secured with the spool holder. Users must select a contact tip that matches the welding wire size. The wire is then guided into the groove of the wire driving wheels via a wire guide tube, and the pressure wheel is adjusted to prevent slippage without deforming the wire. The manual advises releasing the welding wire roll counter-clockwise and cutting any bent head part of the wire to avoid sticking. The correct track of the wire feeding groove must be chosen based on the wire diameter, and an "Inching" button is provided to lead the wire out of the welding torch.
The manual provides guidance on setting up welding current, arc voltage, welding speed, dry extension of welding wire, and CO2 flow. These parameters are crucial for achieving high-quality welds. The machine's digital display and control knob facilitate precise adjustments. For instance, the welding process can be selected (MIG 100% CO2, MAG 80% Ar/20% CO2, GASLESS, Zn Alloy Steel), and settings like inductance, torch holding method (2T/4T), hot start, arc start current, and burn back can be adjusted for MIG/synergic MIG processes. For MMA, arc force, hot start, VRD on/off, and anti-stick on/off are configurable.
The manual emphasizes the importance of regular maintenance to ensure the machine's optimal function and safe operation. It outlines several critical maintenance steps and safety tips.
The manual provides a detailed troubleshooting guide for various components:
The manual stresses that only genuine spare parts should be used for replacements to maintain the machine's original function.
| Welding Process | MIG |
|---|---|
| Output Current | 30-250A |
| Wire Diameter | 0.8 - 1.0 mm |
| Spool Size | 5 kg |
| Duty Cycle (at 40°C) | 60% at 250A (MIG), 60% at 200A (Stick) |
| Wire Feed Speed | 1.5-16 m/min |