11
IM 04L55B01-02EN
Setting Measurement and Recording Conditions
The example here explains how to change the recording
interval when the following settings are at their default values.
File type: Event, Scan interval: 1s (or 2s),
Recording mode: Free (record data at all times)
• The measurement and recording conditions vary
depending on the number of recording channels, recording
interval, and so on.
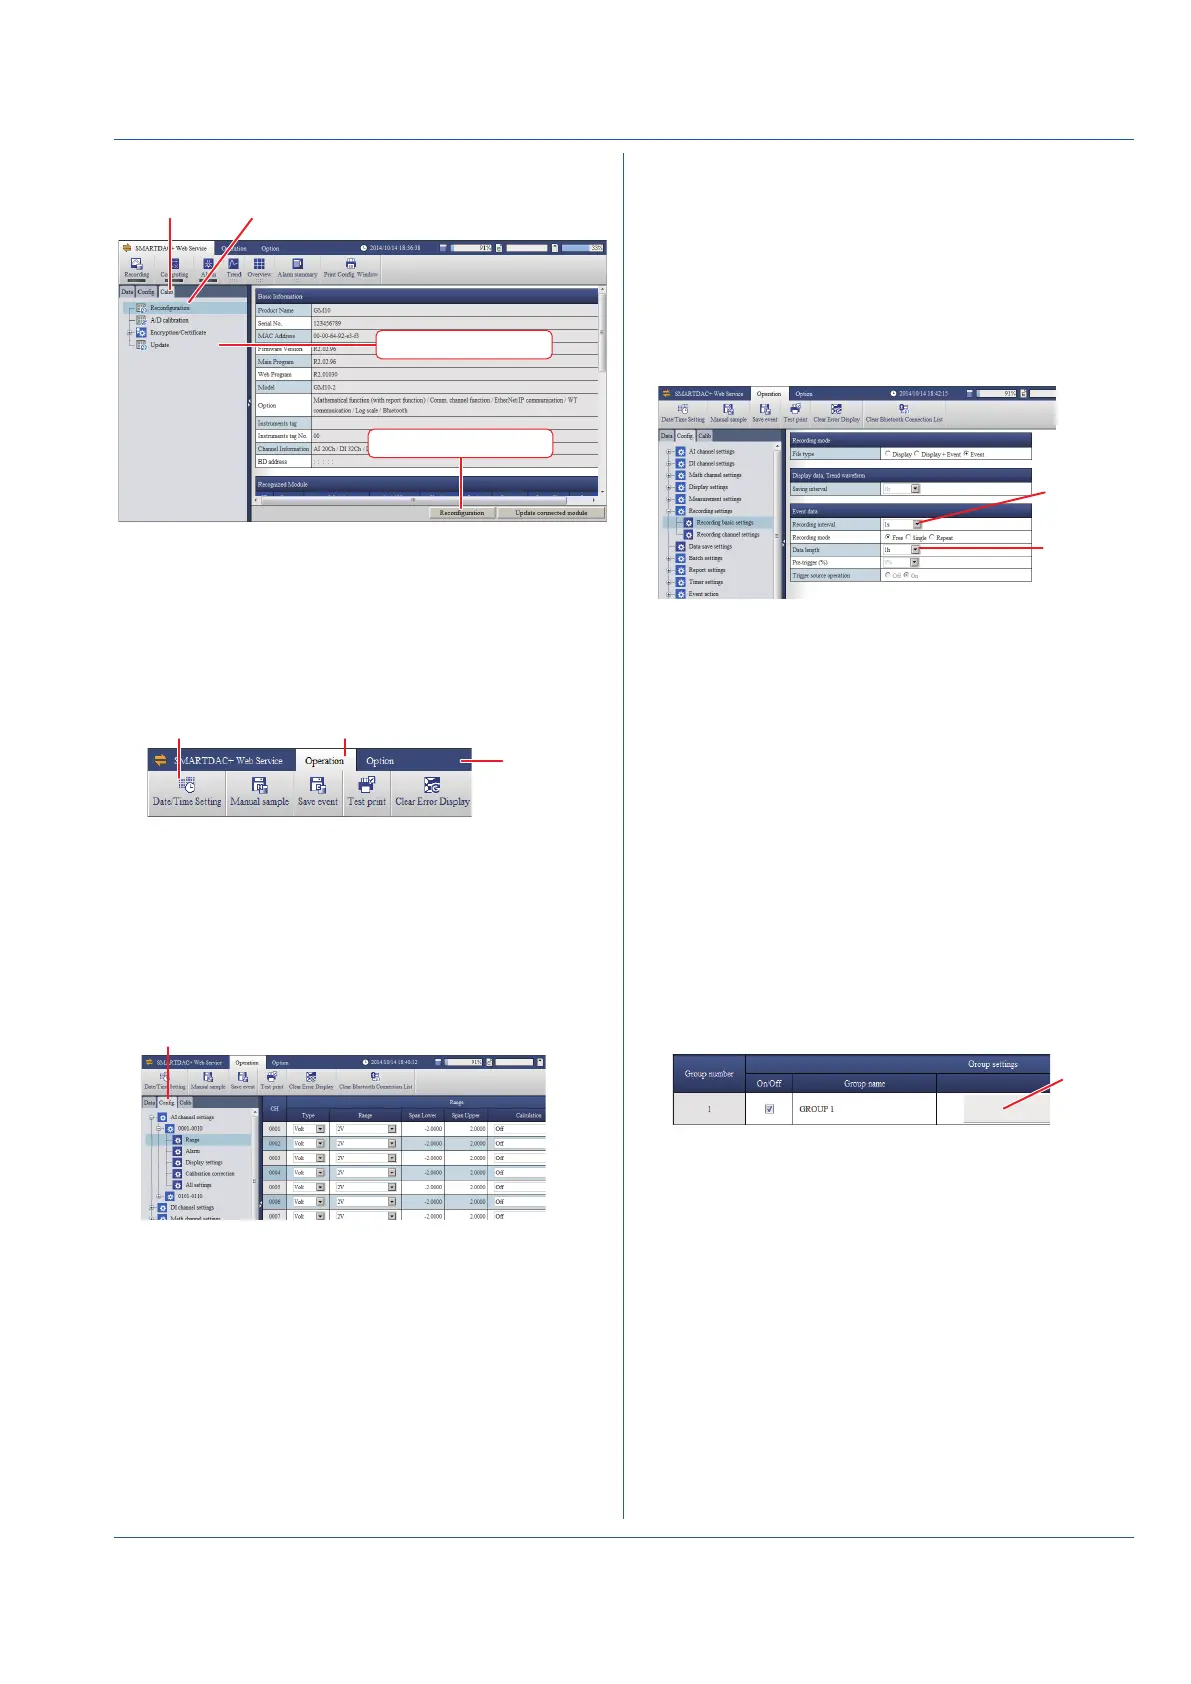
1. Click the Config. tab, Recording settings, and
Recording basic settings.
interval
2. Select the recording interval.
• You cannot select a recording interval that is shorter than
the scan interval.
If necessary, set the data length. The data length specifies
the size of a single recording data file (the save interval).
3. Click Update Configuration in the lower right of the
screen.
A Update Configuration dialog box appears.
4. Click OK.
Setting Display Groups
This setting is necessary for displaying measurement data.
You can assign channels and the group name to each display
group. For details, see the User’s Manual. The example here
explains how to assign AI channels 0001 to 0010 to group
number 1.
1. Click the Config. tab, Display settings, Group settings,
and 1-20.
2. Select the On/Off check box of group number 1, and click
the button under Channel set.
number
The Group number [1] Channel set dialog box appears.
3. Set AI channel 001 to 0010 to On, and click OK. The
selected channels appear under Channel set.
4. Click Update Configuration in the lower right of the
screen.
A Update Configuration dialog box appears.
5. Click OK.
2. In the Address box, enter “http://” followed by the GM10 IP
address. The Web application starts.
Calib tab Reconfiguration
Content selection tree
Reconfiguration button
3. On the content selection tree, click the Calib tab.
4. On the tree, click Reconfiguration.
5. Click Reconfiguration.
Setting the Date and Time
If you need to set the time zone or DST (Daylight Saving
Time) or both, do so before setting the date and time.
1. On the menu bar, click the Operation tab.
Menu bar
Date/Time Setting Operation
2. Click Date/Time Setting to display the Date/Time Setting
dialog box.
3. Set the date and time, and click Update.
Configuring a Signal Input
The example here explains how to specify thermocouple
type T and 0 to 200°C on channel 1 (0001) of slot (module
number) 0.
1. On the content selection tree, click the Config. tab.
2. On the tree, click AI channel settings, 0001-0010, and
Range.
3. For channel (CH) 0001, set the following items.
Type: TC, Range: T, Span Lower: 0.0, Span Upper: 200.0
4. Click Update Configuration in the lower right of the
screen.
A Update Configuration dialog box appears.
5. Click OK.
 Loading...