17
YORK INTERNATIONAL
FORM 102.20-FA1 (1104)
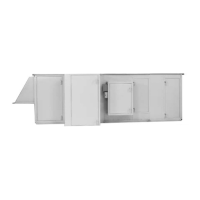
REASSEMBLY
• Insure that fi nal location is fl at and
level over the entire area of the unit
foot print. If not fl at and level the unit
base must be leveled by shimming.
This will allow all doors and dampers
to operate properly after reassembly.
• Sort and inspect all gasketed parts
and replace any gaskets that have been
damaged.
• It is recommended for units that
were shipped in sections having ship-
ping splits, that the entire unit be as-
sembled as one piece not in individual
sections.
• If any raceways were separated, use
construction grade sealant (caulking)
to rejoin the foam insulation inside
the raceways as they are reassembled.
However, if any volume of foam in-
sulation was destroyed or lost, replace
it with canned spray foam after reas-
sembly is complete.
1. LAYOUT THE BASE PARTS
Layout the base rails, bottom raceways or base sec-
tions depending upon how far the disassembly was
carried out.
2. ASSEMBLE THE BASE PARTS
Assemble the base parts as a fi rst step. Be sure all
joints are tight and sealed.
3. INSTALL BOTTOM TIER PARTS
Once the base parts are assembled and level, install
internal coil bulk heads, fan walls, fi lter walls and/or
damper walls that belong in the bottom tier.
4. REASSEMBLE FAN AND MOTOR ASSEMBLY
If the fan and motor assembly was disassembled, reas-
semble it now and install it on the base. Delay this step
if the unit is a tiered or stacked unit until the bottom
tier is completely assembled and the upper tier base is
installed on top of it.
5. INSTALL BOTTOM TIER COMPONENTS
Proceed with the installation of the components to
the support bulkheads and support walls that belong
in the bottom tier.
6. INSTALL THE VERTICAL AND UPPER RACE-
WAYS OF THE BOTTOM TIER.
7. INSTALL WIREWAYS / CONNECT WIRING
Install the wireways if originally provided and
removed. Connect the wiring within and to the
wireways. Observe and match the labels. Do not
install the light fi xtures at this time, but leave the wire
connectors accessible.
8. INSTALL THE TOP PANELS OF THE BOTTOM
TIER
9. INSTALL LIGHT FIXTURES
Connect the wiring while installing the light fi xtures
and attach to the top panel inside liners.
10. INSTALL SIDE PANELS OF BOTTOM TIER
Install the side panels of the bottom tier. Those con-
taining dampers, duct connections, electric boxes,
etc. fi rst.
11. INSTALL UPPER TIER BASE
Assemble and install the upper tier base on top of
the bottom tier.
12. INSTALL THE FAN WALL.
13. INSTALL THE FAN ASSEMBLY
14. INSTALL UPPER TIER BULKHEADS / SUPPORT
WALLS
Install other bulkheads and support walls that belong
in the upper tier.