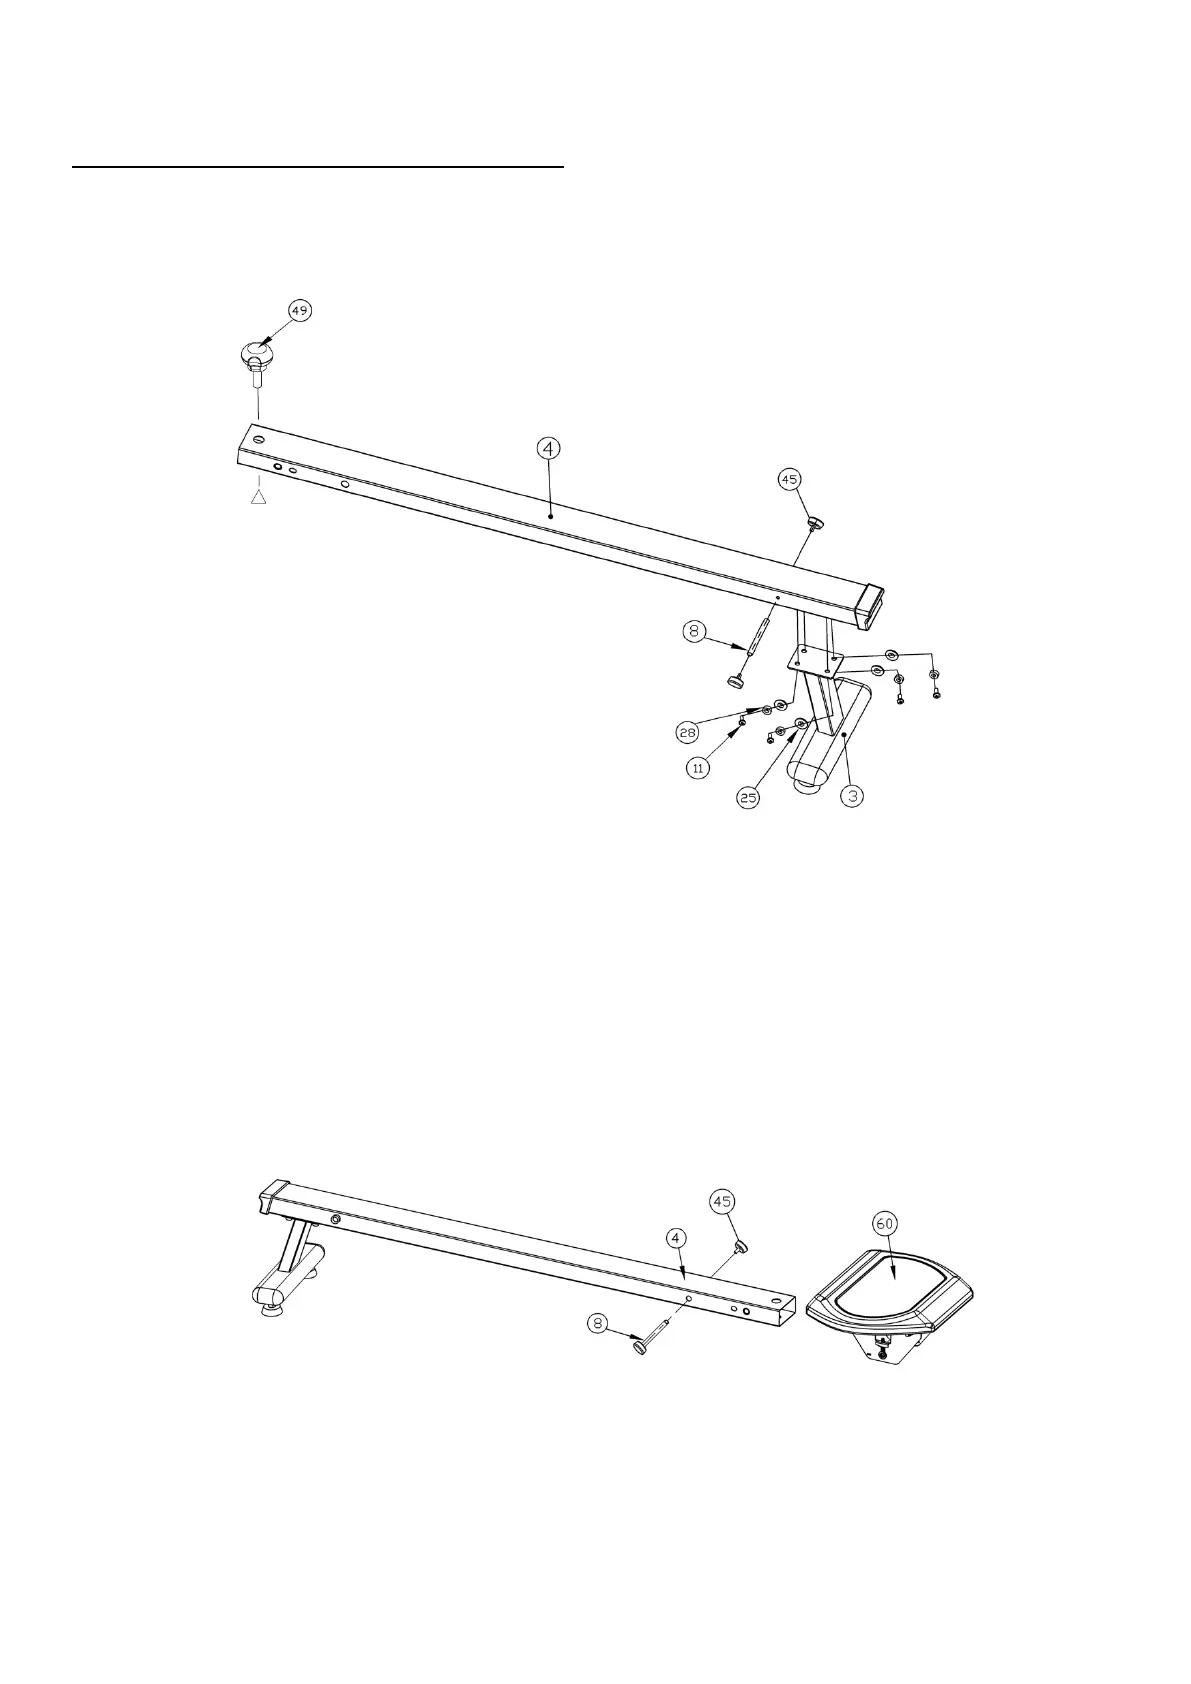
EasyManuals Logo

YOSUDA H-185 User Manual

Default Icon
14 pages
To Next Page IconTo Next Page
To Previous Page IconTo Previous Page
Page #6 background imageLoading...
Page #6 background image
6
STEP 5
Disassemble knob (#49) from the slide rail. Attach two cylindrical cushions (#45) with one
buffer shaft Ø12*79 (#8) to slide rail (#4).
Attach rear stabilizer (#3) to the slide rail (#4) with four hexagon socket round head bolts
M8*16 (#11), four flat washers 8*19 (#25) and four spring washers 8 (#28).
STEP 6
Slide the Seat (#60) onto the slide rail (#4).
Attach two cylindrical cushions (#45) with one buffer shaft Ø12*79 (#8) to slide rail (#4).

Questions and Answers:

Question and Answer IconNeed help?

Do you have a question about the YOSUDA H-185 and is the answer not in the manual?

YOSUDA H-185 Specifications

General IconGeneral
BrandYOSUDA
ModelH-185
CategoryHome Gym
LanguageEnglish

Related product manuals