3. Press the Cal key, highlight DO and press enter.
4. Highlight DO%, then press Enter.
5. Verify the barometric pressure and salinity displayed are accurate. Once DO
and temperature are stable, highlight Accept Calibration and press enter.
®
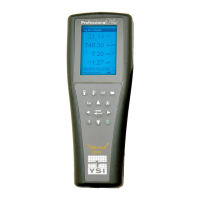
Professional Plus
Quick-Start Guide
This Quick-Start Guide is meant to serve as a quick reference in operating the
Professional Plus. It is not intended to replace the information found in the Operations
Manual. For your convenience, this quick start guide will enable you to unpack your
instrument and get to the field quickly.
TAKING MEASUREMENTS AND STORING DATA
1. The instrument will be in Run mode when powered on.
2. To take readings, insert the probe into the sample. Move the probe in the
sample until the readings stabilize. This releases any air bubbles and provides
movement if measuring DO.
GETTING STARTED
3. Log One Sample is already highlighted in Run mode. Press enter to open a
submenu. Highlight Sites or Folders and press enter to select the site or folder
to log the sample to.
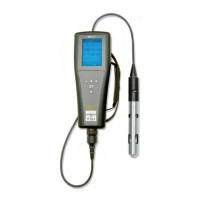
Unpack the instrument and install (2) C size batteries in the back of the instrument.
Tighten the four screws of the battery plate on to the back of the instrument.
4. If necessary, use the keypad to create a new Site or Folder name. If Site List and
Folder List are disabled in the System menu, you will not see these options
when logging a sample.
If necessary, install the sensors into the cable assembly by inserting the sensors into the
ports and then hand tightening them. Do not use a tool and do not over tighten.
5. Once the Site and/or Folder name is selected, highlight Log Now and press
enter. The instrument will confirm that the data point was logged successfully.
If using a 1010 cable, a sensor must be installed in port 1 for correct operation. If
installing a pH/ORP combo sensor into a 1010 cable, ORP will not be measured. If
using a 1020 cable, install a pH, ORP, pH/ORP, or an ISE sensor in port 1 and a DO
sensor in port 2.
6. If you would like to log at a specific interval vs. logging one sample at a time,
press the System
key. Use the arrow keys to highlight Logging and press
enter. Enable Continuous Mode and adjust the time Interval if necessary. On
the Run screen, the option to log will change from Log One Sample to Start
Logging based on the time interval entered.
If using a Quatro cable, install a pH, ORP, or ISE sensor in ports label 1 and 2. A sensor
must be installed in port 1 for port 2 to operate correctly. If you install a pH/ORP
combo sensor into port 1 or port 2, ORP will not be measure. Install the Dissolved
Oxygen sensor in the port labeled DO. Install the Conductivity/Temperature sensor in
the port labeled CT following the instructions included with the sensor. For ease of
installation, YSI recommends that you install a sensor into port 1 first; followed by DO
installation, then port 2, and lastly C/T.
7. During a continuous log, the Start Logging dialog box on the Run screen will
change to Stop Logging.
UPLOADING DATA TO A PC WITH DATA MANAGER
1. Make sure Data Manager and the USB drivers are installed on the PC. The
USB drivers will be installed during the Data Manager installation.
Please refer to the Getting Started Setup section of the Manual for a complete list of
sensor/cable port configurations.
2. Connect the Communications Saddle to the back of the Pro Plus instrument
and use the USB cable to connect the saddle to the USB port on the PC.
3. If connecting for the first time, Windows
®
may prompt you
through two ‘New
Hardware Found’ Wizard in order to complete the USB driver installation.
Install a port plug into any port that does not have an installed sensor. Attach the cable
assembly to your instrument.
4. Open Data Manager on the PC and turn on the Pro Plus.
5. Click on the correct instrument in Data Manager under the Select Instrument
heading. Once you’ve highlighted the correct instrument, click the Retrieve
Instrument Data tab and check Data, GLP, Site List, Configuration or Select
All options to retrieve data. Click Start.
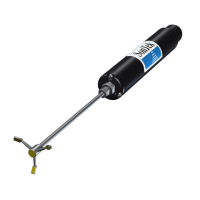
INSTALLING THE DO MEMBRANE
Note: The DO sensor is shipped with a red protective cap to protect the electrode. A
new membrane cap must be installed before the first use.
1. Prepare the O
2
probe solution according to the instructions on the bottle.
After mixing, allow the solution to sit for 1 hour. This will help prevent air
bubbles from later developing under the membrane.
6. After the file transfer is complete, the data is available for viewing, printing,
and exporting from Data Manger and the data can be deleted from the Pro
Plus if desired.
2. Remove, and discard or save the red protective cap.
7. Press the File
key and choose Delete Data if you no longer need the data
on the Pro Plus.
3. Thoroughly rinse the sensor tip with distilled or deionized water.
4. Fill a new membrane cap with probe solution. Avoid touching the membrane
portion of the cap.
5. Thread the membrane cap onto the sensor, moderately tight. A small amount
of electrolyte will overflow.
CONTACT INFORMATION
YSI
6. Screw the probe sensor guard on moderately tight.
1700/1725 Brannum Lane
Yellow Springs, OH 45387
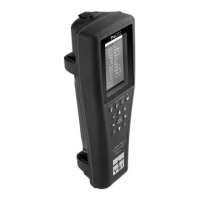
MENU FUNCTIONS
Tel: 800-765-4974 (937-767-7241) Item # 605595
The Professional Plus has a menu-based interface. Press the “hot keys” to access the
System, Sensor, Calibration, and File menus (from left to right at the top of the keypad).
To navigate through the menus, use the up and down arrow keys to highlight a desired
Fax: 937-767-1058 Drawing # A605595
E-Mail: proseries@ysi.com
Revision B
Website: www.ysi.com
February 2009