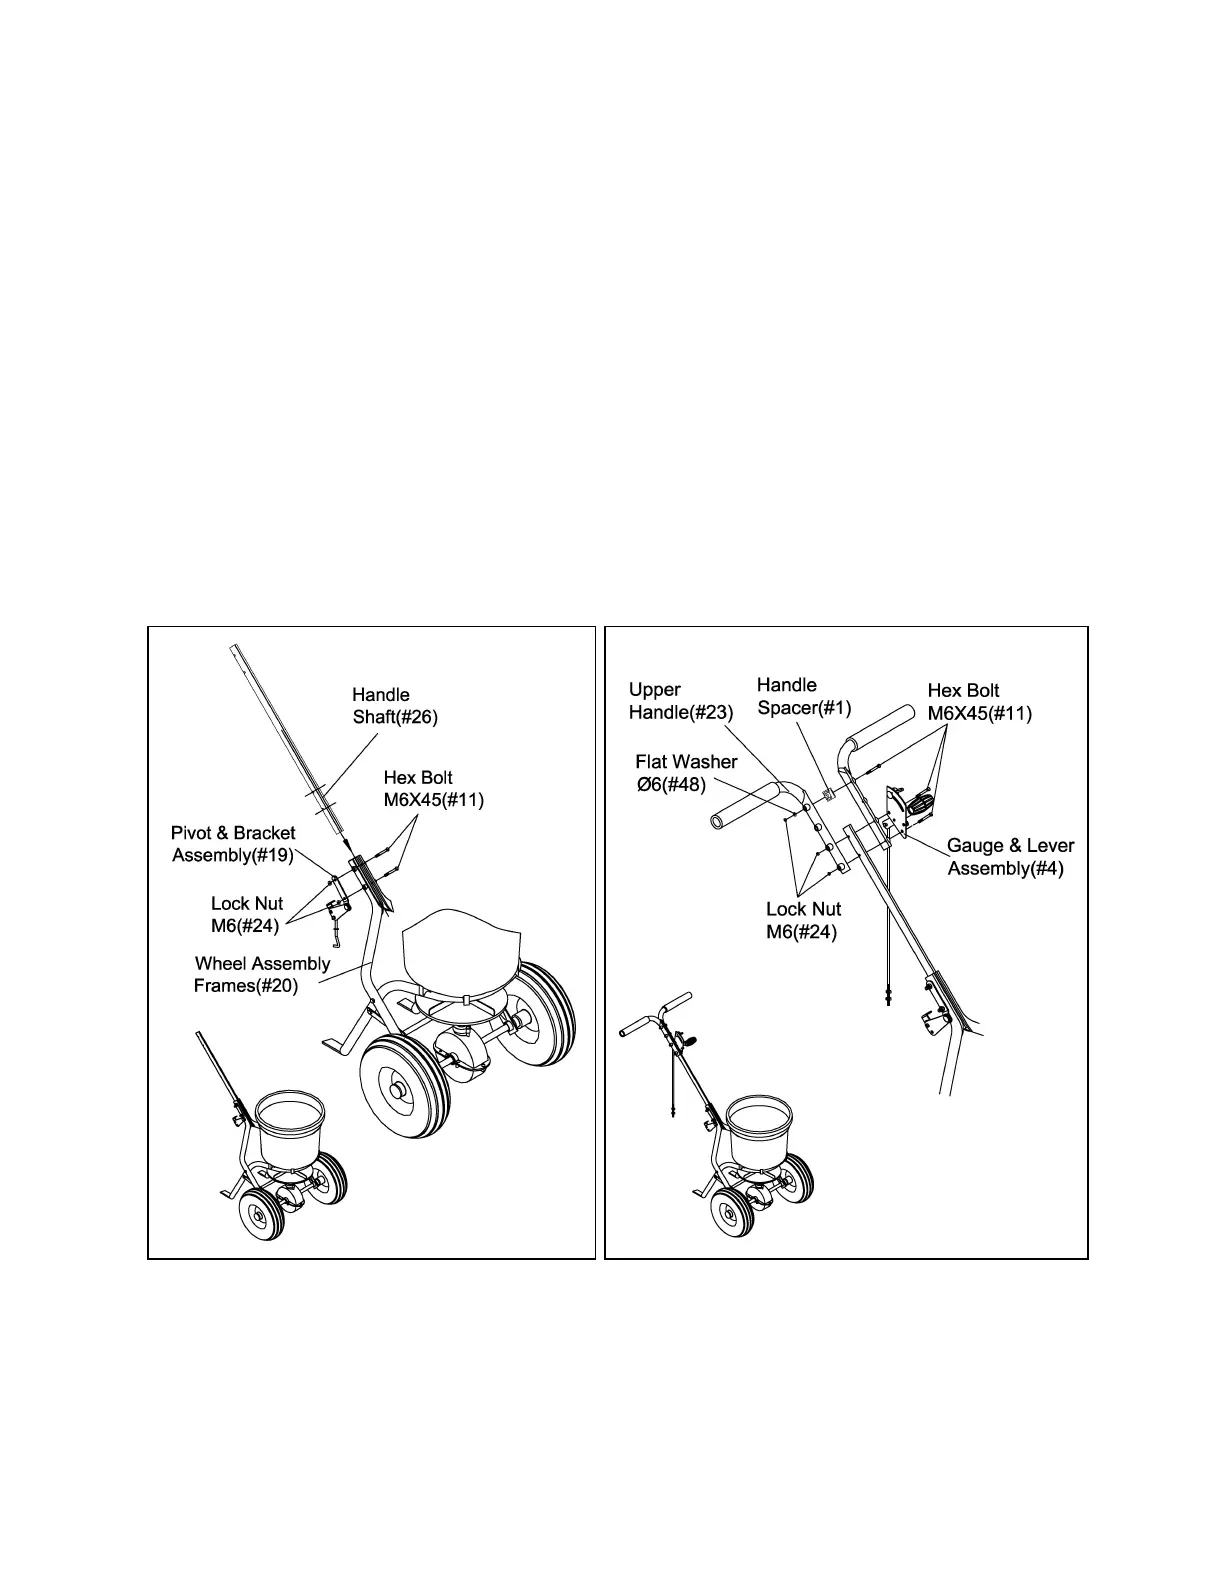
1. Flip the hopper over onto it’s wheels.
2. Insert Handle Shaft (#26) between the top ends of the Wheel Assembly Frames (#20).
3. Pass two Bolts M6 x 45 (#11) through Wheel Assembly Frames and Handle Shaft. Slip
Pivot and Bracket Assembly (#19) onto protruding bolt ends. Fasten with Lock Nuts M6
(#24). Pivot and Bracket Assembly should be on the right side of the handle when standing
behind the spreader.
GO BACK AND TIGHTEN ALL NUTS AND BOLTS ASSEMBLED SO FAR. DO NOT
OVER TIGHTEN.
NOTE: The handle can be higher or lower depending on the user’s preference. Before
installing the gauge, upper handles and handle shaft, decide which of the three positions
will be most comfortable for the operator. If the middle or upper positions are chosen, use a
handle spacer in the hole nearest to the handle grips.
4. a) Insert Bolts M6 x 45 (#11) through the Upper Left Handle (#23), then through the Handle
Spacer (#1) and Upper Handle on the Right side, screw with Flat Washer Ø 6 (#48) and
Lock Nut M6 (#24). Slide Gauge and Lever Assembly (#4) onto the bolts and fasten with
Lock Nut M6 (#24).
5. Tighten lock nuts securely.
6
7