EasyManuals Logo

Zebra 105SL Installation Instruction

Zebra 105SL
18 pages
To Next Page IconTo Next Page
To Previous Page IconTo Previous Page
Page #5 background imageLoading...
Page #5 background image
5
Media Rewind Upgrade
Preparing the Printer
10/23/2006 33181L-001 Rev. A
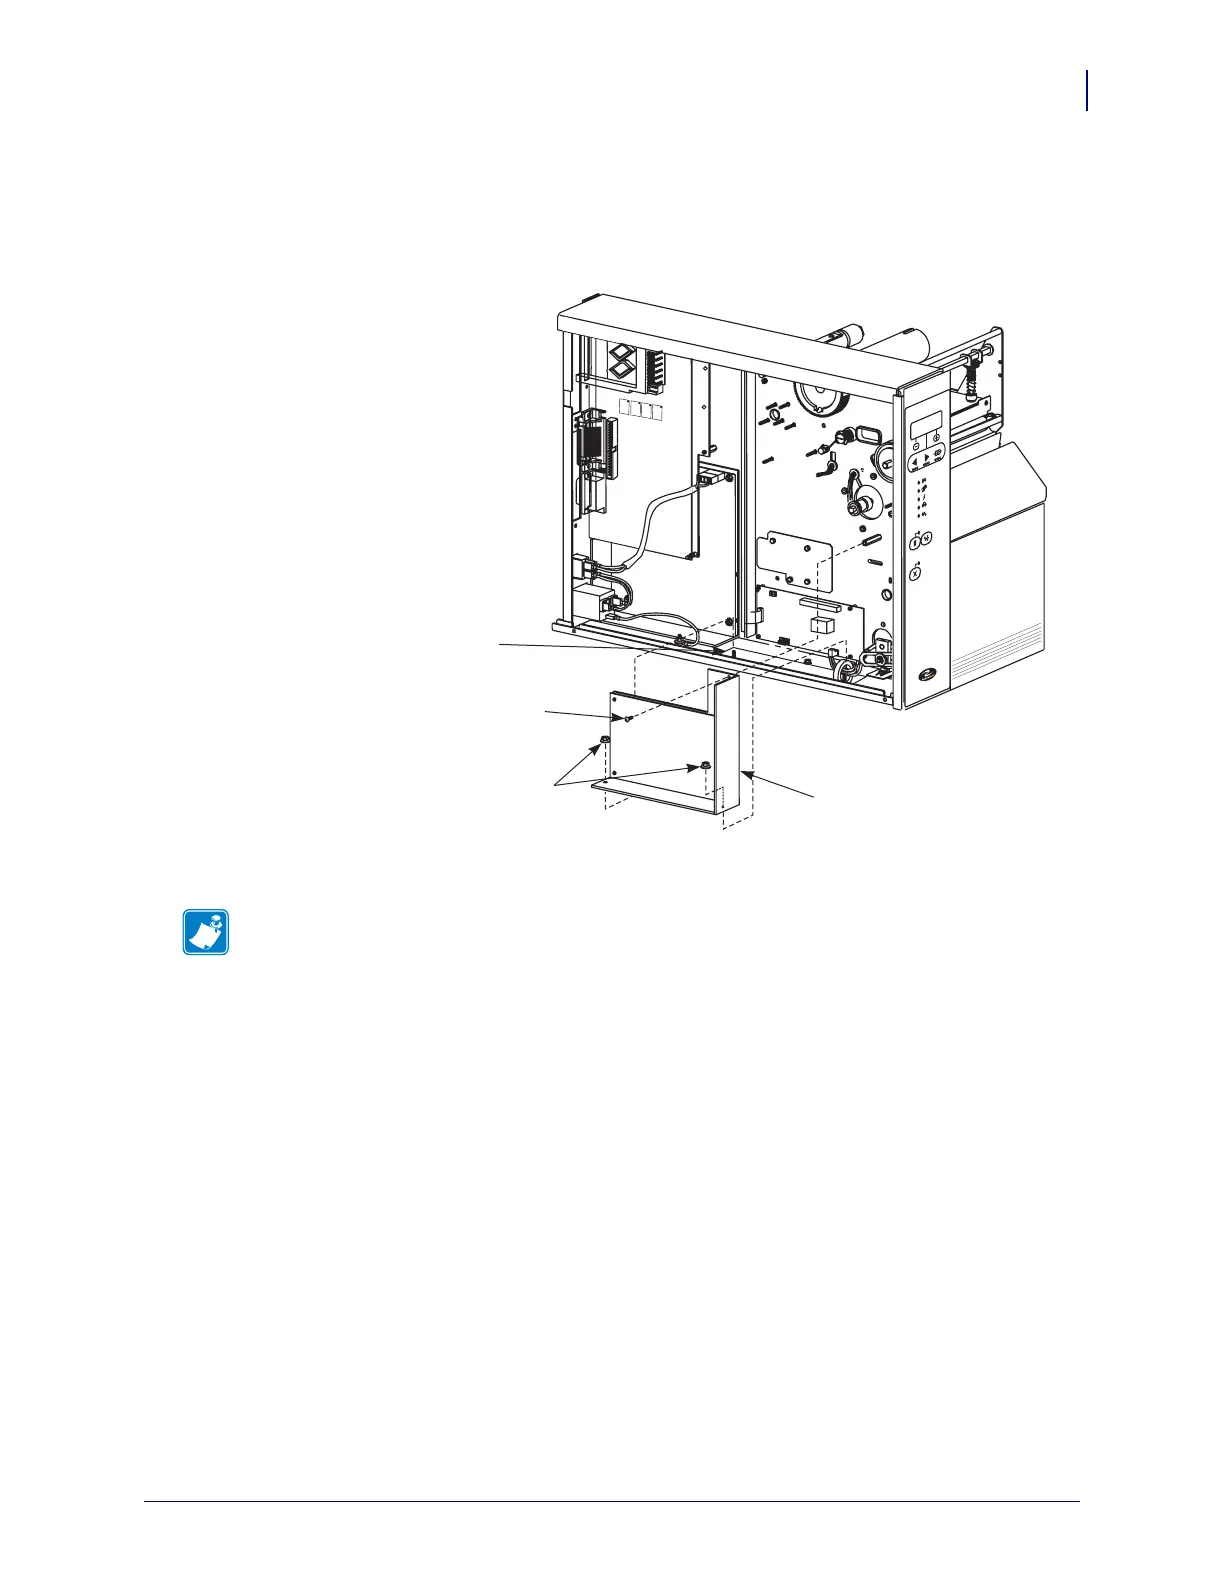
5. See Figure 2. Inside the electronics cabinet, remove the two nuts and one mounting screw
that secure the DC power supply assembly in position.
Figure 2 • DC Power Supply Removal/Installation
6. Remove the DC power supply assembly from the printer chassis.
Note • The black heat conduction pad MUST NOT be discarded.
POWER
TAKE LABE L
ERROR
CHECK RIBBON
CANCEL
FEED
PAPE R OUT
PAUS E
DATA
P
R
EV
IO
U
S
PREVIOUS
N
E
X
T
/S
A
V
E
NEXT/SAVE
S
E
TU
P
/E
XIT
SETUP/EXIT
DC Power Supply Assembly
Hex Nut
Screw
Do Not Remove
Heat Conduction Pad

Other manuals for Zebra 105SL

Questions and Answers:

Question and Answer IconNeed help?

Do you have a question about the Zebra 105SL and is the answer not in the manual?

Zebra 105SL Specifications

General IconGeneral
Print technologyDirect thermal
DisplayLCD
Product colorGray
Network readyYes
Dimensions (WxDxH)283 x 495 x 394 mm
Standard interfacesParallel, Serial
Internal memory6 MB
Maximum label width115 mm
Maximum label length0.991 m
Power requirements90-264 VAC, 48-63 Hz
Weight and Dimensions IconWeight and Dimensions
Depth495 mm
Width283 mm
Height394 mm
Weight29000 g

Related product manuals